Like this? Follow me:
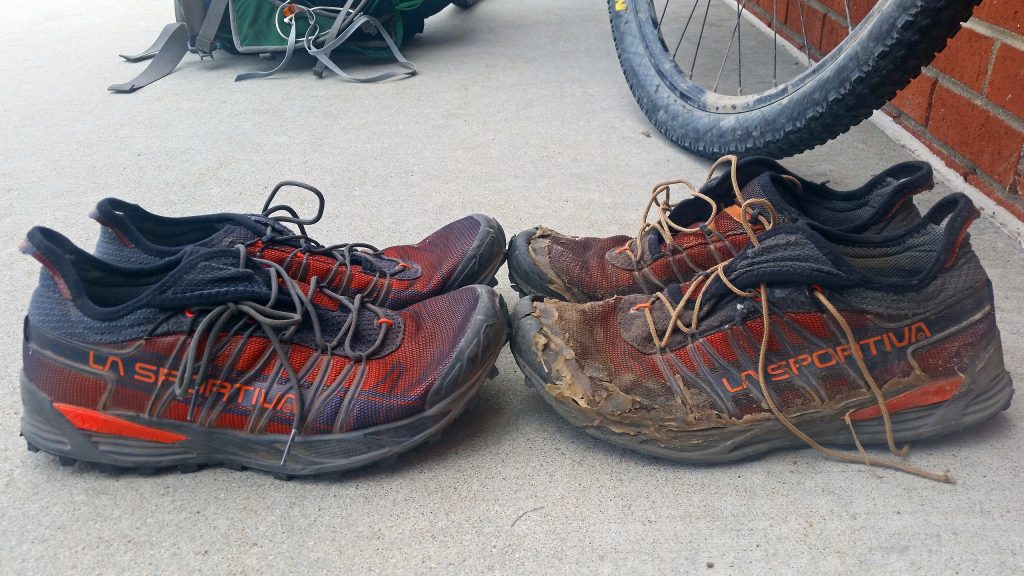
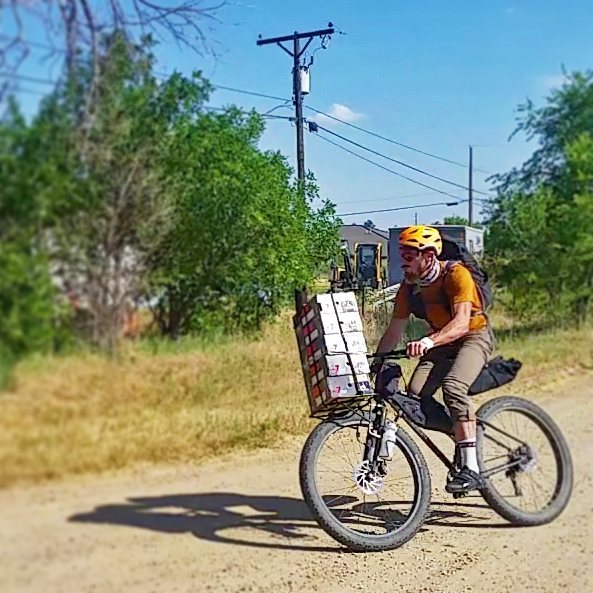
The Sportiva Mutant is my personal Greatest Of All Time trail runner – and it’s a good chance, it’s yours too. Sock-like upper, tons of cush., knobby outsole, and sticky as all get out rubber. They’re my go-to shoe for any on or off trail adventure, be it a run, a fastpack, or a backpack. This is the shoe I used for my Tour of the Highest Hundred, and Sangres de Cristo Range Ridge Traverse, as well as many other mountain adventures.
But that doesn’t mean I don’t like modifying and customizing them, just like I do most of my gear. Here are some of the things I do:
Upper
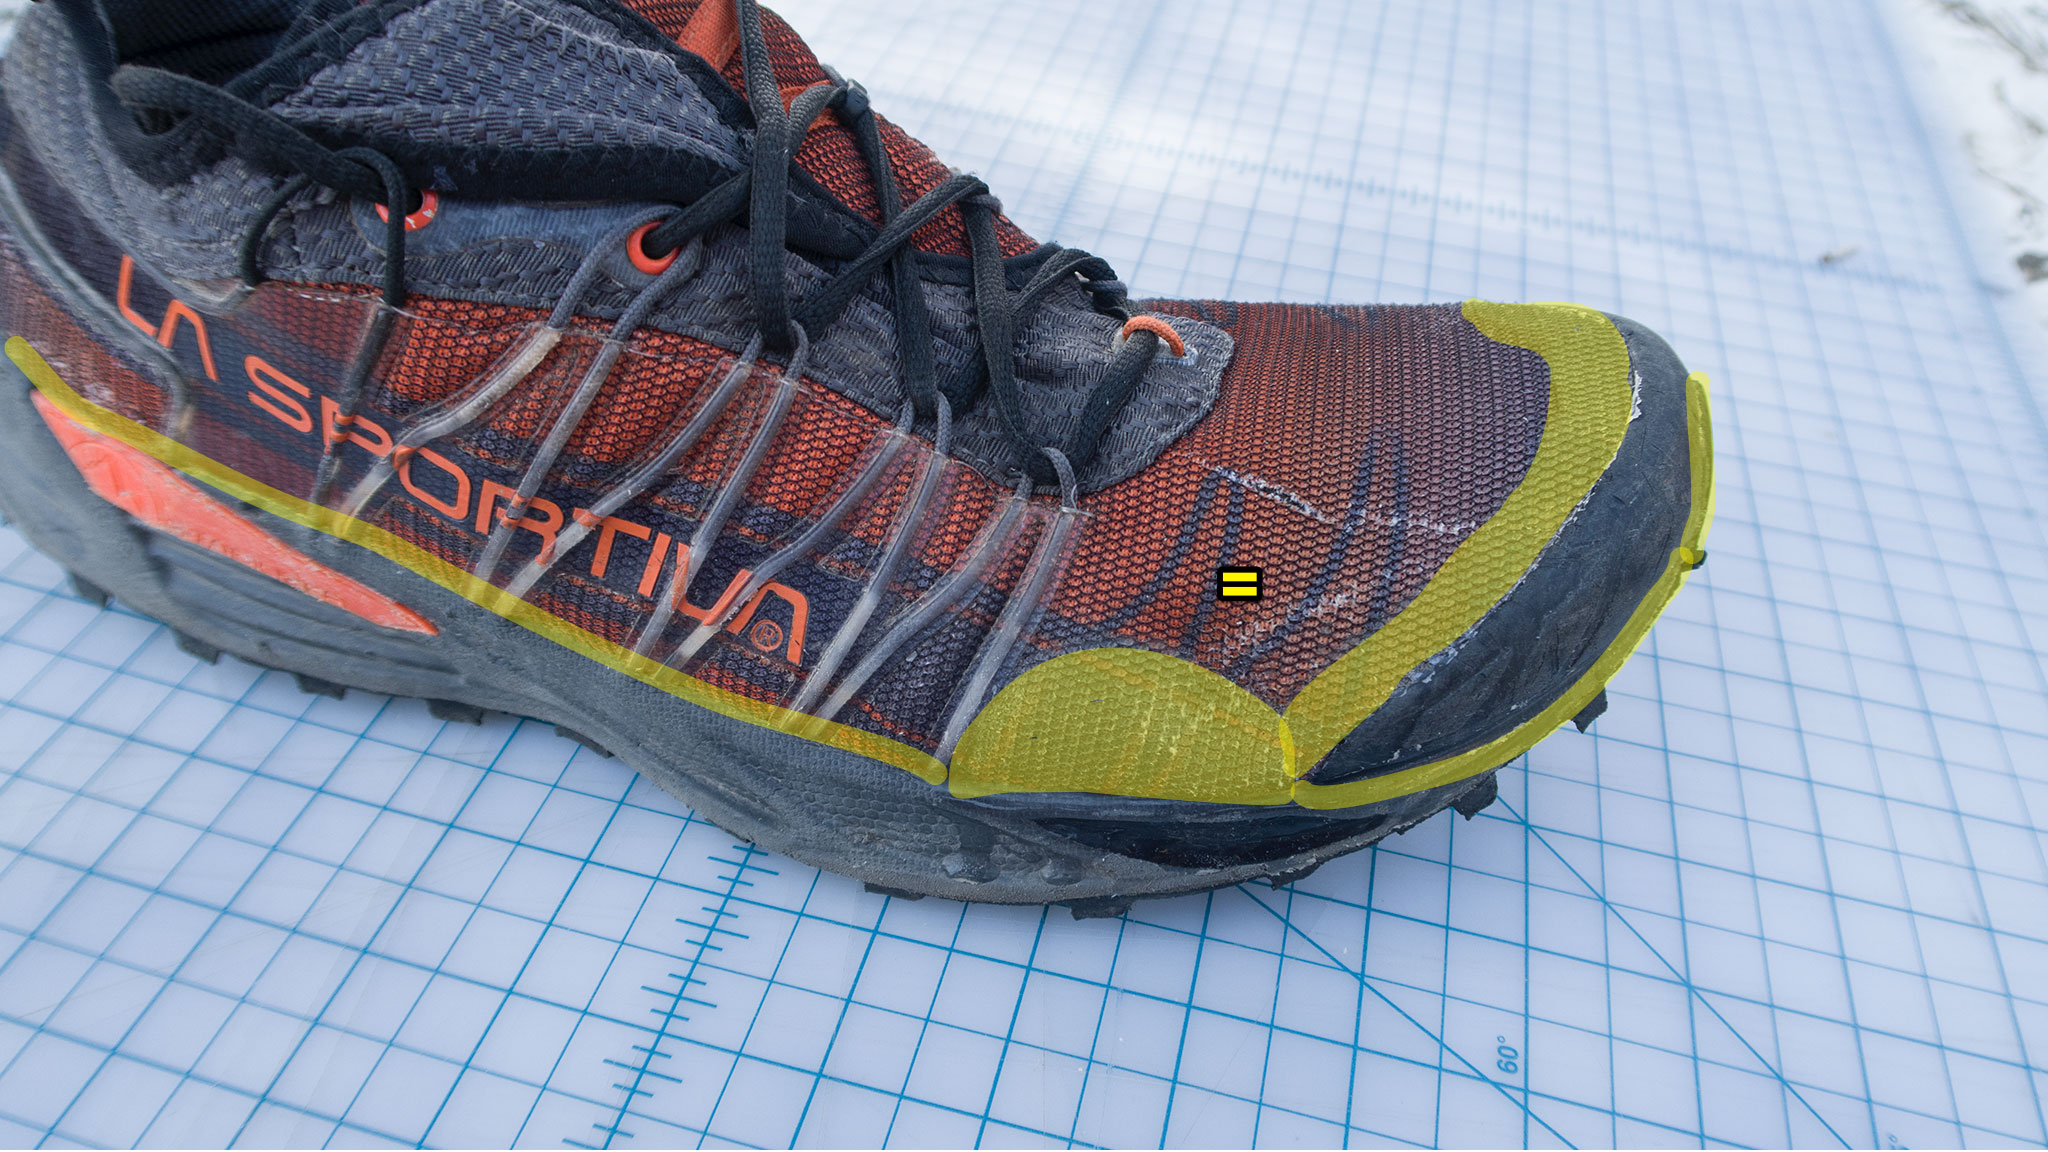
The upper of the Mutant is soft, form fitting, well ventilated, quick to dry, and super comfortable – due mostly to the lined mesh material used. But, this material is more fragile than I’d prefer, particularly if you’re like me, and are hiking off trail in scree, talus, thick undergrowth – anything really that can tear the mesh, often. What to do?
Reinforce problem areas with a type of adhesive. My favorite being Seam Grip +WP from Gear Aid. Unlike a product like Shoe Goo, Seam Grip tends to be less viscous and tends to find itself inside small cracks and seams of say: a shoe. For this application that characteristic is useful, as it’ll seep into the mesh fabric of the Mutant, rather than stay on top, like a more viscous adhesive would – save the Shoe Goo for building up a damaged area.
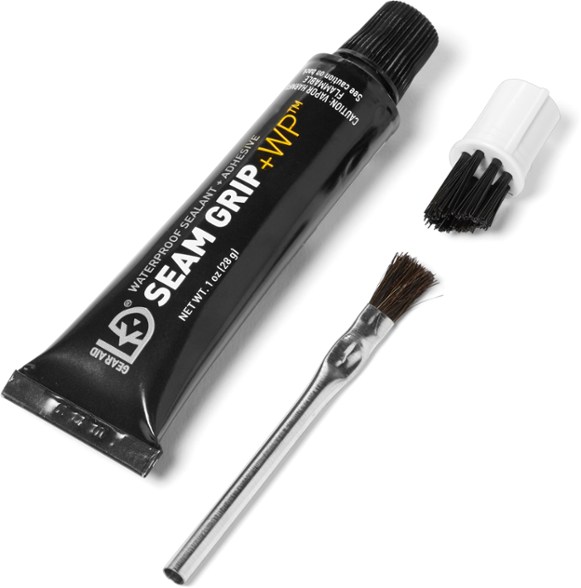
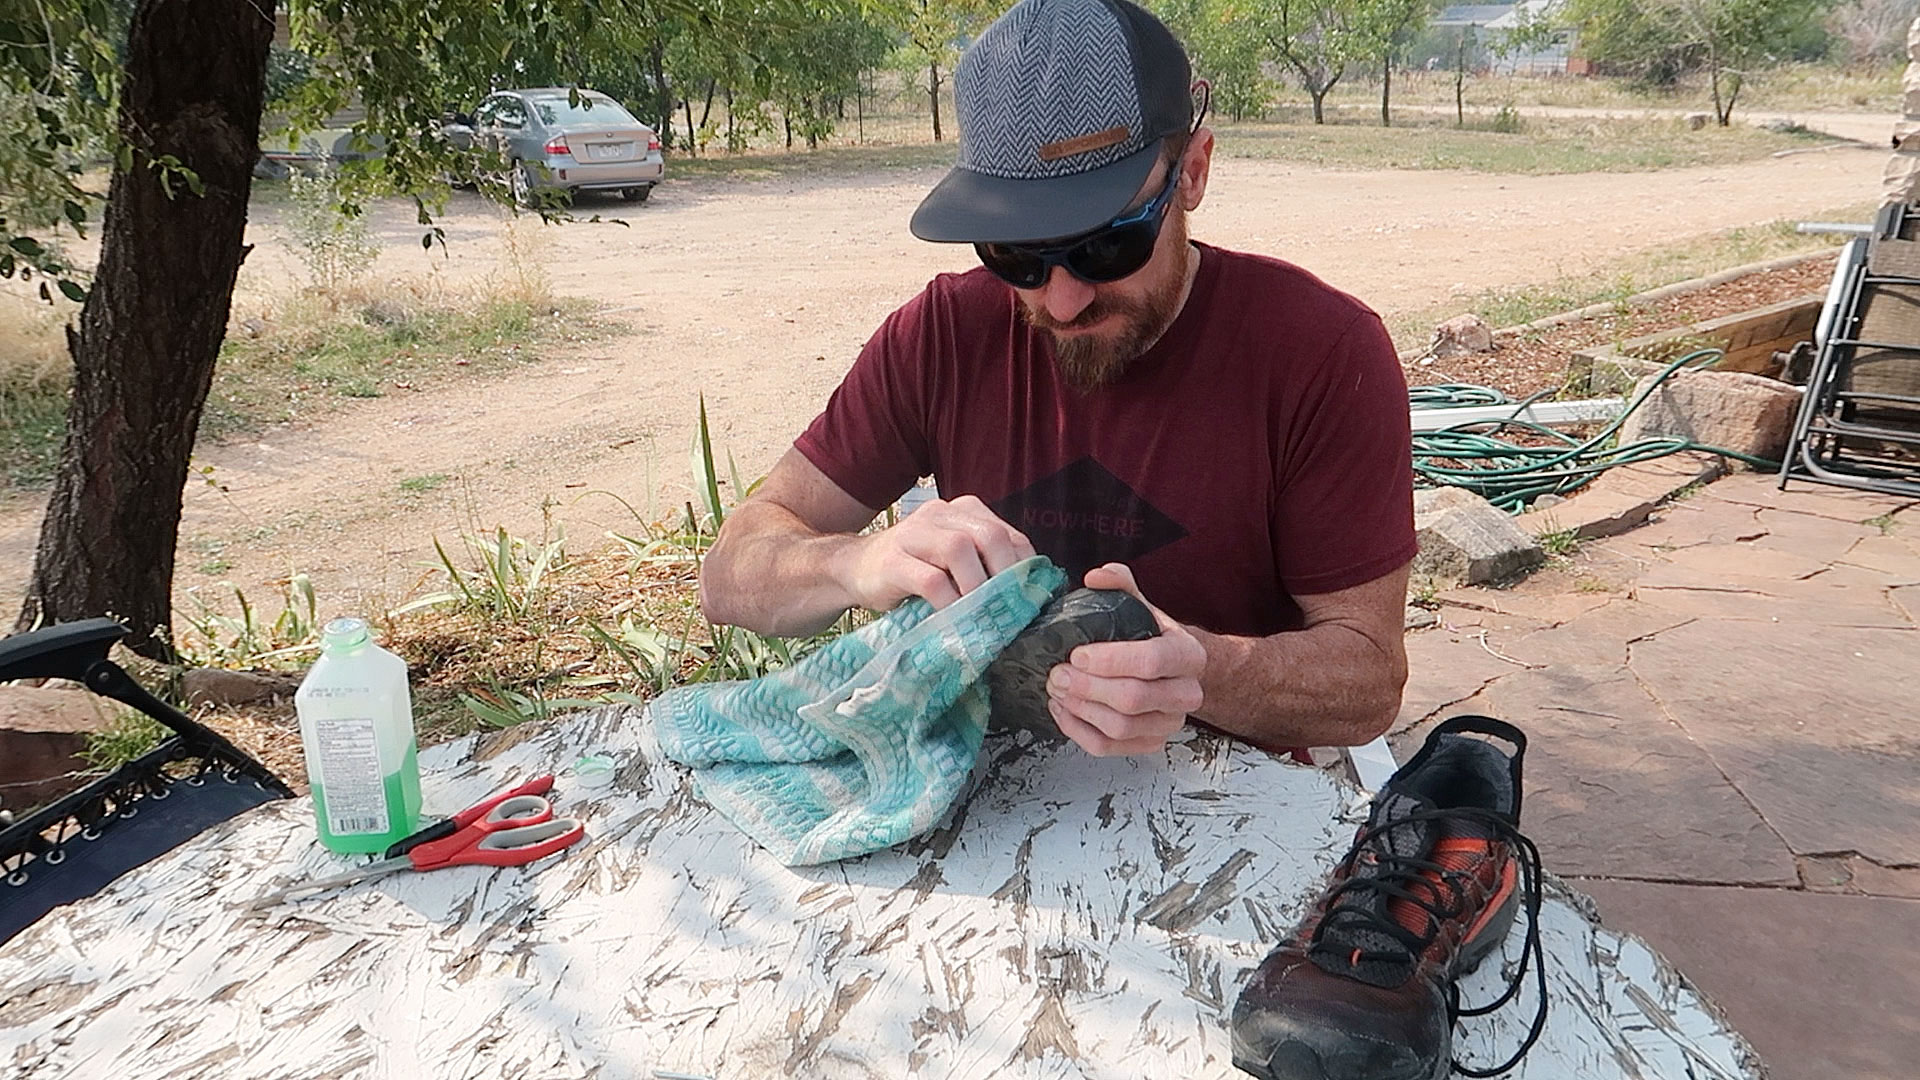
Prep the upper of your shoe by lightly cleaning it with water, than with rubbing alcohol. Allow your shoe to dry.
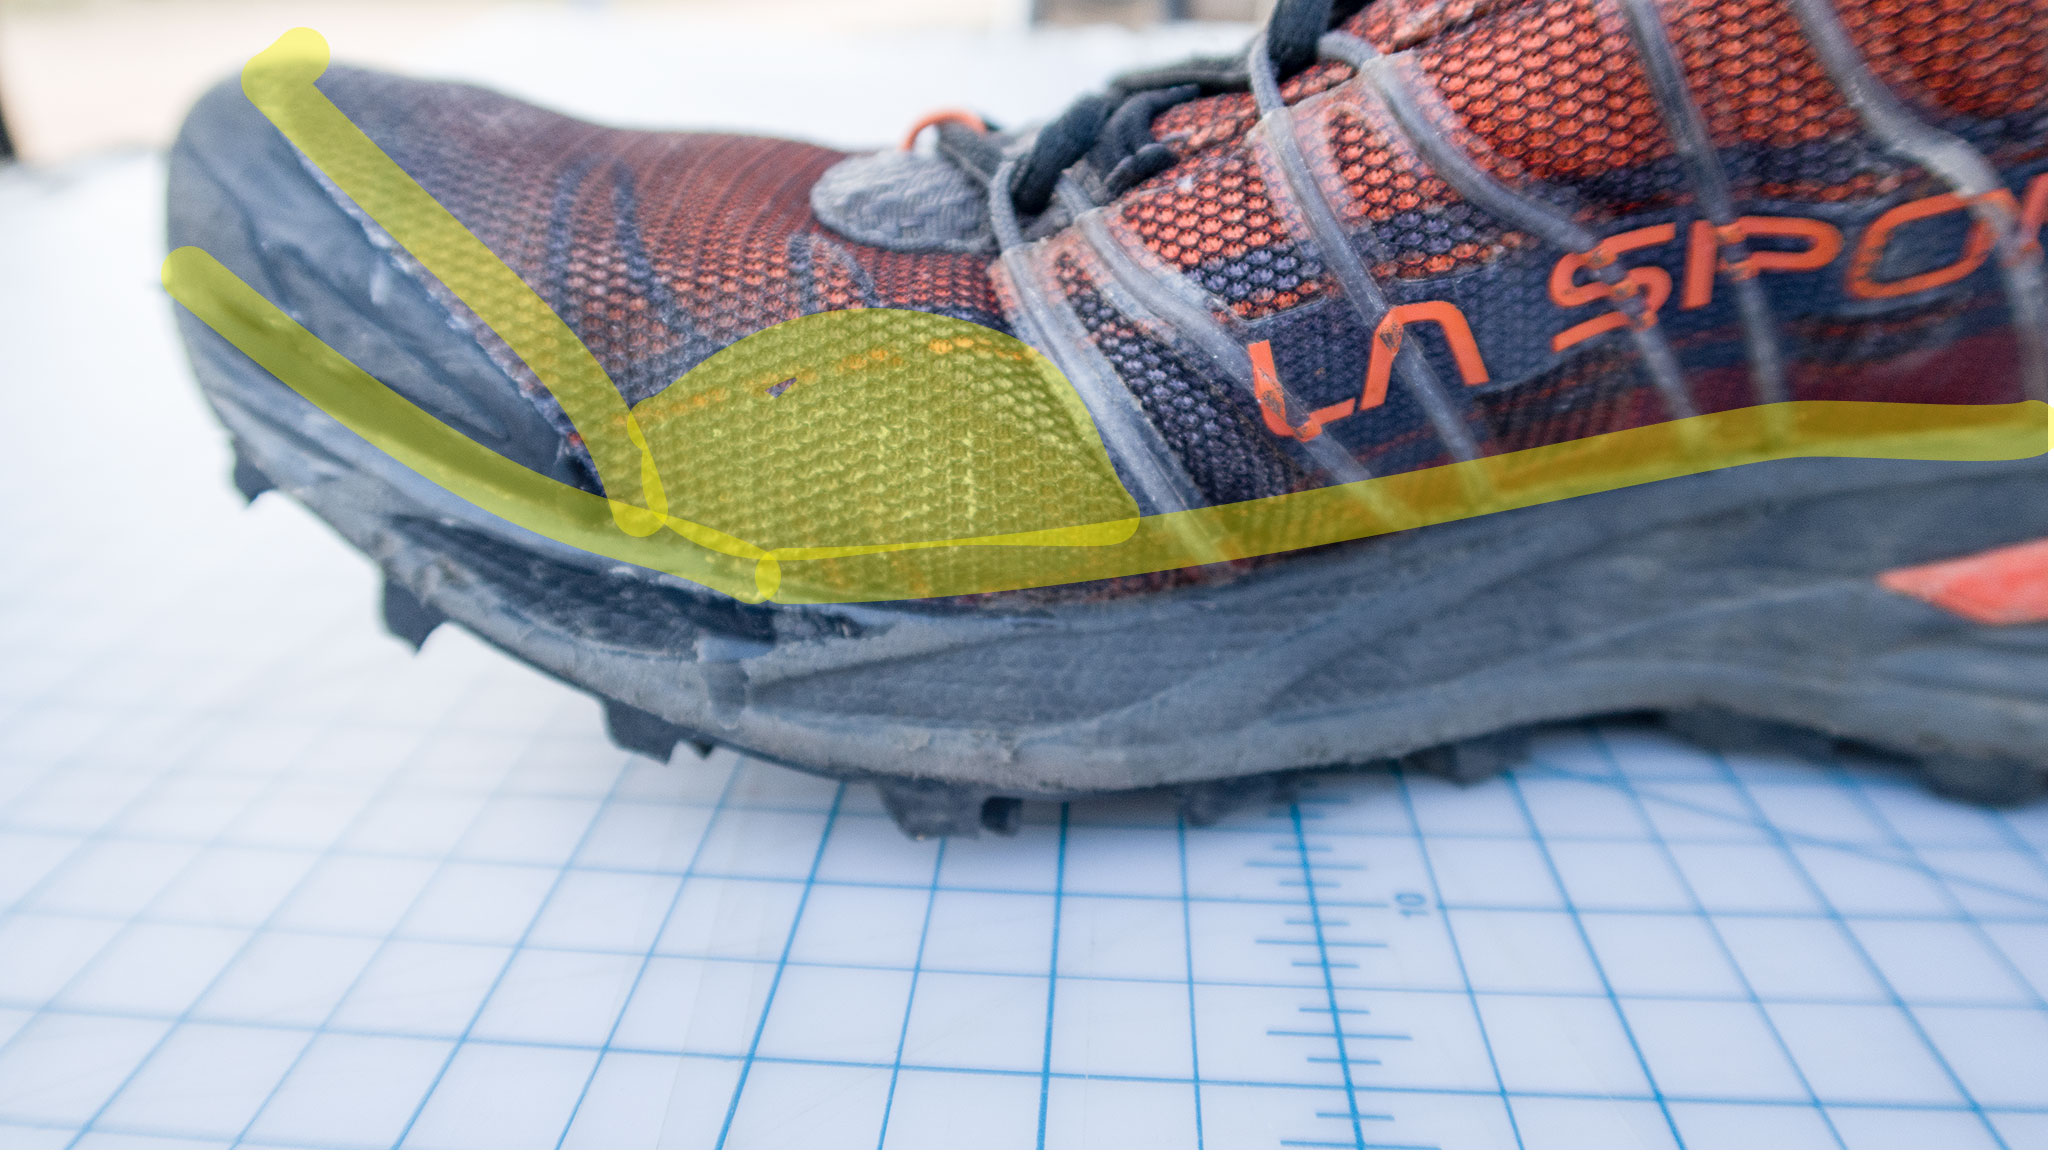
The problem areas I usually focus on especially are:
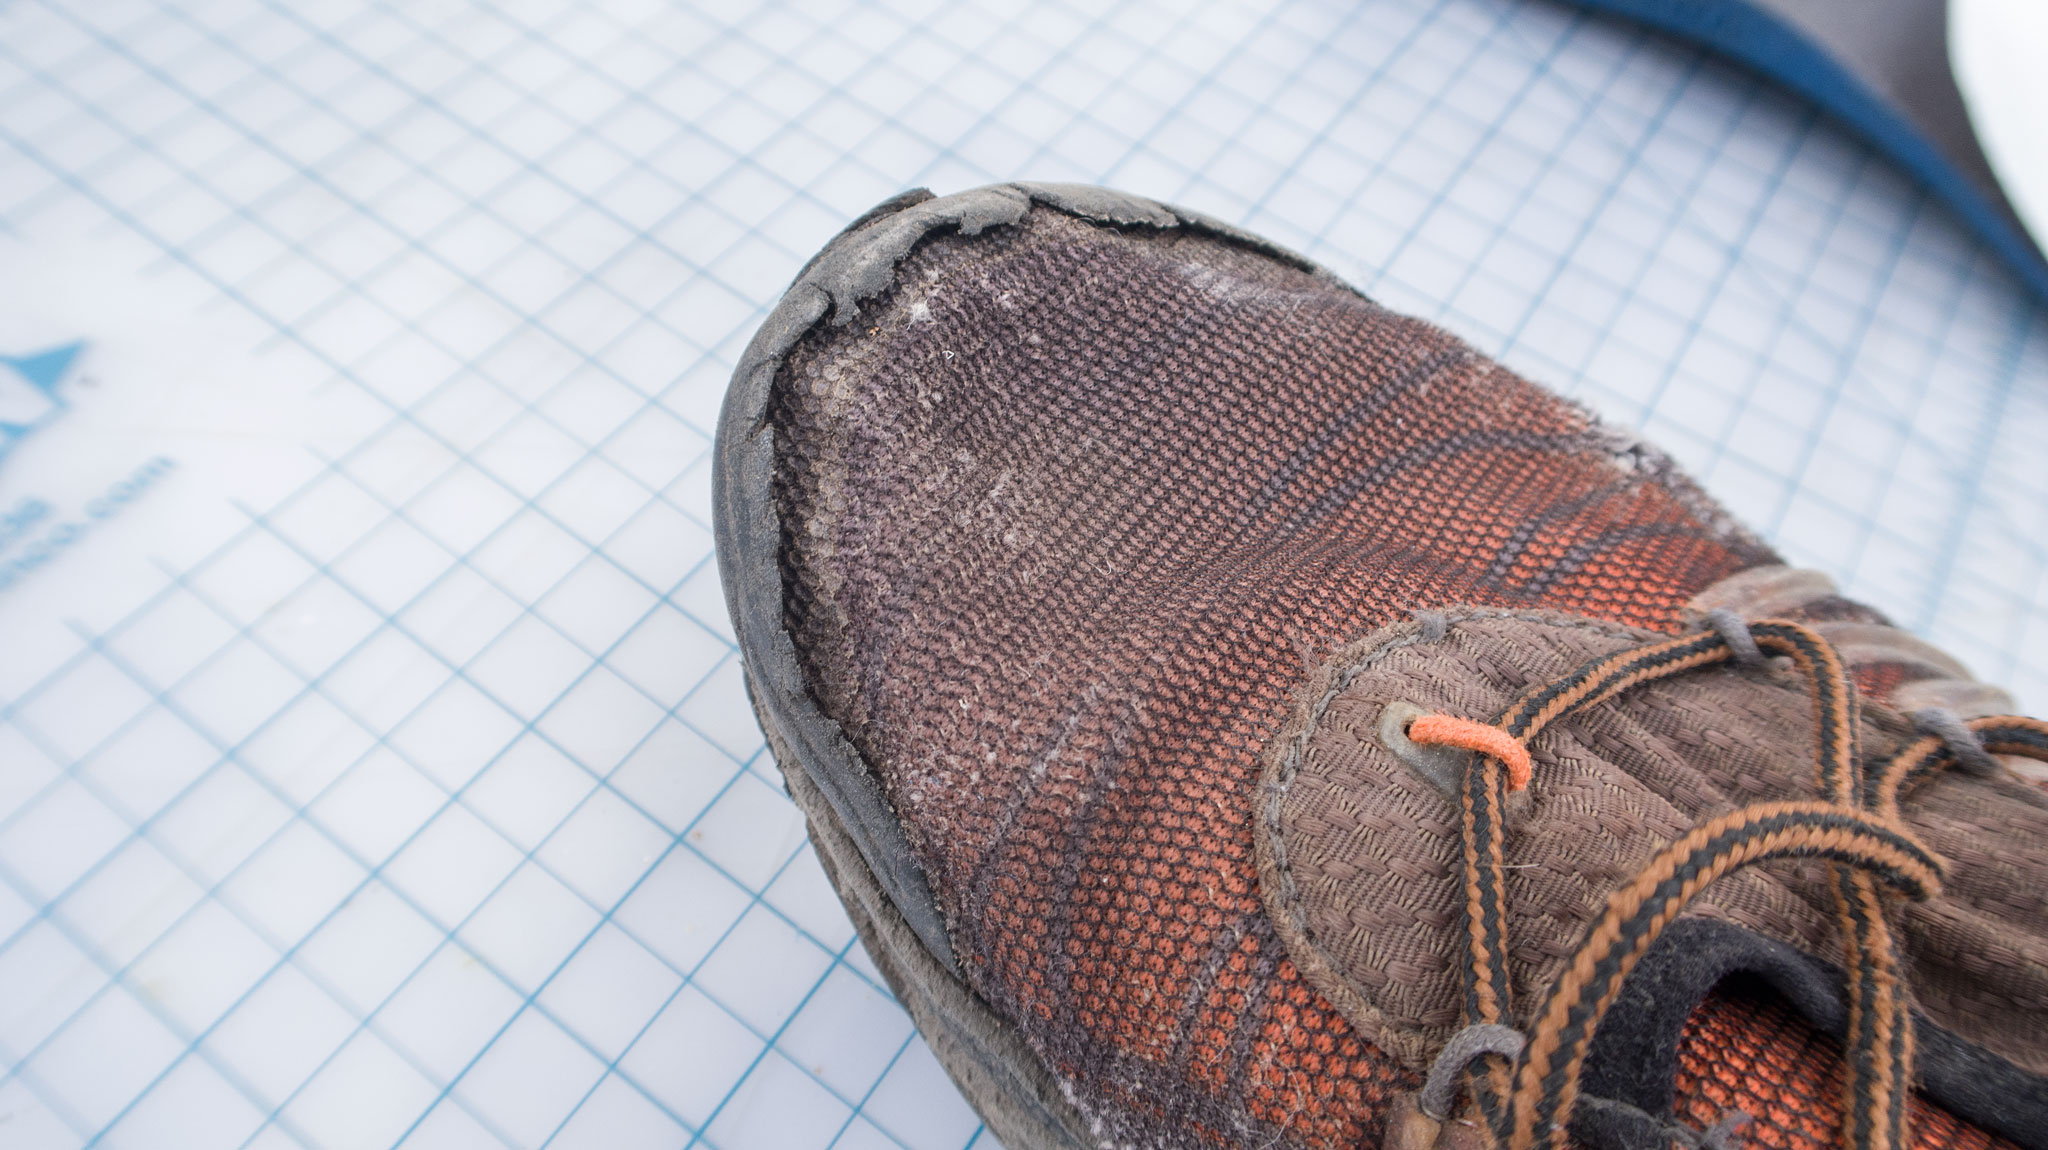
- the pinky toe – this area of the shoe is where I’m mostly likely to get a hole – after a few weeks, it sometimes looks like I’ve been practicing my kickflips in them; usually not the case.
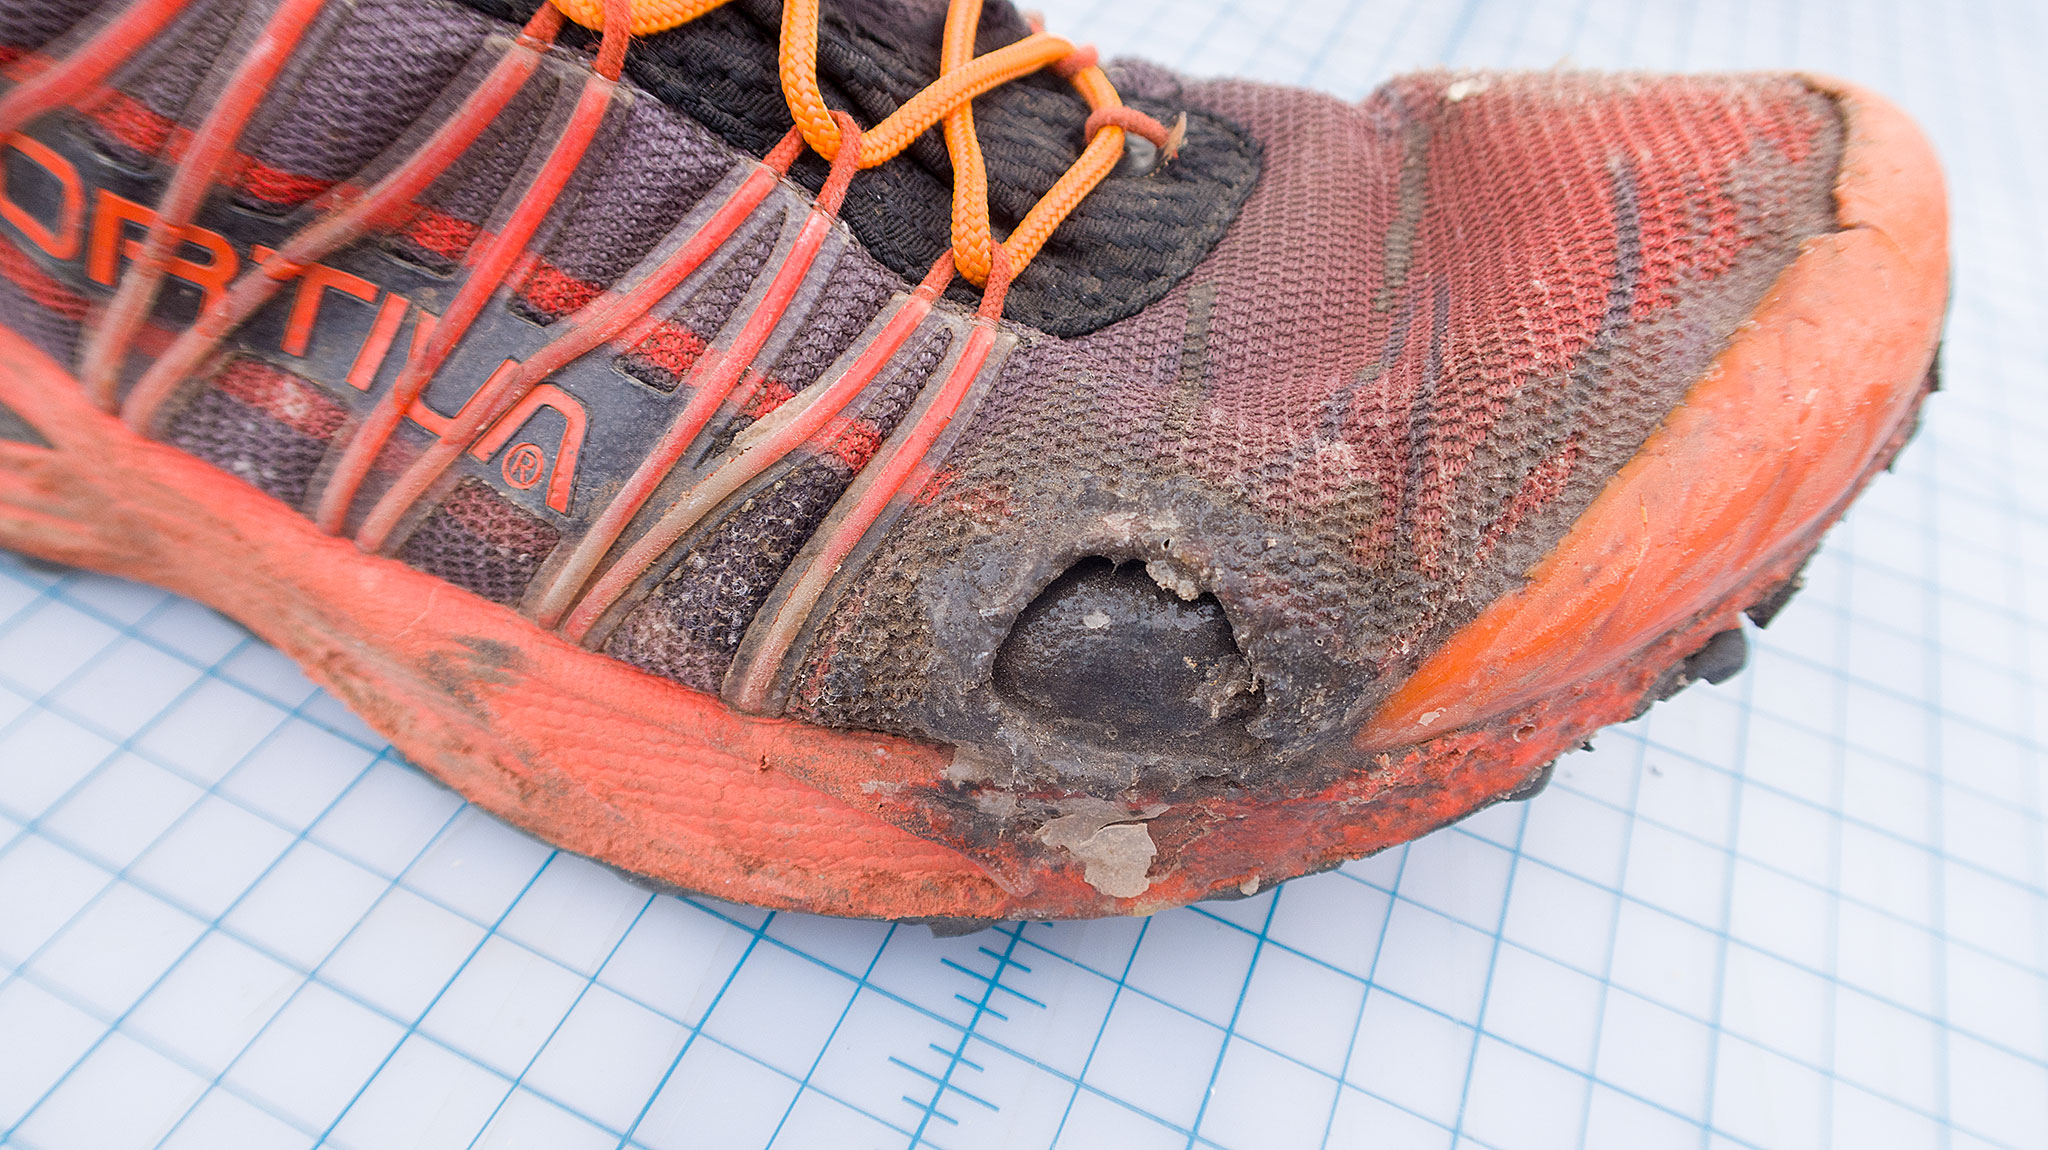
- the knuckle of the big toe – basically the other side of the toe box
Cover the mesh fabric of these areas with a thin layer of Seam Grip. Multiple applications of thin layers is better than one thick layer, but weigh the benefits of doing like, 10 tiny layers over 7 days. You can always reapply a layer after a week of running, and continue this as a habit to keep the lifespan of your shoe as prolonged.
Next, I’ll outline the toe cap and mesh seam with a small layer of seam grip that’s about a centimeter in width. Catching a toe again and again on rocks will ultimately start ripping the toe cap off from the mesh.
Also consider putting a layer of Seam Grip where the toe cap meets up with the sole of the shoe – especially near the big toe, as this area of the midsole tends to get eaten up quickly.
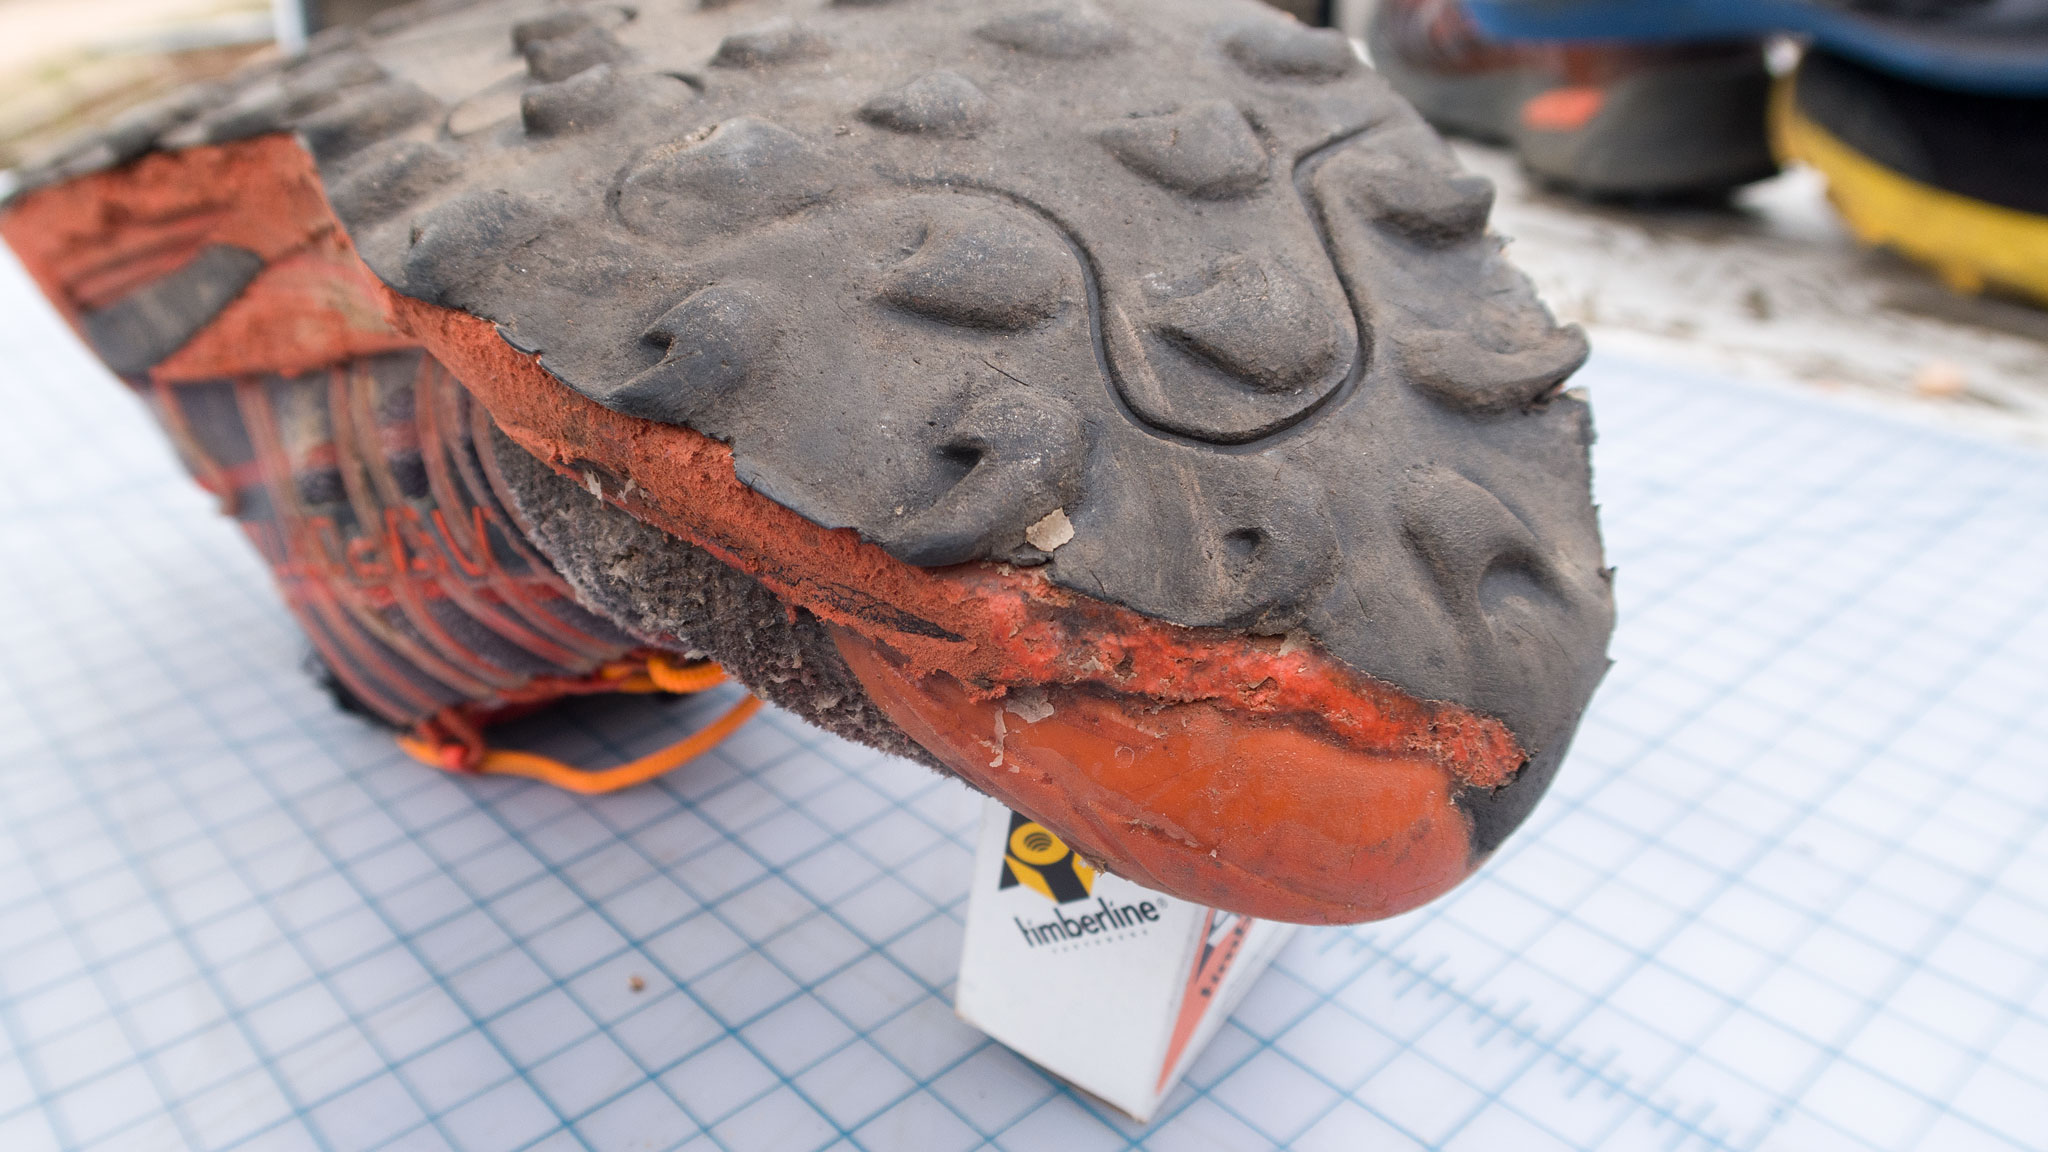
If you’re feeling really thorough apply a layer of Seam Grip around the entire bottom of the upper where the mesh fabric upper meets the midsole. This is a fragile area of any shoe, as it’s closest to the ground. This little layer of Seam Grip could also potentially up the water resistance of the shoe, when running across small streams.
The application of Seam Grip is best done on brand new shoes, before you start running in them, so do a good job to begin with. Applying Seam Grip to a worked pair of shoe is better than nothing, but cosmetically, things may not look the bestm, and the Seam Grip may not stick to the upper quite as well.
Give your shoes a good look every week or so, and do some touch up on any areas that look like they need some extra love.
Shoelaces
The shoelaces that come with the Mutant are weaker than I would prefer, and I try to replace them as soon as possible – even replacing them when the the pair of shoes is new. There’s not much worse than a great run ruined by a broken shoelace.
Almost any other pair of laces will work better – even dress shoelaces will be stronger. Grabbing a pair of tube laces at the supermarket that’s labeled for sports – or even for work boots is most likely the best for our needs. In a pinch, you could even use some thin accessory cord you can buy by the meter at the gear shop, although accessory cord is sometimes not as pliable as we want for shoelaces, and slip knots like the kind used for tying shoes will come undone easily.
The diameter of laces that work is actually much bigger than you would suspect. A tube lace that’s ~3mm in diameter will fit into the eyelets of the Mutant, but any thicker and it’s not worth the bother. A flat shoelace will be less than ideal, and I would suggest against them.
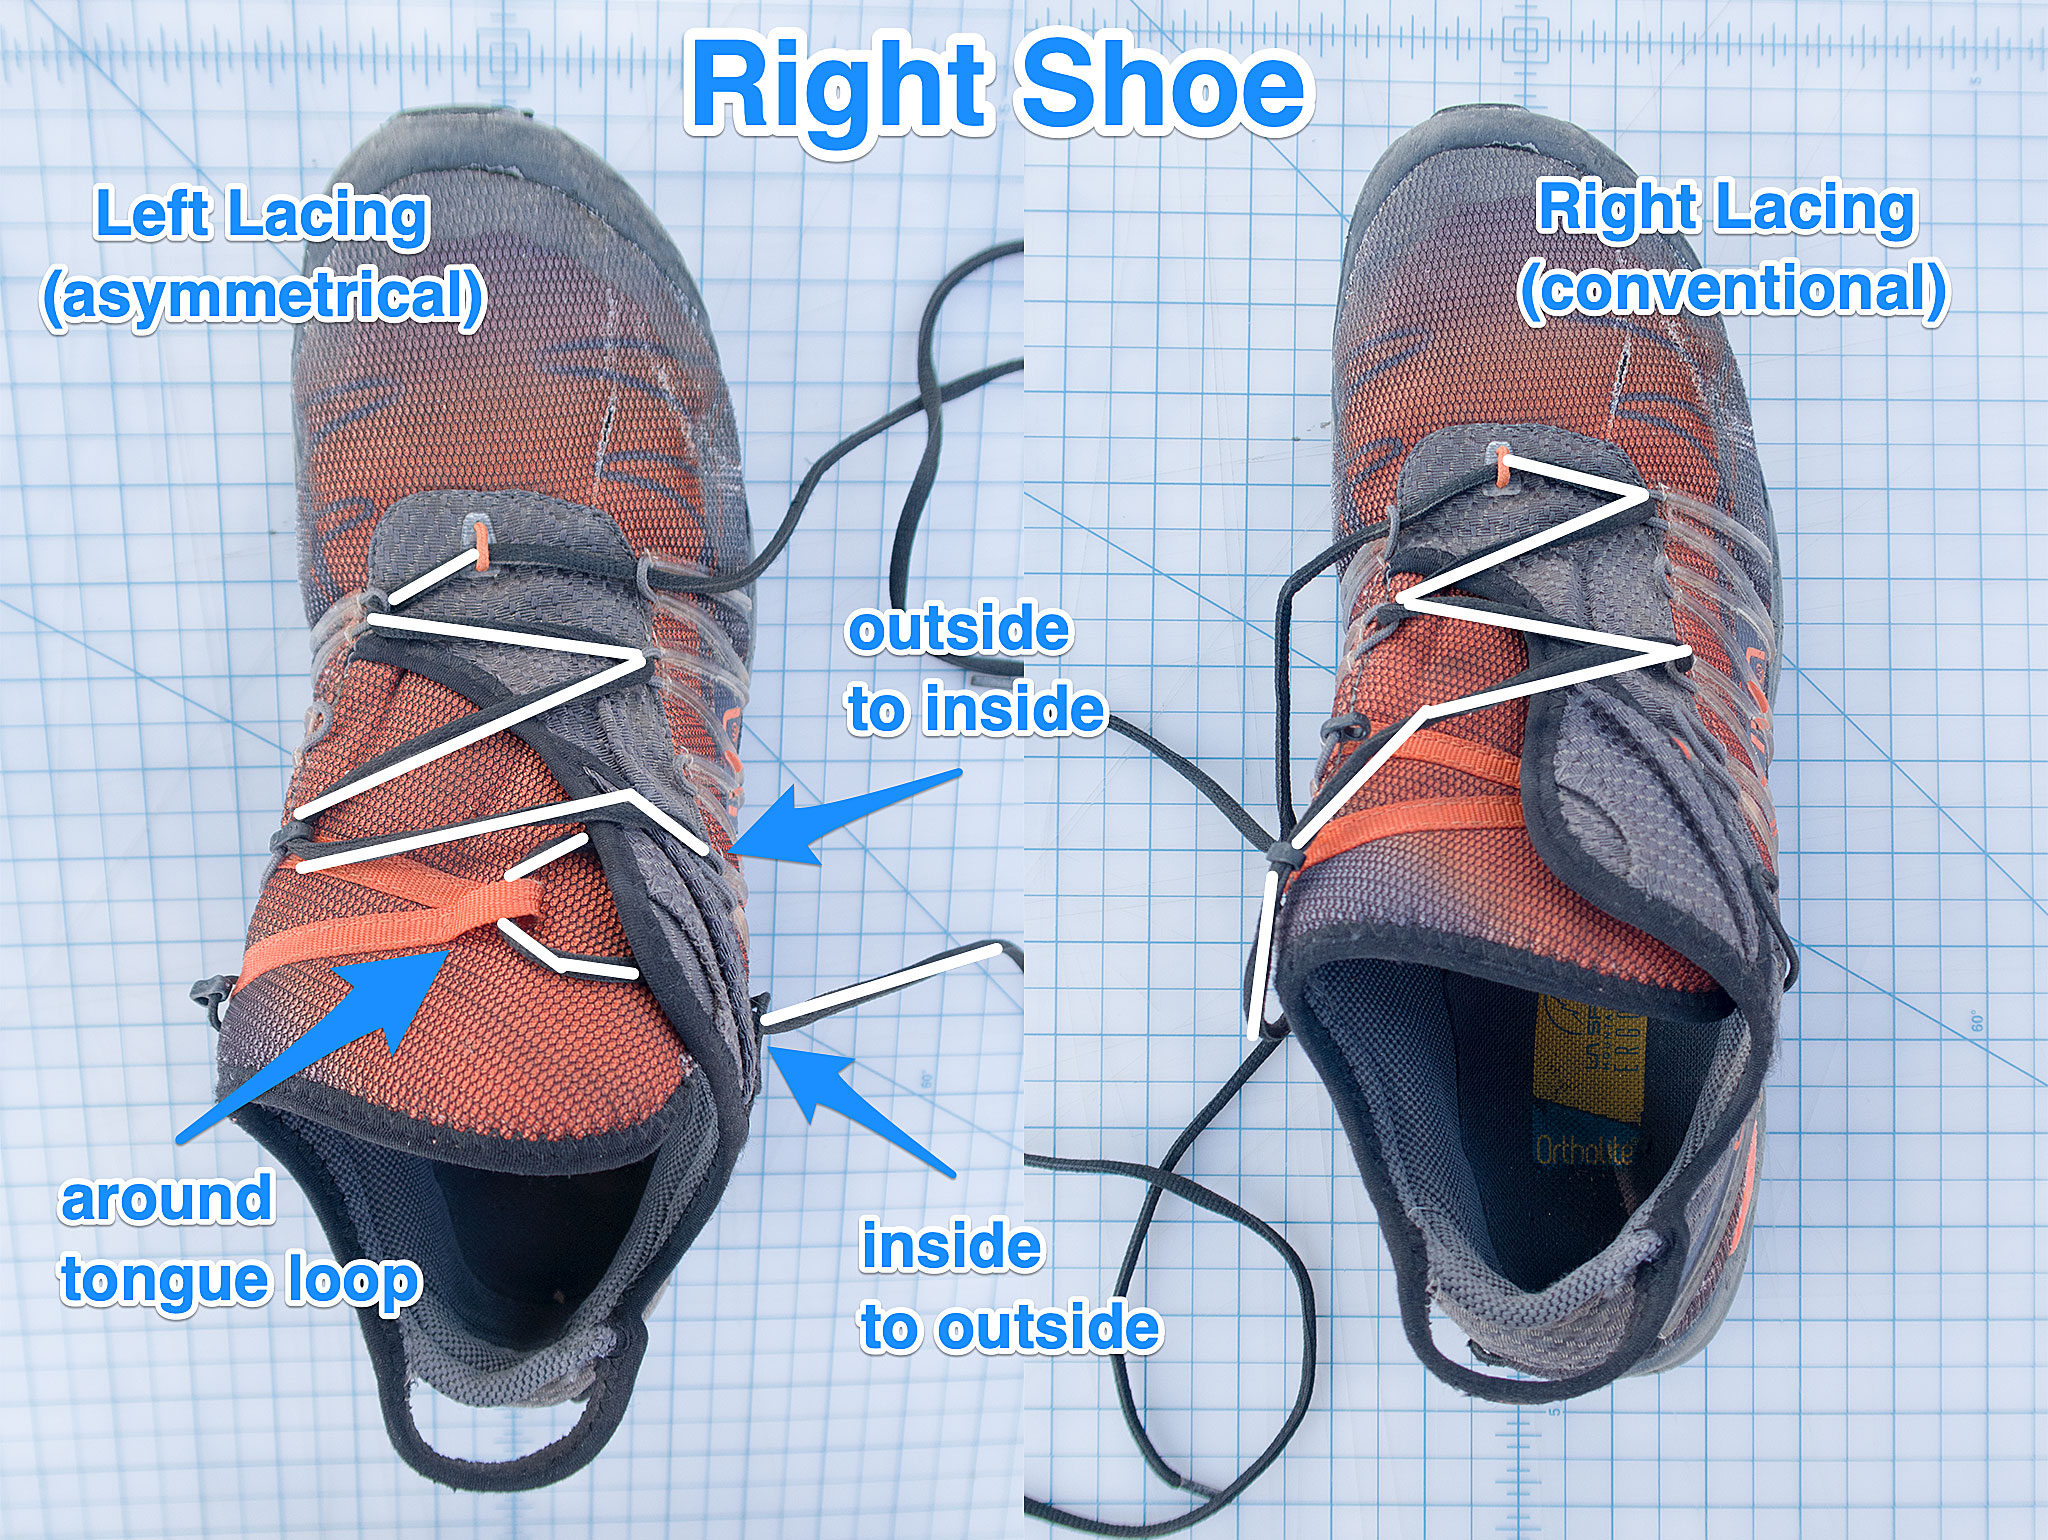
Lacing
The lacing of the Mutant is asymmetrical after a few crisscrosses, so consider taking a photo of the lacing pattern so you can more easily recreate the pattern when relacing – or use my handy cheat illustration below:
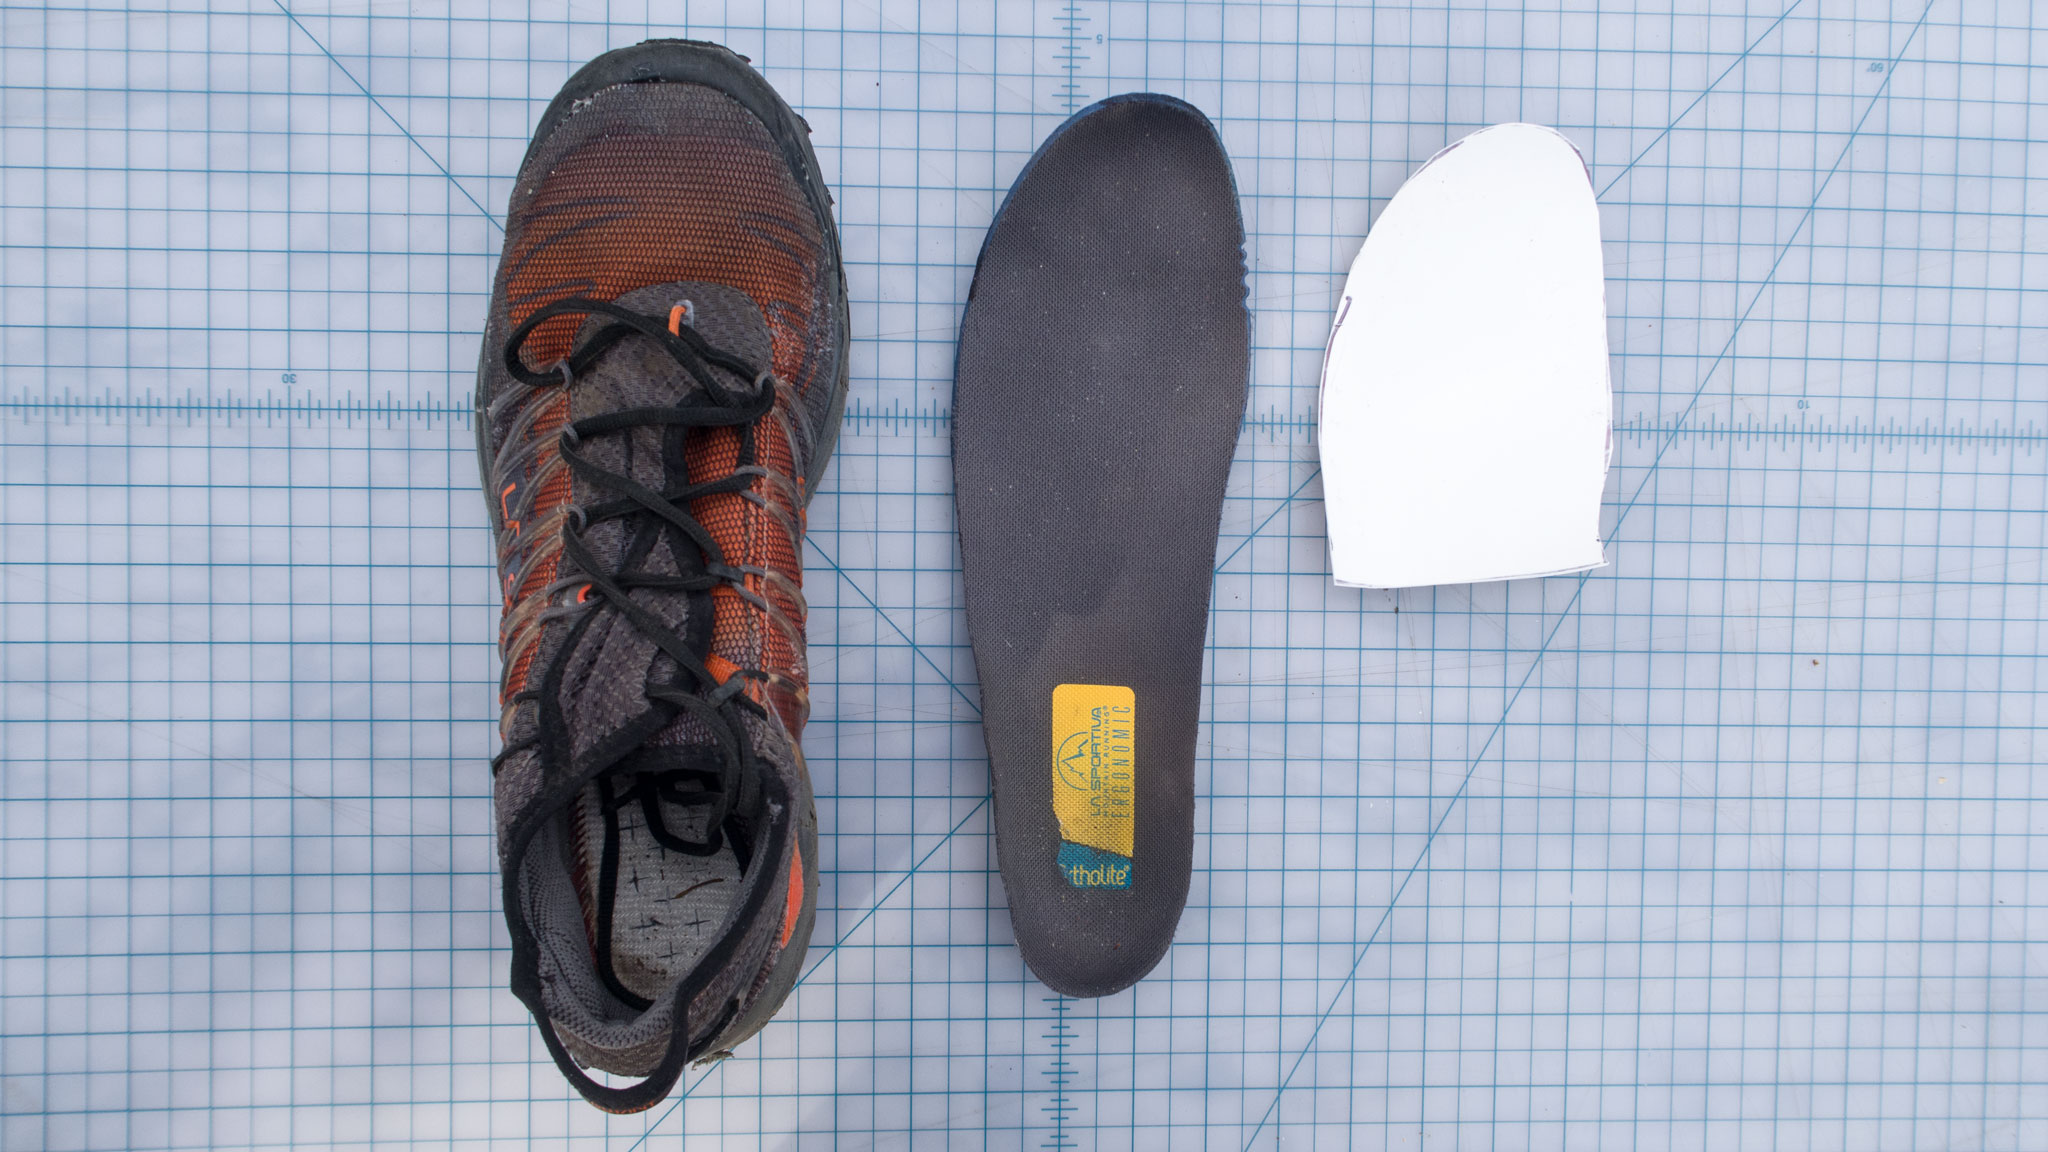
Insole
For the most part, the insole of the Mutant is fine. I’m not going to go into utilizing fancy, special after market insoles – I just don’t use one myself. If you have a pair and love them, that’s great; if you use one for motion control/pronation stuff, that’s way over the pale of this article. Mutant is not a minimal shoe, so expect a bit of support and a bit of motion control, but otherwise, it’s fairly neutral.
But, what the Mutant does lack is a proper rock plate. The trails around Boulder are, to put it lightly: rocky, and having a little shield between your foot and your shoe’s sole can be nice for longer runs and going off trail. Any rock plate will remove some sensitivity between your foot and the ground, so keep that in mind of that compromise.
I’m actually not a huge fan of shoes that have built in rock plates. Oftentimes, the rock plate is sandwiched between the outsole and the midsole, which seems fine in theory, but the rubber of the outsole seems to not adhere to the rockplate as well as it will to the EVA midsole and the rubber of the outsole will slowly peel off.
But we can approximate a rock plate by making our own inserts that go underneath the insole, inside the shoe itself. Get an empty milk jug, some sort of plastic juice container, or an empty tub of protein powder and cut it up so it lays flat.
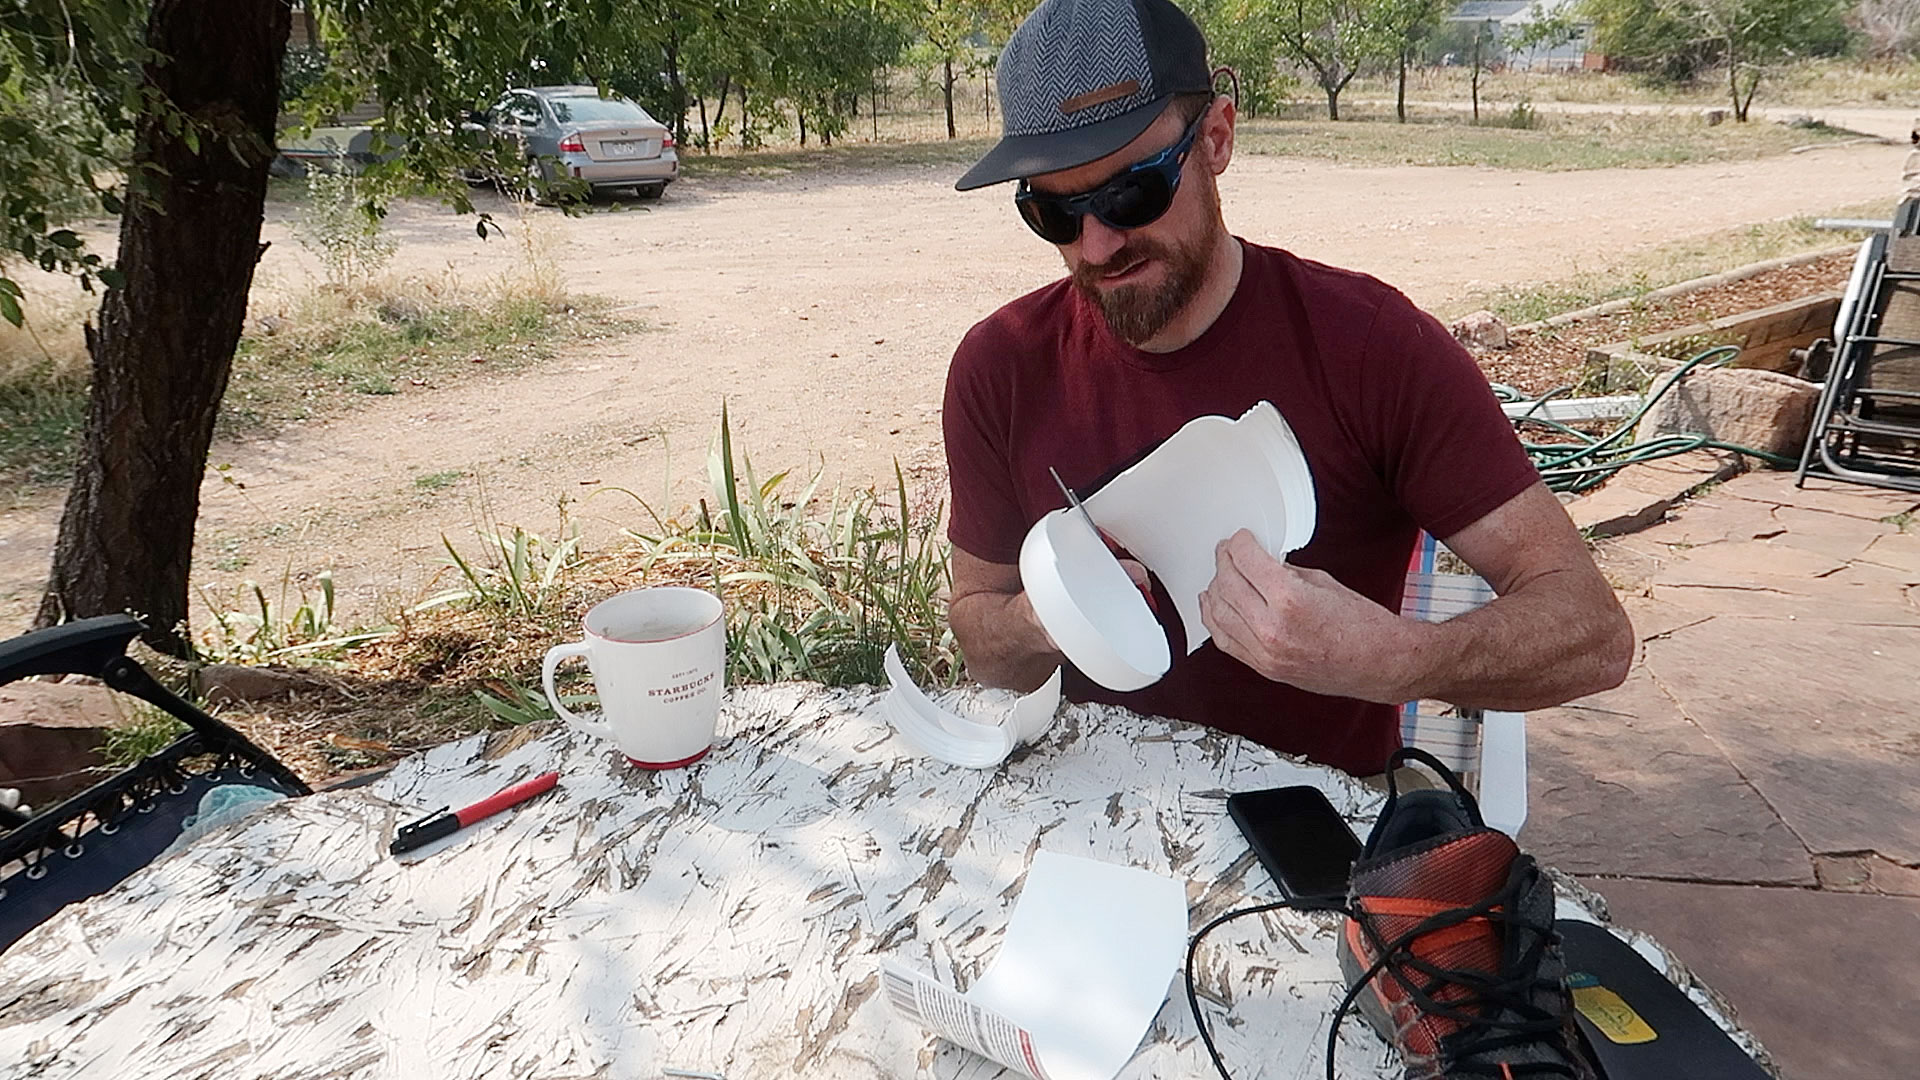
Take out your insole to use as a template. Trace the insole onto the plastic using a sharpie. Cut out the plastic with scissors. You won’t need to cut the entire insole shape, but make sure the midfoot to the toes is covered, and cut things off around the arch.

Put your new fancy DIY inserts in your shoes and there you go: homemade rock plate.
A nice advantage of these inserts is that they’re removable – it’s oftentimes preferred to not have one, but make a pair yourself, and keep them with your shoes for days your feet feel particularly beat up. Great for fastpacking and backpacking trips too.
Outsole
The Mutant uses the very sticky FriXion® XF rubber for its outsole and is one of the reasons I, like many, love the Mutant. The midsole is an EVA foam, with a fairly tall 10mm drop. The chunkiness of the outsole is around a 9 out of 10 and works well in mud, as well as gravel. It may be my favorite shoe lug pattern of all time – I’ve looked for Sportivas that feature it since the Sportiva C-Lite 2’s. If you also like the lug pattern, but are looking for either a traditional lacing system or a longer lasting outsole, consider the Lycan II.
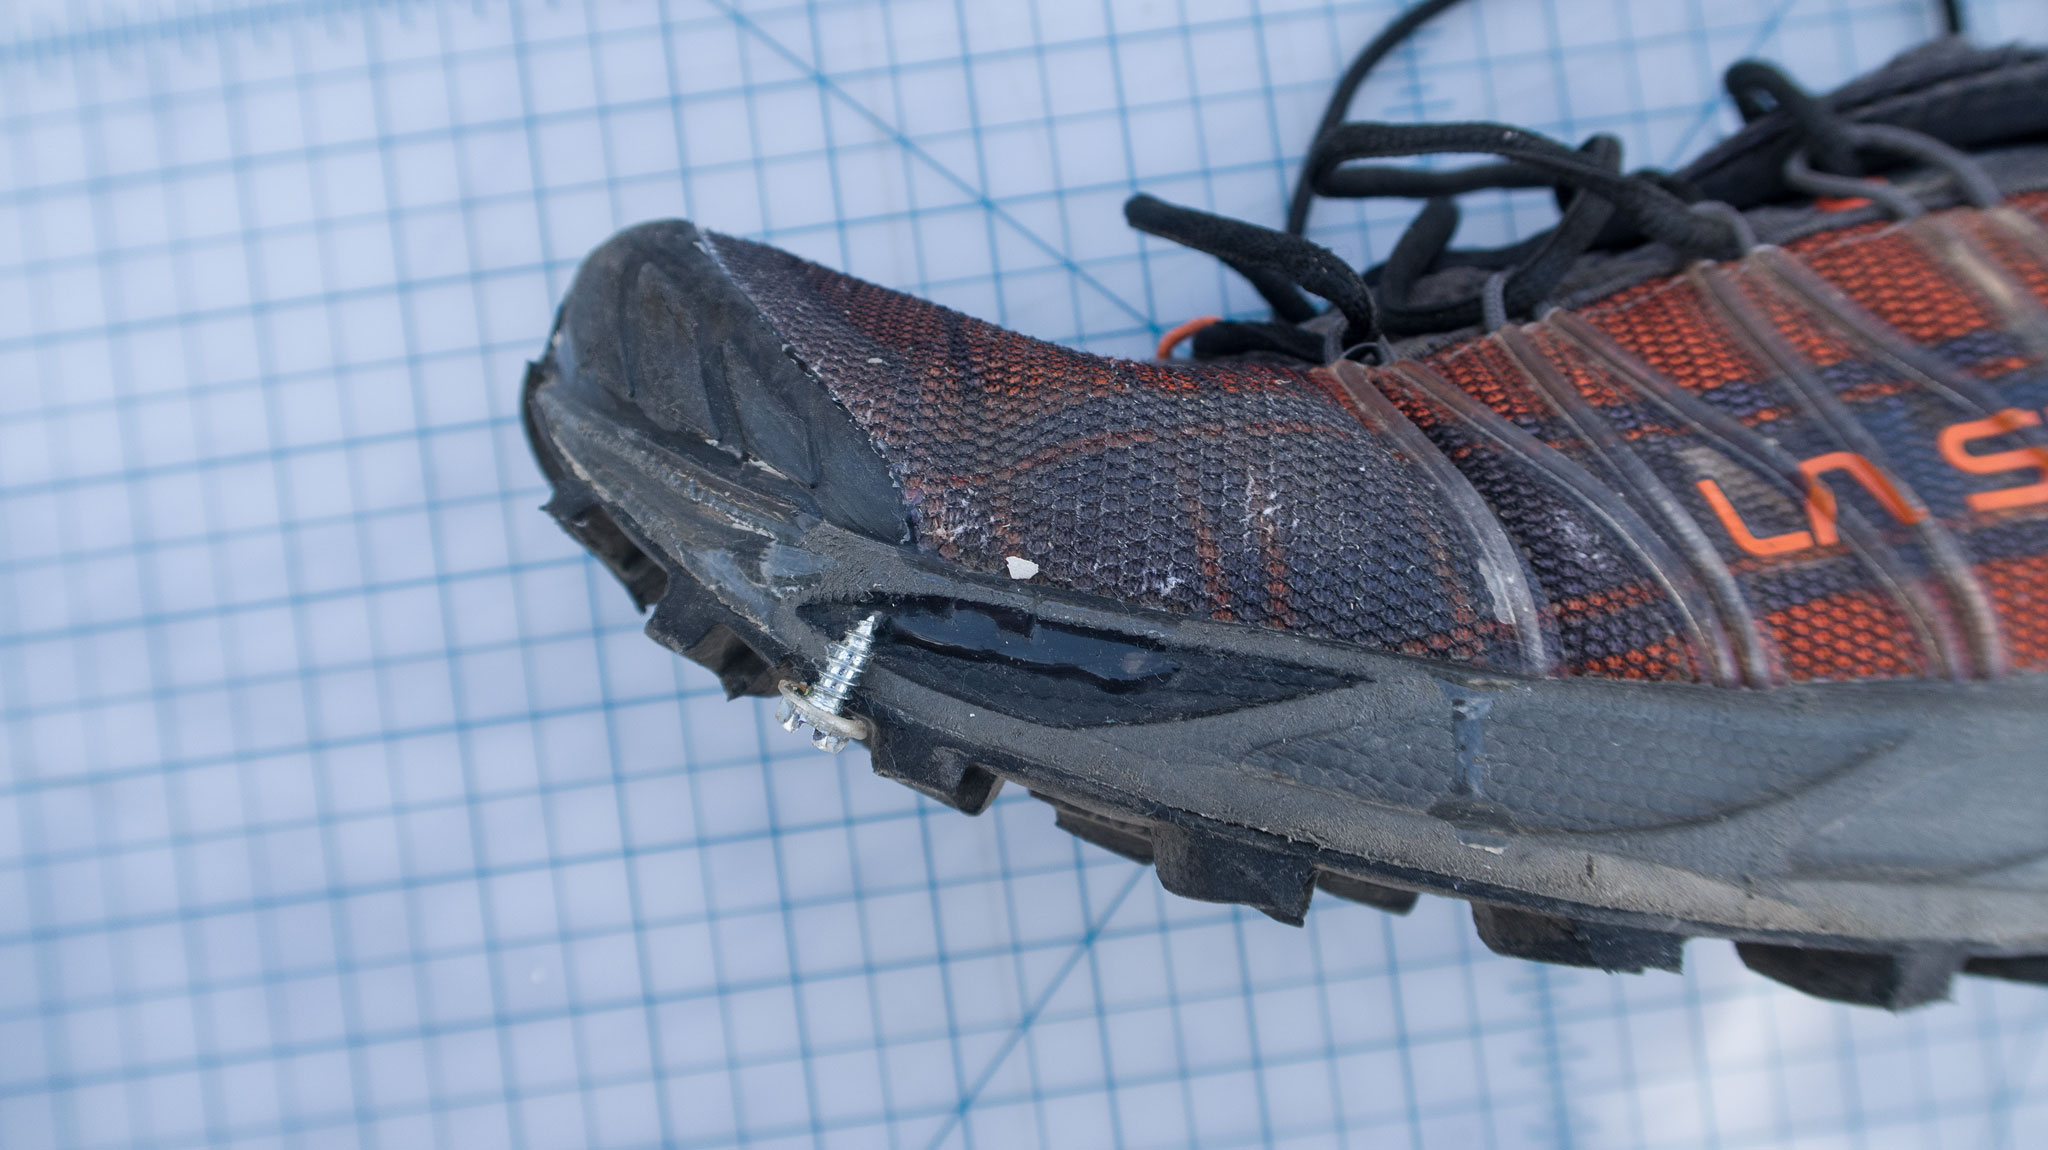
Screw Shoes
We’re entering the shoulder season here in Boulder, and it’s just one good snow storm away until we have the north-facing aspects and higher elevation mountain trails hold snow, which will turn into ice basically until June. Unless you already have a winter-specific shoe with built-in spikes like the Sportiva Blizzard (highly recommended), one time-tested hack is to screw in self-tapper sheet metal screws into the outsole.
I find this technique highly useful for running on the local trails. Microspikes can also be used, but they’re also expensive and are prone to get damaged on the type of terrain I run on (rocky/off-trail). Screws will eventually fall off, but they can also be easily replaced, and the pattern can be customized to your liking.
For shoulder season duties, adding just a few screws to the heel of the outsole is all I really want – just enough to get me through an icy patch of trail – especially when descending, without making a fool of myself or requiring me to bring microspikes for just a few feet of terrain – it really does get old having to take on/put off microspikes a dozen times during a run.
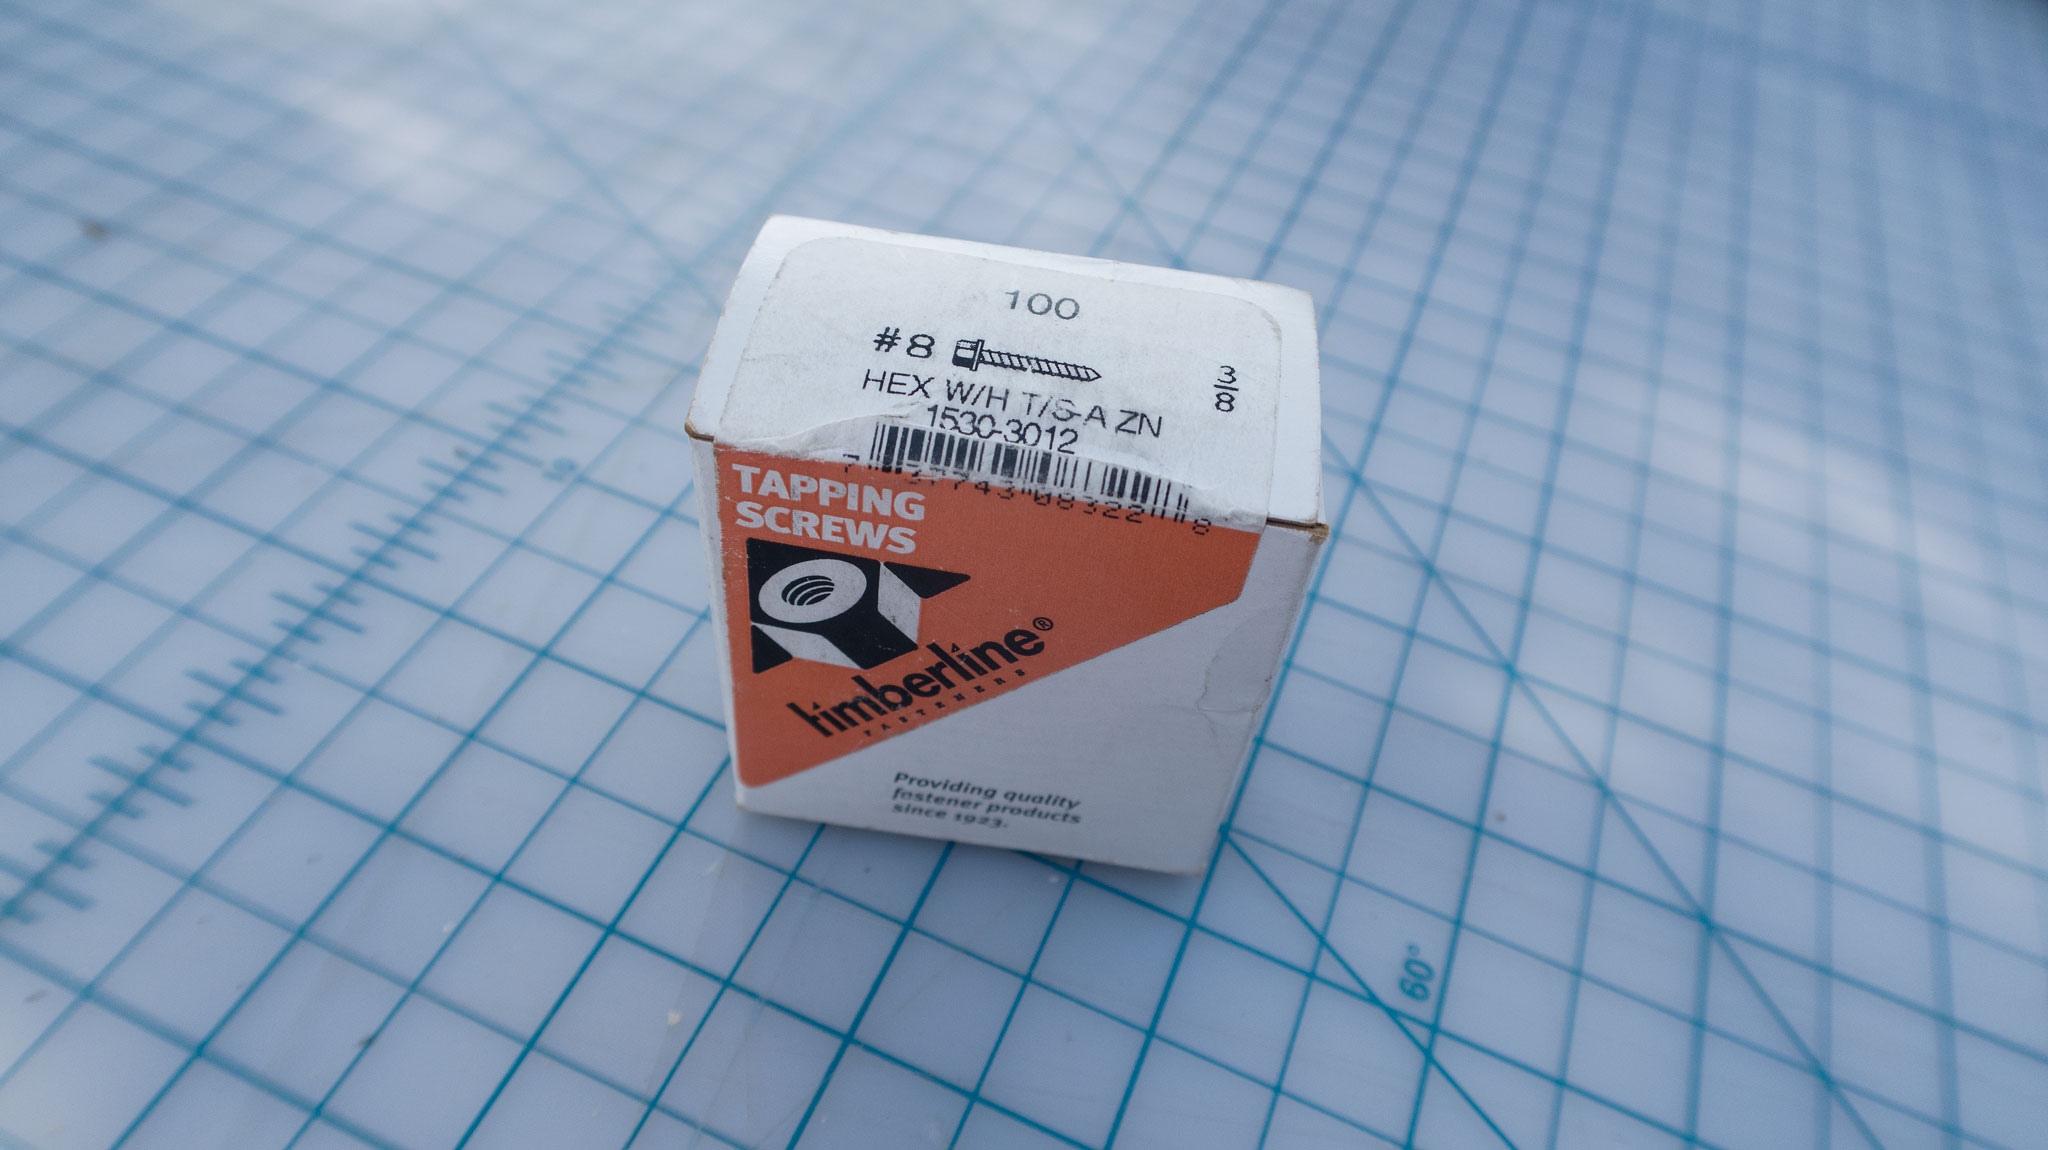
I usually pick up 3/8″ length, #8 size, hex heads.
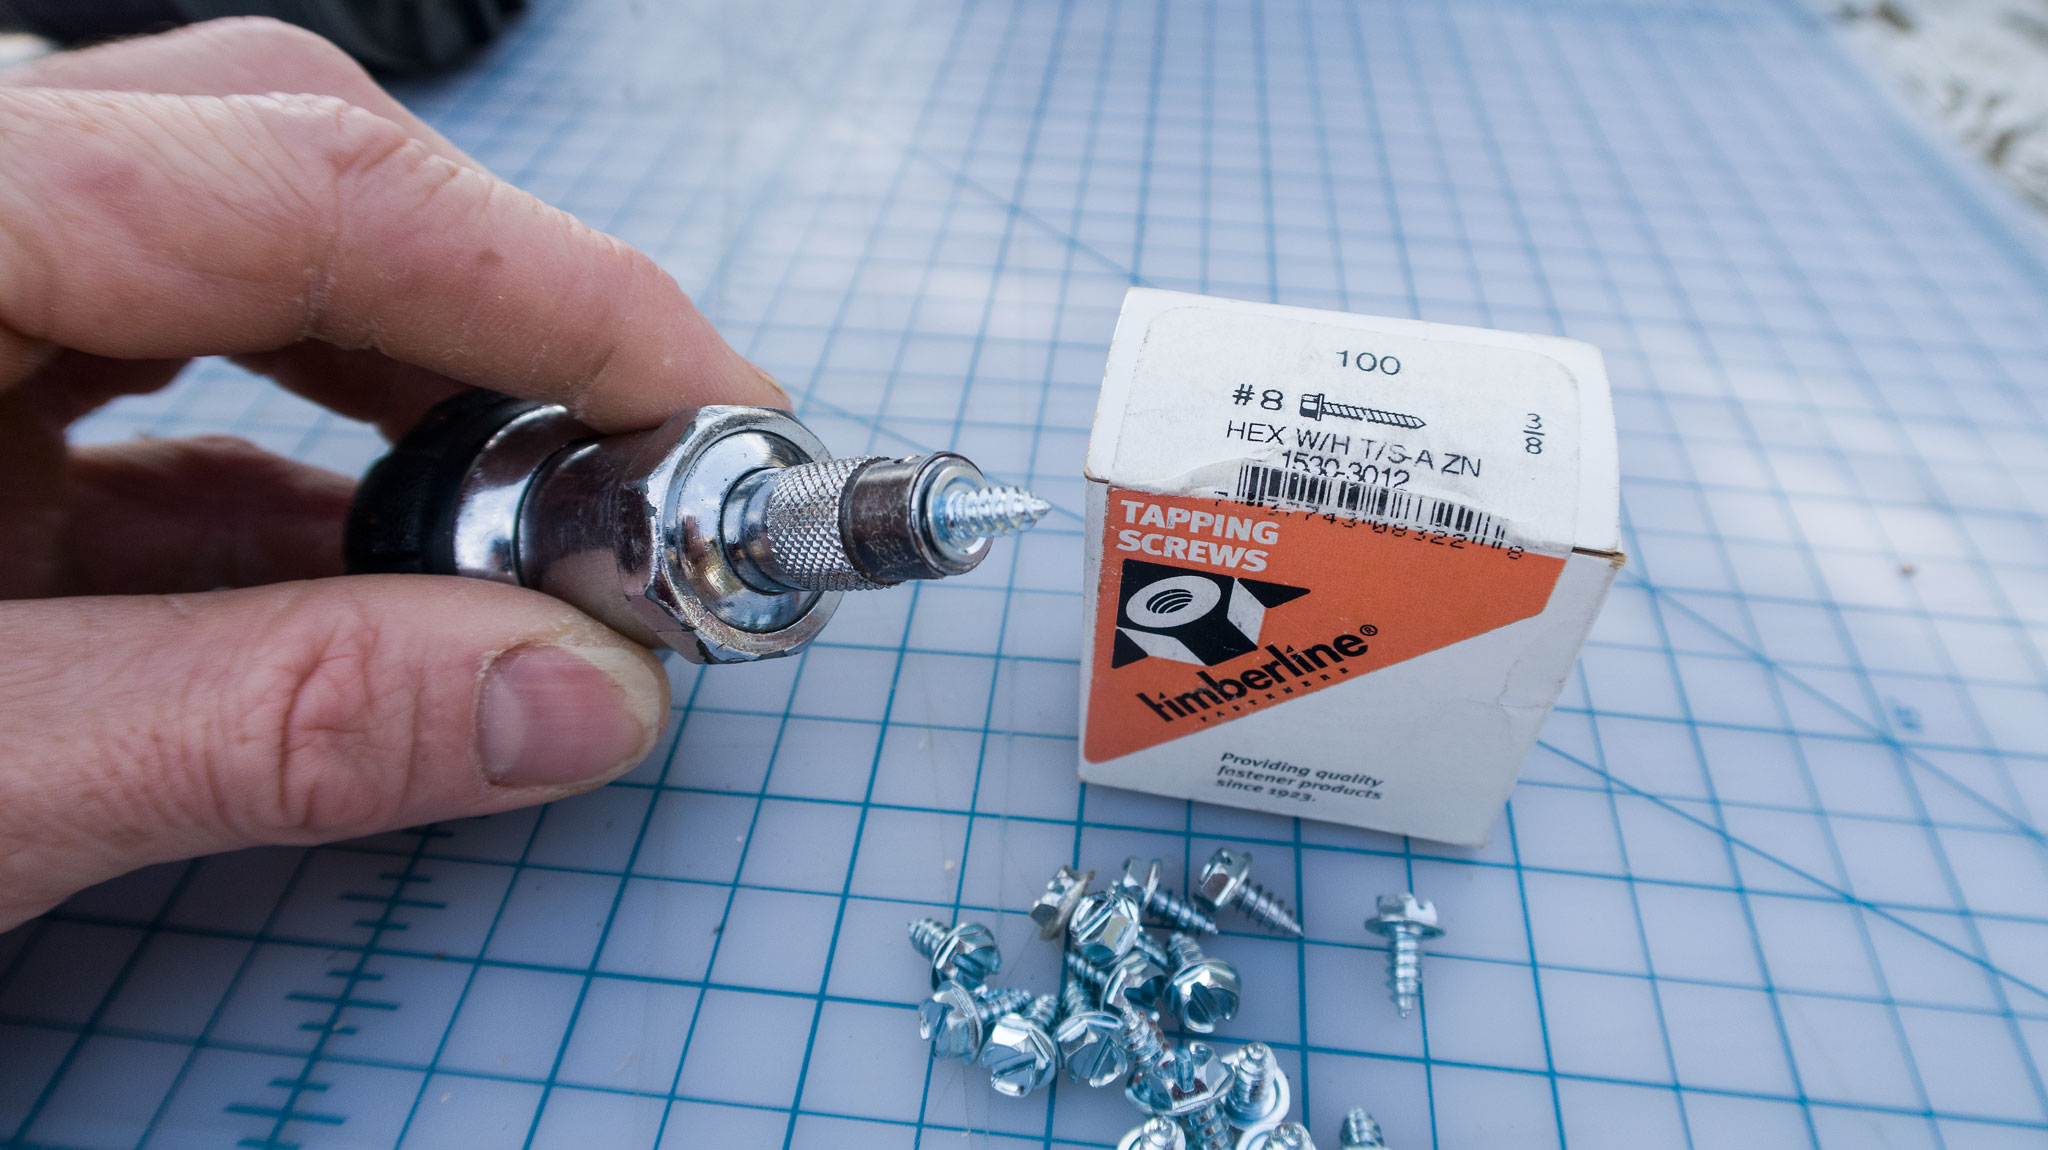
They do have a slot on the top to use a straight slot screwdriver, but trying to screw them into a bouncy outsole is a fool’s errand. Instead, invest in the correct hex driver and use a power drill. In a pinch, I’ve also been able to use a hand-held ratchet screwdriver with no driver – the hex head will be approx. the same size as the hex of a bit. I can also easily bring this ratcheted screwdriver with me to the TH, and inspect my shoes before starting my run.
The local hardware store, McGuckin, will already have these set away in their own little drawer labeled, “Winter Running”, as the demand for them is so high in the People’s Republic. The man/myth/legend Scott Carpenter has his own old school page on screw shoes.
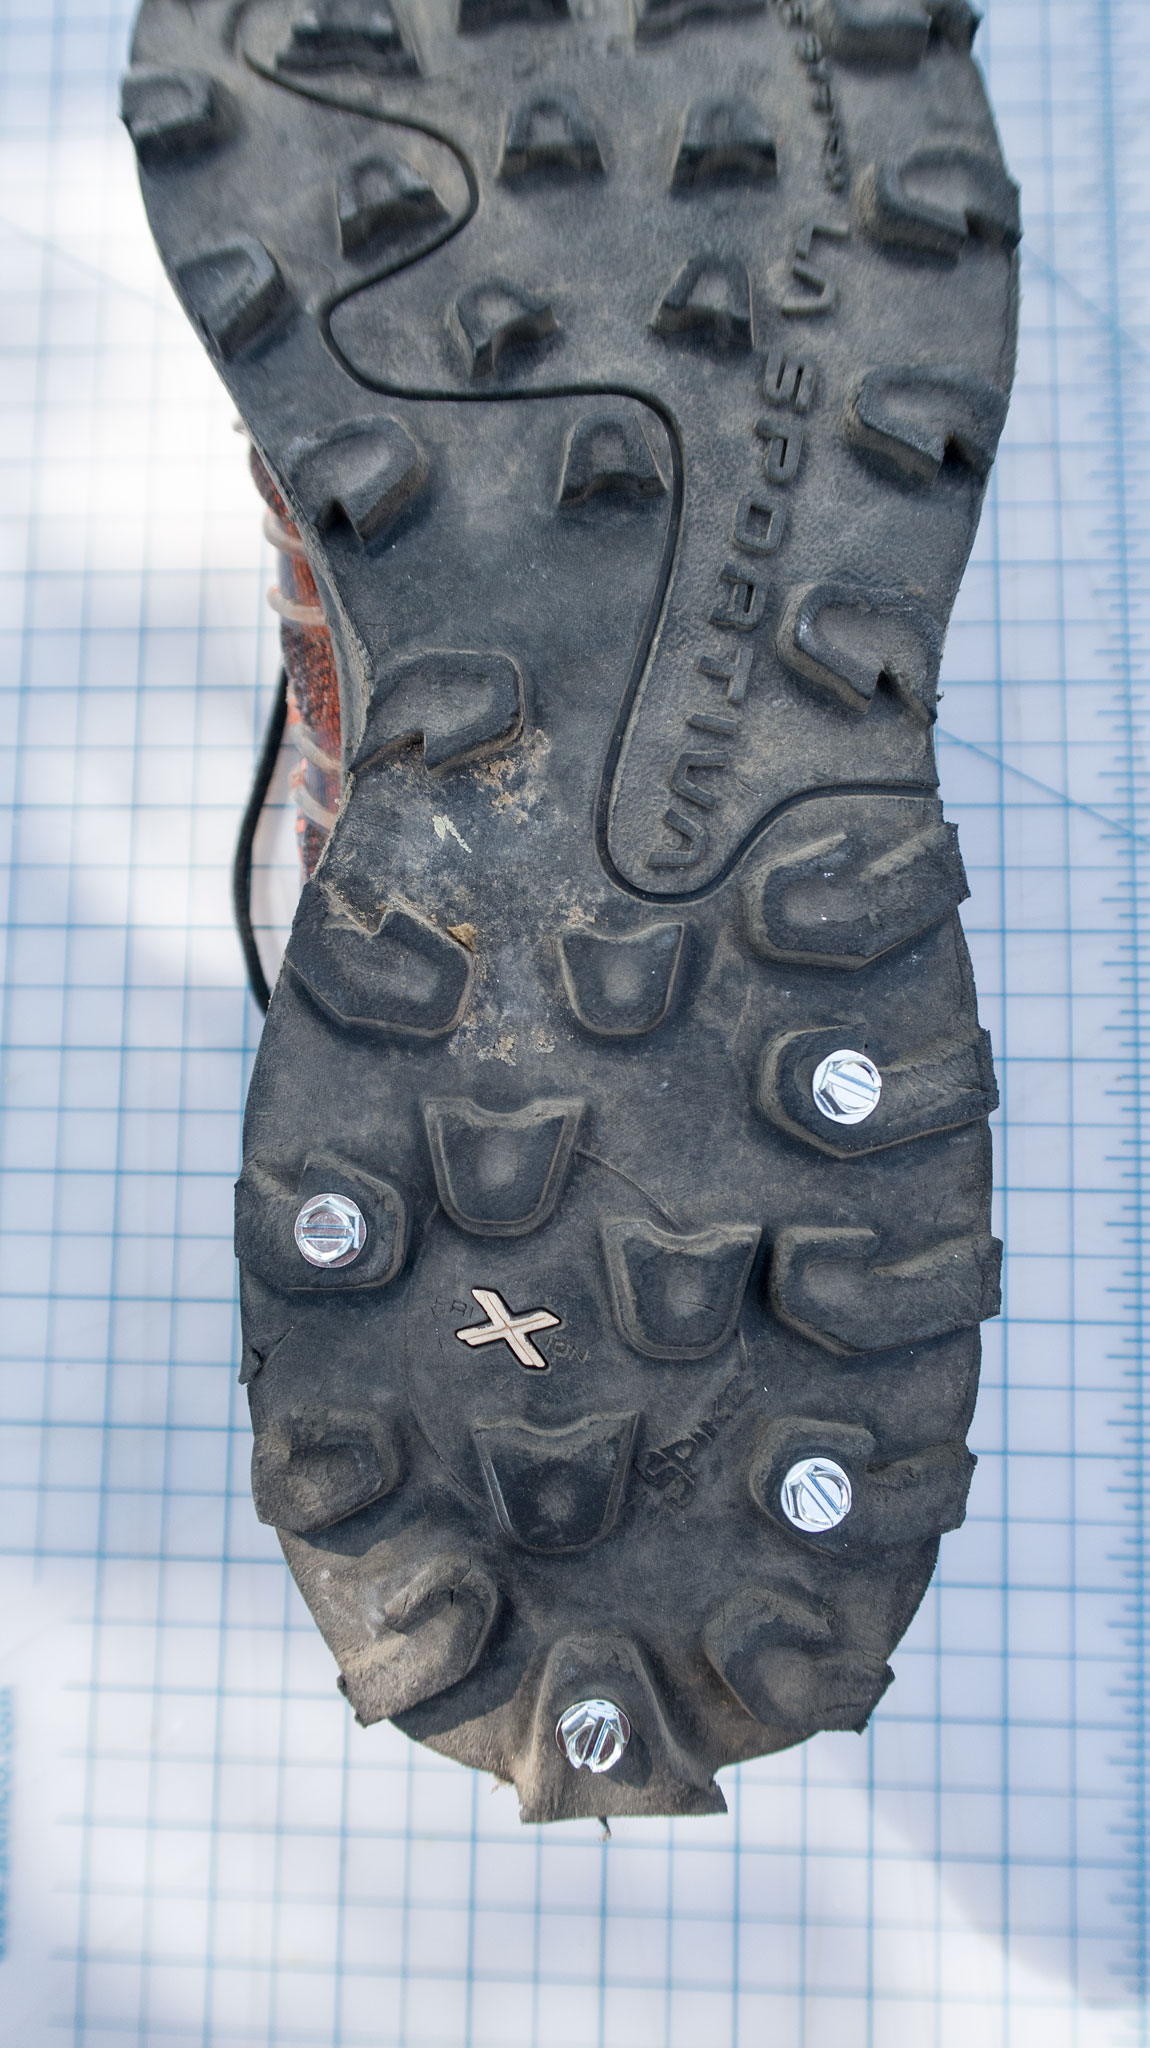
The Mutant drop of one centimeter is more than enough cushion to put in the screws in that I prefer without risking screwing all the way through the midsole. Screwing through (or near) is usually only a big problem if you’re adding screws near the toes of your shoe, so if you decide to add screws all over the bottom of your Mutant, be particularly careful near the toes. Also remember that the midsole will compress when you land, so you don’t want a screw to be near the top of the midsole, or you will feel it while you run.

Take advantage of the meaty lugs of the Mutant and add your screws there. Use the Blizzard‘s spike pattern as a pattern for your own shoes – or just add where you prefer. I haven’t found that the exact pattern is altogether super important, except in very snowy conditions where I like traction for my toe-off. That means a screw or two around the ball of my foot.
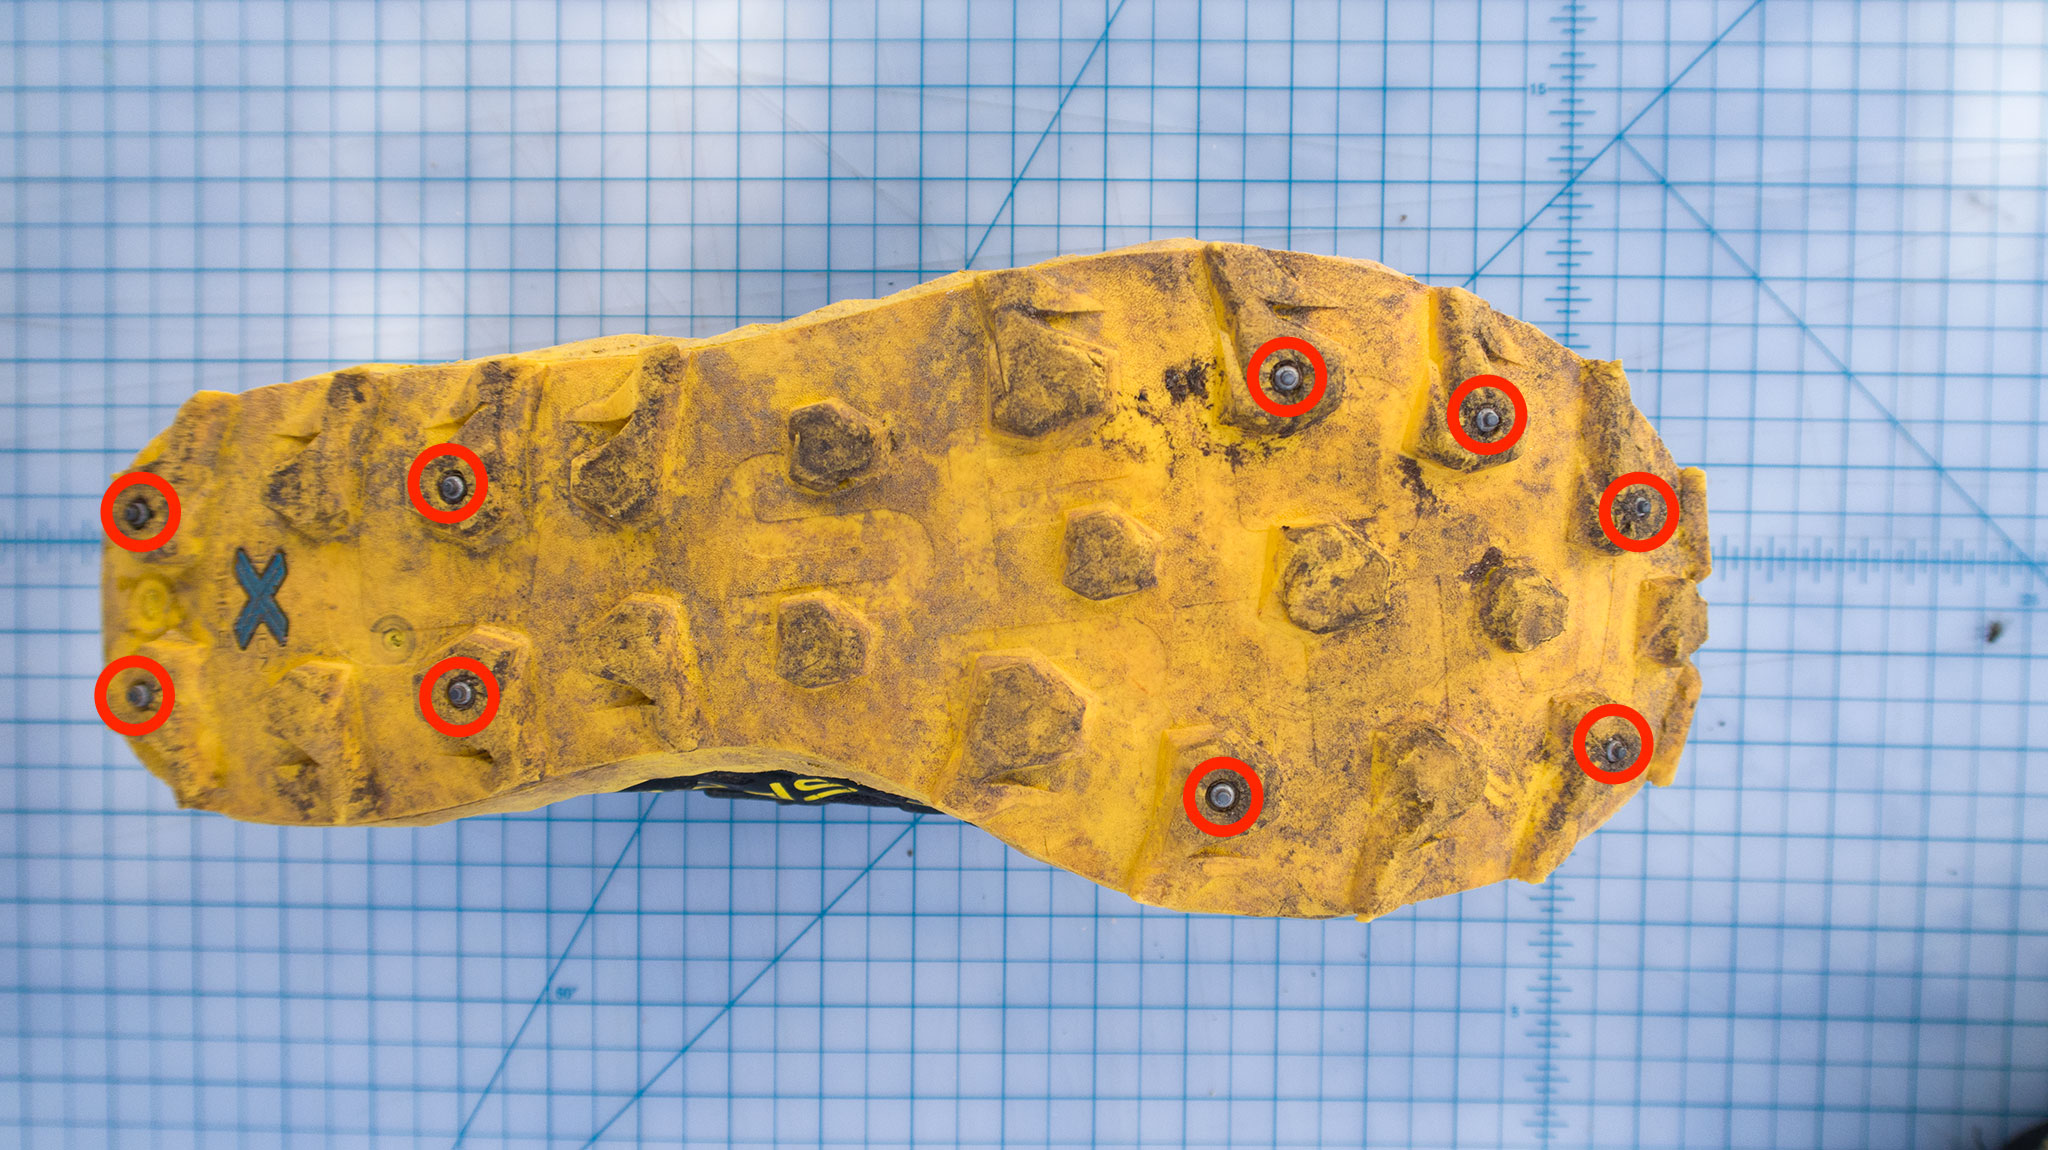
As I noted, these screws may come out. The lifespan of your screw may be slightly elongated by taking that Seam Grip from our mesh customization and applying it around the threads of the screw before driving it into the sole.
And that’s it! Of course, these customizations can be done on other shoes, other than the Mutant, so give them a try and experiment yourself. What other customization do you do to your trail running shoes when running, fastpacking, or backpacking?
