Like this? Follow me:
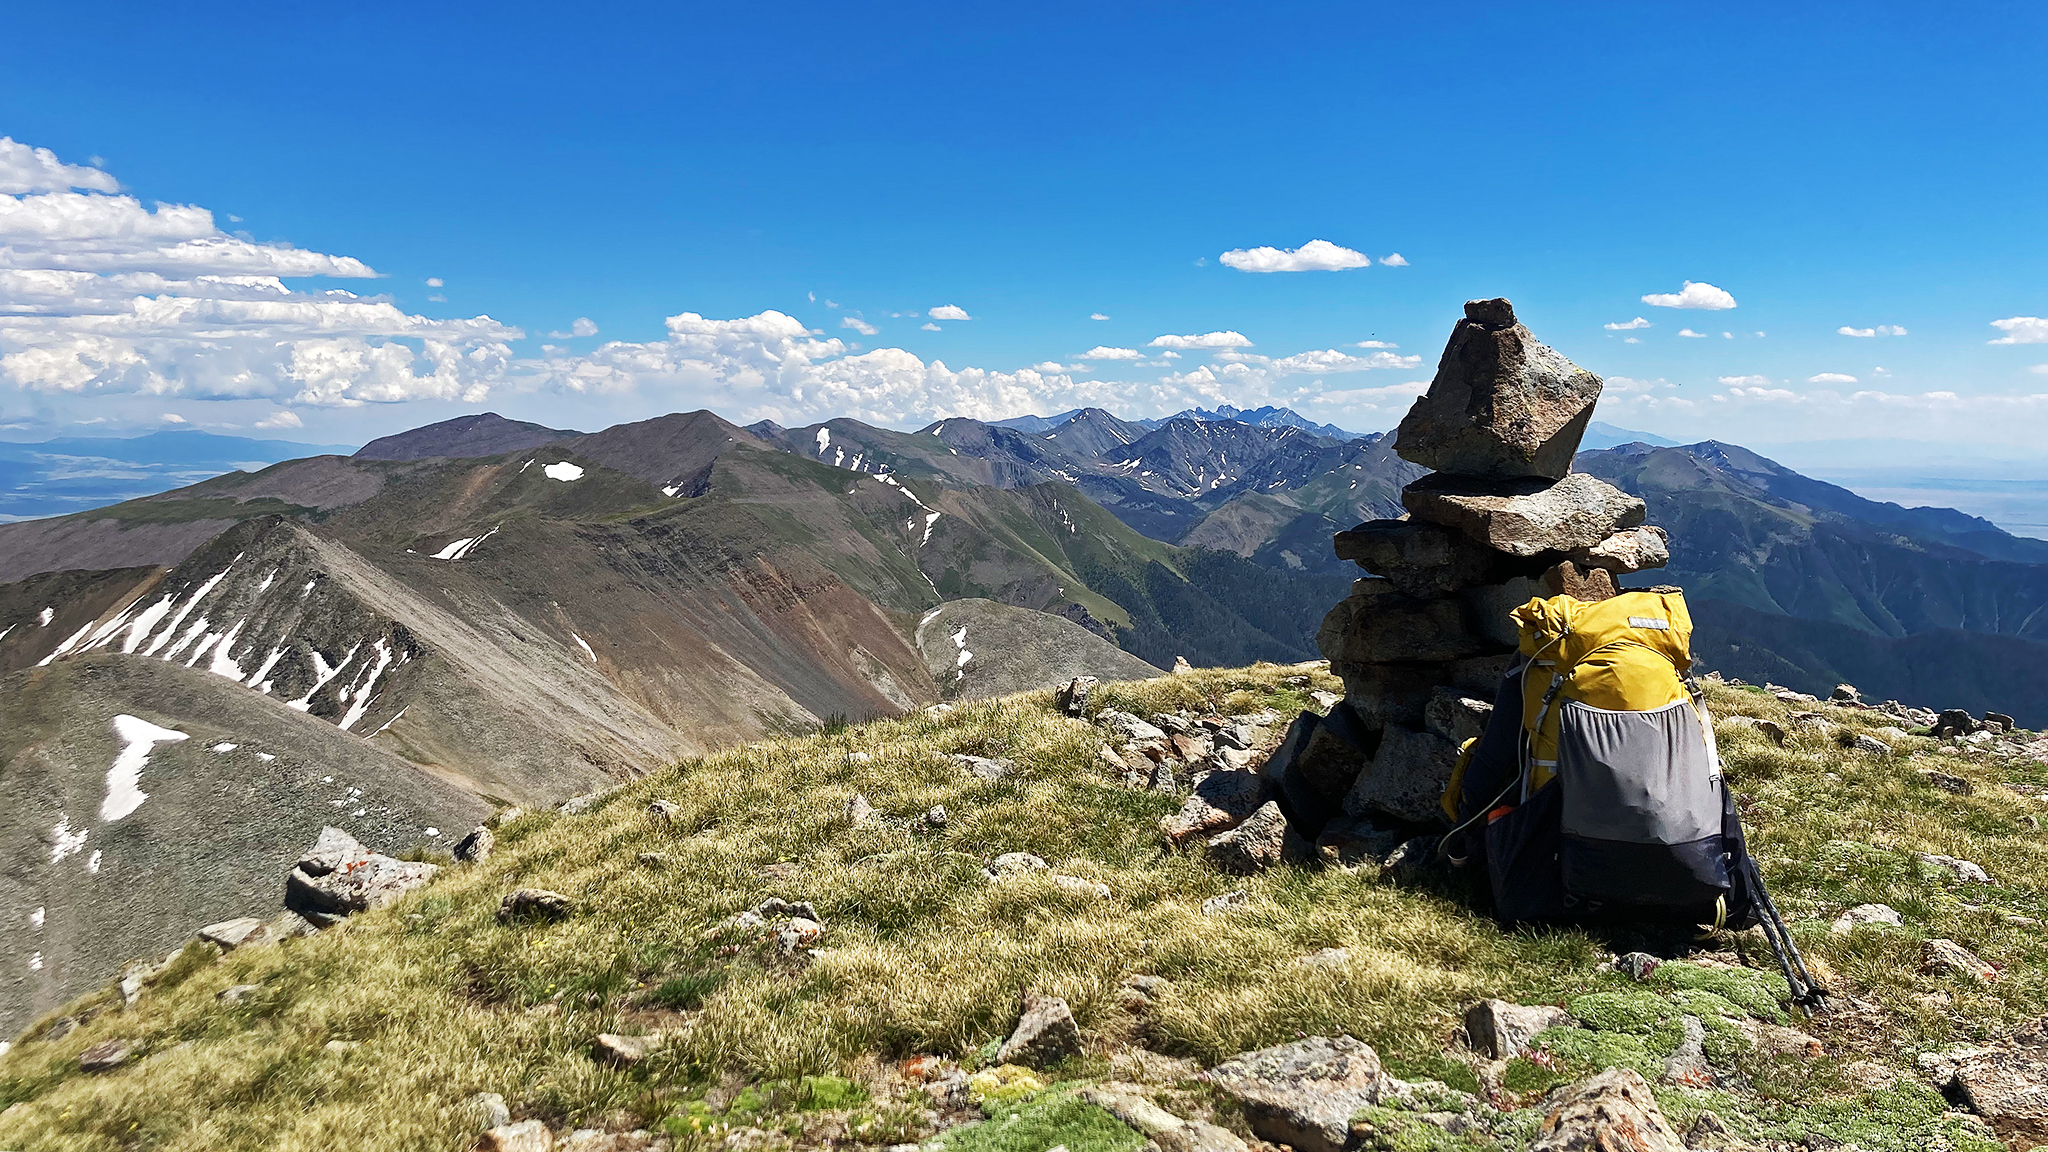
The gear you bring for an adventure like the Sangre de Cristo Range Traverse can be critical to the success of the trip itself. The momentously mountainous route asks much from you to be ready for anything. With a low point of 7,073′, a high point of 14,304′ and an average elevation of 11,857′, temperature swings of 40-50 degrees F are realistic to anticipate. All matter of weather can be experienced: from stale, hot, sunny days without shelter, to wind storms – and even hail/snow storms. Water is not bountiful directly on the route and the low humidity and high elevation dehydrates you faster than you may anticipate. Not a bad idea to treat it less like a high route and more like a desert route.
One of my goals was to lighten my skin-out weight – the weight of everything I brought: pack weight, worn weight, food weight – everything, when compared to my successful 2019 trip. Bringing a lighter kit may mean a faster traverse and a more comfortable hike.
My total skin-out weight in 2019 was 16,388 grams/36.13 lbs. You can view the pack list on this on the 2019 lighterpack and described at length. There certainly seemed ways to improve upon this. Below is the pack list I used (minus a few things, like stuff sacks). This is also available in the 2023 lighterpack, which has absolutely everything. For each category, I’ve listed both the 2023 and 2019 totals, as well as the differences in weight.
Full Disclosure: I do partner with a few companies, namely La Sportiva and Ultimate Direction. I test gear and write reviews for OutdoorGearLab. I used to work for both Sea to Summit, and Rab (as I write this, I currently do not work for either). Many of the products listed below are from those running sponsorships, bought by OGL for me to review, or bought by me at a discounted employee price. There’s a chance other gear I’m not directly affiliated with was bought on a pro deal. Some gear I bought used at a local sport recycler I like. There are few referral links to buy this gear yourself. If I did a review of a piece of kit for OutdoorGearLab, I’ve instead linked to that review.
Clothes: Head
La Sportiva Hive Cap
- Find the Hive at: La Sportiva
A fairly long-brimmed baseball cap, with a colorway that matches my sunglasses (so that’s nice). Reasonably lightweight. In 2019 I brought a cycling casquette as that’s what I normally wear most days. Casquettes usually fair well in windy conditions, similar to an old-style train engineer’s hat. Both caps weigh about the same, but the casquette provides less sun coverage, so a baseball-style cap was a nice upgrade. I can’t think of anything I would more prefer to bring. Other hats may have better coverage, but the amount of wind found up there may make most anything else unrealistic.
Outdoor Research Equinox Legionnaire Cape
- Find the Equinox at: Outdoor Research | REI
I bought the cap + cape, but didn’t really like the cap itself, so just kept the cape in my gear. The cape provides excellent sun protection for the back of the neck and ears, as well as the front of the neck if you wrap it around and snap it together in front of your neck. Although this accessory worked well, it was very hot to wear and somewhat superfluous as I also brought a hooded sun shirt/neck tube. Next time, I probably will leave this accessory at home or just make my own by directly sewing a flap of thin fabric to my hat. One strange use for it was when napping: turning it around so the cape bellowed down from the bill of my baseball cap provided excellent shade for my eyes to grab a few minutes shuteye.
Beak-o Cheeko
- Find the Cheeko at: Beek-o
Getting sunburnt on my face is one of my least favorite things about all-day mountain activities, and being as fair as I am, it’s almost inevitable. I played with many face protection schemes for my nose and cheeks from nose guards to KT Tape on my face, but settled upon the Beak-o Cheeko. It’s easy to wear, stay put, doesn’t annoy me, and provides excellent all-day/multi-day protection that’s far better than sunscreen. No matter how much sunscreen I put on my nose, it inevitably will get burnt. The only real downside to the Cheeko is that it looks a little freaky. I found turning it inside out and wearing it with the flat dark gray side visible helped, the underside blended in with my sunglasses a whole lot better than the very silver front side. If you get one of these, I’d suggest getting a black one.
Outdoor Research Echo Ubertube
- Find the Ubertube at: Outdoor Research | REI
A basic neck tube made with OR’s Echo fabric. Nice and light, and feels good-enough on my sensitive skin. In 2019, I used a Buff which was a few grams heavier. I prefer this one and would for anything outside of cold conditions.
Sea to Summit Permethrin-Treated Mosquito Head Net
Find Head Net at: Sea to Summit | REI | Amazon
Bug pressure was threatened to be very high, so this was a must-have. Similar to what I’ve brought before, so no real surprises – and something I’d bring again. I may have used it for about an hour as I napped near Music Pass – the threat of a mosquito-apocalypse just didn’t materialize, most likely because of the high temps that moved in to the area the same time I did. I have reasonably sensitive skin, so getting bug bites on my body is not a great scenario for me.
I actually treated all my clothes with a spray on Permethrin treatment, including this tube. Seemed to work great. Mosquitos with the West Nile Virus have been found in Colorado, so the threat of disease is now more than a theoretical issue.
No Warm Beanie?
In 2019, I brought along a very light beanie, but went without one this year, as my base layer was hooded. That worked well.
- 2023 Total: 150 grams
- 2019 Total: 122 grams
- + 28 grams
Clothes: Top
La Sportiva Quarter Zip Running Shirt
- Find La Sportiva running shirts at: La Sportiva
This was one of the lighter tops I own that had a half zip, so it came along on the trip. In 2019, I used a sleeveless tank, which left my shoulders pretty exposed to the sun. Even with sleeves, this shirt is lighter than the tank. Not much I would change. I brought both this shirt and the hooded sun shirt, as neither would provide enough sun protection alone, but together worked well.
Outdoor Research Echo Hoody
Just like in 2019, I brought along the OR Echo hooded sun shirt, which is one of my favorites. Along with my base layer La Sportiva shirt, sun sleeves, hat, neck tube, cape, and Cheeko, this made up the sun protection for my upper body. As hooded sun shirts go, this one is made with fabric that has a pretty low UPF rating when compared to other hooded sun shirts, but probably some of the best breathability. I run hot naturally, so I have to walk a fine line between sun protection and feeling like I’m being baked underneath all that protection. In the past, I would just get burned and deal with the consequences, but now that I’m old, I’m thinking that’s a pretty stupid move.
So I decided upon on a flexible layering system. When I felt I needed to really cover up, I could. But when I felt the power of the sun was a bit less, I could remove some of clothes protection, but still feel relatively covered and protected. Depending on my mood, I’d risk taking more clothes off if the temperature really got high.
This system worked, although there are some accessories I’d like to streamline, most notably the cape I mentioned above, which was just too warm to use in the mid-day sun. I can’t say it was perfect: there were many times in the high afternoon I was running hotter than I had really wished, which affected how much water I drank. But ultimately, not being sunburnt at all on the seventh day was a miracle. I find sunburns especially painful, and one less issue to have to deal with on this already very difficult trip, the better.
Black Diamond Solution 150 Merino Half Zip
This 150 g/sm merino wool blend base layer was what I essentially used as my mid layer. I rarely wore this while moving – a few hours after sun down – but it’s an altogether handsome and excellent piece. The hood meant I could forgo bringing a beanie: one less thing to lose. I did wear the Solution each night overnight while sleeping.
In 2019, I brought a Patagonia Men’s R1 TechFace Hoody, which is quite a bit heavier and bulkier (427grams vs. 226.8 grams). For future projects where I’m either moving or sleeping and unless temps are certain to dip where I’ll be moving while cold, I don’t see a reason for me to bring a heavy mid layer at all, and will probably stick with a baselayer like the Solution.
Rab Kaon Down Jacket
- Superseded by the Rab Mythic Alpine Light
- Find more down jackets at: Rab
An excellent down jacket with less insulation in the pits so you don’t sweat through it. In 2019, I wore a Montbell Superior Down Jacket which was a fair bit lighter, but was also just smaller and lacked a hood. I mostly wore the Kaon while sleeping and getting ready in the early morning, but it could have been worn moving if temps decided not to rise. Rab has discontinued the Kaon, so you will want to look at the Mythic Alpine Light which is marginally even lighter. In the future, maybe I’ll trade up!
Rab Zenith Jacket
- Superseded by the Latok Paclite
- Find more waterproof jackets at: Rab
As with down, Rab makes excellent rain gear (being UK-based and all). This is not the lightest of jackets, but the monsoon was threatening to begin at the end of my trip, so I was happy to bring it along. I’ve been pinned down at 13,000′ on Broken Hand Pass during a monsoon hail storm, and it’s relatively unpleasant. In that scenario, there was a Class 3 trail down to a popular campsite and trailhead I could take once things cleared up. On most of this trip, I’d be a good day away from any help, so not experiencing hypothermia was a big goal of mine.
I also didn’t have anything lighter in my stable, so this was it! The most superfluous features of this jacket I really didn’t need were the two front pockets and pit zips, which add a bit of weight. Rab has discontinued the Zenith, and replaced it with the Latok Paclite. That jacket may be slightly lighter. The pit zips stay, but one of the two front pockets has been removed.
In 2019, I brought the lighter La Sportiva Odyssey GTX Jacket but that jacket had wet out years ago. In the future, I would consider bringing a jacket which could save a few grams. I mostly wore this jacket late at night and early in the morning.
- 2023 Total: 1039 grams
- 2019 Total: 1102 grams
- -63 grams
Clothes: Hands
La Sportiva Trail Active Glove
- Find these gloves at: La Sportiva
Nice, light gloves. I wasn’t expecting conditions so cold as to make gloves absolutely essential, and I only used these late at night or when collection snow. In 2019, I used a much burlier, heavier Pearl Izumi Men’s Cyclone Gel Glove – something I’m apt to use in the Winter! If I was to do it again, I could see going even lighter with a svelte liner glove.
Outdoor Research ActiveIce Sun Sleeves
- Find these sun sleeves at: Outdoor Ressearch | REI
These covered both my arms and hands, which is why they’re living in this category. These worked well to supplement my hooded sun shirt, as well as to provide coverage to my arms when I didn’t wear it at all. I generally prefer rolling my sleeves down, then up – stay rolled down better than rolled up when moving. These sun sleeves work pretty well as sun gloves as well, so I opted to not bring any of those. If I was to do it again, I may revisit my sun protection for my upper body. I like the breathability of the Echo hooded sun shirt but I also had the idea of breaking out the sewing machine to customize it to have SHORT sleeves and have the sun sleeves be the only sleeves worn to save a few grams and remove some overlap.
- 2023 Total: 122 grams
- 2019 Total: 104 grams
- +18 grams
Clothes: Bottoms
Hoka Running Shorts
Not sure the model – but they’re very lightweight shorts you may feel like wearing for a very fast race. I bought them on discount while working the gear shop at the local Ironman. They have a liner, but it’s pretty minimal as well and didn’t cause too much bother to me. In 2019, I used a pair of linerless Salomon S-Lab 6in shorts paired with the Exofficio Give-N-Go Sport Mesh Boxer Brief chasing lightweight and comfort – and that indeed worked. This trip’s solution worked well enough (for me) and actually was lighter by over 70 grams!
The Sportiva shorts that I adore (and don’t seem to be available anymore) have built in pockets on the front and back for stowing food, but since I had a pack with a hip belt, I didn’t need those pockets. Sportiva has a similar short out, the Tempo, but I find the inseam too short for my I guess really giant tree trunk legs (thank cycling): my inner thighs will chafe against each other – not what I want on a multi-day trip.
Outdoor Research Men’s Astro Sun Pants
- Find the Astro Sun Pants at: Outdoor Research | REI
I’ve never really preferred hiking in pants before, but sun protection was something I really wanted to emphasis, so pants were in. The issue is always going to be that pants are hotter to hike in than just shorts, yet are going to be far more protective to sun than shorts + sunscreen. Bringing pants also meant not bringing tights, which were again a staple in my quiver. So did the pants work? Well, to keep me from getting sunburned: yes.
I did hike a little hotter than I would have liked. I had anticipated that I could just pull up the pants over my calves to allow my lower legs to breathe, but I found that these pants are really tight in the ankles and rolling them back down was quite difficult as my enormous calves were in the way. I modified these pants slightly by removing the pockets and sewing the openings shut to save a few grams.
Ultimate Direction Ultra Pants
- Find the Ultra Pants at: Ultimate Direction | REI
These were my rain pants. I dislike hiking in rain pants and will stubbornly resist doing so, so these were worst case scenario pants that I didn’t even think I’d take out. I removed the back pocket to save a few more grams.
To my surprise, I actually used these each night to help supplement the warmth of my sleeping bag. Usually using something that also blocks perspiration from leaving your skin/clothes can be dangerous to practice, as wet clothes can then leave you even colder, but it didn’t seem all that of a problem on this trip, perhaps because it was just so dry to begin with and I myself was ultimately usually dehydrated and not perspiring as much (which is dangerous and scary to think). In 2019, I used a pair of Outdoor Research Men’s Helium Pants, which are more or less comparable.
Outdoor Research Alpine Onset Bottoms
- Find the Onset Bottoms at: Outdoor Research
I didn’t bring tights but I still thought it best to bring some long underwear, so these came along for the ride. They worked perfectly, and were almost only used while sleeping. Really happy that I had them, as temps at 13,000’+ overnight got chilly. I do have lighter bottoms that aren’t as warm as my disposal, such as the Artilect Boulder 125 if I was trying to chase grams, but I thought these OR bottoms were a realistic compromise of lightweight/warmth.
What these long johns really replaced were a pair of insulated pants I used in 2019 – the Patagonia Men’s Nano Puff Pants. The weight savings of using OR sun pants + OR long johns (395 grams) was substantial when compared to using a pair of tights and the insulated bottoms (658 grams).
- 2023 Total: 585 grams
- 2019 Total: 1066 grams
- -481 grams
Clothes: Feet
La Sportiva Mutant
- Find the Mutants at: La Sportiva | REI | Backcountry
- Video: Watch my vide on what’s new in the 2023 La Sportiva Mutant
These are what I used in 2019, they worked insanely well, I love them to this day, and will use them until basically La Sportiva puts out something even better. Footwear was especially important on this route, as there are many technical bits you truly don’t want to be weak on. For this go-around, I did add the 5.4 pitch up to Northeast Crestone from the North Buttress of Crestone Peak, as well as a steep pitch on the south side of Broken Hand Peak while descending among some other cruxes. I’m ultimately a fairly descent climber, but I still value a pair of shoes that support my climbing.
I could have also brought a pair of approach shoes to help with the hard bits, like I did for the Milner/Berthoud Pass trip, but my climbing confidence was high and I had done almost all the climbing needed – just in reverse, so I decided to risk not bringing those and lean on my experience. I could have also resoled my Mutants with extra grippy rubber, but that’s an additional expense, the cobbler’s lead time is now about 2 months out, and that would add weight to my feet.
I did modify the Mutant by switching out the laces to something stronger, and applying SeamGrip to most of the upper. The SeamGrip helps with durability issues of the mesh, but does impact the breathability. I wish I didn’t apply SeamGrip to all of the upper, as my feet did get toasty. Creek crossings – water in general – wasn’t much of a problem for drainage issues, but that would have been impacted, too. I didn’t add a DIY rock plate this time. My left ankle was actually quite swollen from a recent sprain/talus bone bruise and I thought that the DIY rock plate would just be another source of friction and thus: heat, which I was trying to keep to a minimum.
Ultimate Direction RNNR Socks
Going with the theme of trying to keep the feet happy and relatively cool, I brought these socks this go around, rather than two pairs of wool socks.
Darn Tuff Hiking Socks
Find Darn Tuffs at: REI
I mostly wore these during the night to have a clean, warm pair of socks to sleep in and keep the money-makers happy. The colorway also looked fire with my Mutants.
- 2023 Total: 848 grams
- 2018 Total: 885 grams
- -37 grams
Electronics
Garmin inReach Mini
For tracking/SOS purposes. Same one I used in 2019, worked flawlessly for what I used it for. This year, I didn’t bring a stand-alone GPS and relied on the inReach to actually record my track at 1 minute/30 second intervals, instead of the ~1 second intervals a standalone unit would give me. Not bringing a standalone GPS and the 12 AA batteries needed to feed it saved 452 grams – a full pound – alone. In the future, buying the inReach Mini 2 would be wise, as the runtime is far better, so less charging would be needed.
iPhone SE 2020
I’m happier hiking with music/podcasts – I prefer a little distraction to help with concentration – so I relied on my phone for tune. The phone was mostly on with disabled network capabilities (Airplane mode) which helped conserve battery power. I did have Caltopo loaded up with the track I was to follow, but the route to follow is real obvious (The ridge! Follow the ridge!) and I only consulted it for the very serious, technical segment between Fluted Peak and Milwaukee Peak where there’s some fairly intense route finding, and for some very important water sources I needed to hit. I also used Caltopo to record the Fluted to Milwaukee segment with more granularity than my inReach allows to update the next revision of the Caltopo map – and whew did that blow through some battery!
My phone being old and abused did have a pretty torched battery (77% capacity), so battery life was… bad. If money was no object, I would have liked to have a newer phone, but you sometimes roll with what you have and I have a tendency to ride my gear until the wheels fall off, rather than constantly upgrade items to the latest and greatest. This model of iPhone was criticized for its terrible battery life in reviews at the time of its release and I can confirm. A newer phone with a larger built-in battery would have helped to not suck so much power from my battery pack at least initially. It’s possible that a newer phone also just runs more efficiently, too.
Fenix HM65R Head Torch, 4x 18650 3500 mAh batteries
- Find the HM65R at: Fenix Lighting
Although the UL headlamp du jour is one of the Nitecore NU25 varieties, it just wouldn’t have enough throw for this project, nor have the battery life, so something with more lumens and replaceable batteries is a better fit, like this Fenix. Many will scoff at the four batteries I also brought. Because of the extended time I was using the headlamp while hiking – some of my days approached twenty three hours – the four batteries for almost 6 nights/days was just perfect for me. Although this headlamp does have its own USB-C charging port and one battery I brought had a micro USB charging port as well, I didn’t use either. In the future, there may be a newer, more efficient head lamp to use, but I still would prefer one with this many lumens.
In 2019, I brought the Zebralight H600w Mk IV, which has comparable lumens, but just one LED. Surprisingly, this Fenix is lighter. I did find that the Zebralight would stop allowing me to run at a high intensity of light, I probably was tripping some safeguard. I lost it one Winter on Longs Peak, so bought the Fenix as a replacement. I find the USB port nice piece of mind, the dual LEDs useful, the interface to use them simple, and the light lock essential.
Anker Powercore 20000 mAh battery
Big Boi! Primarily, this was to recharge my phone, and secondarily to recharge my inReach. I ended the trip with this pack exhausted, my phone at 1% and my inReach at 10%, so this capacity was just about perfect. As I noted when writing about the iPhone, a more efficient phone with a less tapped out and bigger internal battery could have helped not to suck so much juice from the battery pack, since well: it itself has more capacity.
In 2019, I brought the same capacity in two 10k mAh packs, as that’s just what I owned. This one battery pack weighed ~60 grams less than those two, I guess from just the cases around the actual lithium battery.
There is a bit of room for improvement, as Nitecore does offer a 295 gram, 20,000mAh battery pack, if you want to throw down $119.95 for the privilege. Wasn’t in my budget. As time goes on, we’ll see if solar power makes sense for a trip this long. Maybe even now and because of how much sun you’re going to have, a >7 day trip could work with a custom solar charger solution, but weight is still going to be similar to a simple 20k mAh battery so it may be a wash. If this route was twice as long: then it would be time to really think about solar.
USB ear buds x2 (extra charging case)
I brought two cheap ear buds, plus an extra case I had for tunes. Those three charging cases got my through the route for the most part. From what I understand, a bluetooth pair of ear buds uses the same amount of power than a wired pair of headphones, although the power the ear buds themselves drain will be extra. Each case probably has around 300 mAh of capacity.
- Total 2023: 1,188 grams
- Total 2019: 2123 grams
- -935 grams
Items not carried in 2023: Camera, Camera Batteries, Standalone GPS, AA batteries for GPS
This turned out to be a substantial amount of weight savings. I was sad to not bring a better camera, but I knew from my 2022 trip that shooting footage takes a ton of time away from actually finishing the route successfully, which was my primary goal. In 2019, I only shot video for the first few hours, until I realized that this route was going to take my full attention and effort. I did take some beautiful stills which are some of my favorite photos I’ve ever taken. Not bringing a standalone GPS may be partially a sea change in tech, where the inReach can record a good-enough track, and Caltopo is just an excellent app that does most everything my standalone GPS can do – just better.
Sleep System
Western Mountaineering Summerlite 32F Sleeping Bag
- Find the Summerlite at: Western Mountaineering
An excellent summer bag, featuring a full left zip. In 2019, I used a heavier Sierra Deasigns Cloud 35 (652 grams). Although the bottom of the bag had less fill than the top, it also uses more and heavier nylon fabric so the rating isn’t quite as high (9.5oz 800 fill for the Cloud, vs. 10oz, 850+ fill for the Summerlite). The useful sleeping pad pocket of the Cloud was missed. The Summerlite is probably as small of a bag that I can handle comfortably, as I am not a small man. I do own a Rab Mythic Ultra 180 (400 grams), but it’s a tight fit and only has a zip that goes less than a quarter of the way down, which I’ve already had to have repaired.
NEMO Switchback Sleeping Pad Short, 6 of 10 panels
This doubled as the padding for my pack, and was supplemental to my blow up and cut-down Thermarest – basically I used it so that my feet rested on something other than rocks. For back padding, it worked really well, albeit it kept my back very, very hot. With the additional clothes I wore for sun protection, I was hiking much warmer than I would have liked, and this did cause me issues. I don’t have a solution for that as the entire point of a pad is literally to retain heat. As a pad for my feet during the night, worked fine. In 2019, I brought a closed cell foam butt pad, so basically the same thing as this, but just 2 panels, instead of 6 (57 grams vs. 173 gams).
To my surprise, this pad also worked phenomenally for when I just wanted to take a nap during the day! Blowing up the Thermarest just seemed like too much bother for 10 minutes of shut-eye. I find just letting the body sleep for a small amount of time often works better than caffeine. The pad was very easy to grab from the back sleeves of my pack and also: repack as you don’t have to open up the main compartment of my pack. I also used it sparingly to do some spontaneous yoga to help my back, body (a little cat/cow does wonders). I don’t know if I’d do a long-haul backpacking trip without something like this again with the body I have – total star piece of gear.
Rab Survival Zone Lite Bivi
This isn’t available anymore, but it’s a simple nylon bivy with a DWR coating, no zipper, cinch closure – absolutely perfect for what I like to do in the summer. Did the job of protecting my bag and pad(s) from dirt and if I was caught without a shelter up in a storm, I would have a little bit of protection to either put up that shelter or quickly leave.
In 2019, I brought the Ultimate Direction FK Bivy – also now unavailable. It’s uses a lot thinner material, so is more breathable, far less weather resistant, but it did have a built in bug net. I picked the Survival Zone Lite Bivi as my attempt in the Sangres in 2022 had my 15d tarp ripped to shreds in a wind/rain storm and my bacon was saved because of the Survival Zone (good name then I guess), as I stayed reasonably warm and dry – albeit in the fetal position for 6 hours – while being completely exposed to the storm at 13,000′.
I’m not sure what I’d use instead in a future attempt. I looked at heavier bivies that could be used without a shelter like the OR Helium, but then the problem of, what to do with the rest of my gear comes up and it just makes sense to bring a shelter of some sort anyways so that everything can be stored underneath.
I also looked into bringing an even more minimal Tyvek sleeping bag cover, but then you lose all the weather resistant goodness of a bivy for marginal weight savings and a good chance you’ll rip the cover shreds from the talus – I’d rather not use disposable/wasteful gear. For less extreme trips (below treeline!) maybe the sleeping bag cover could work.
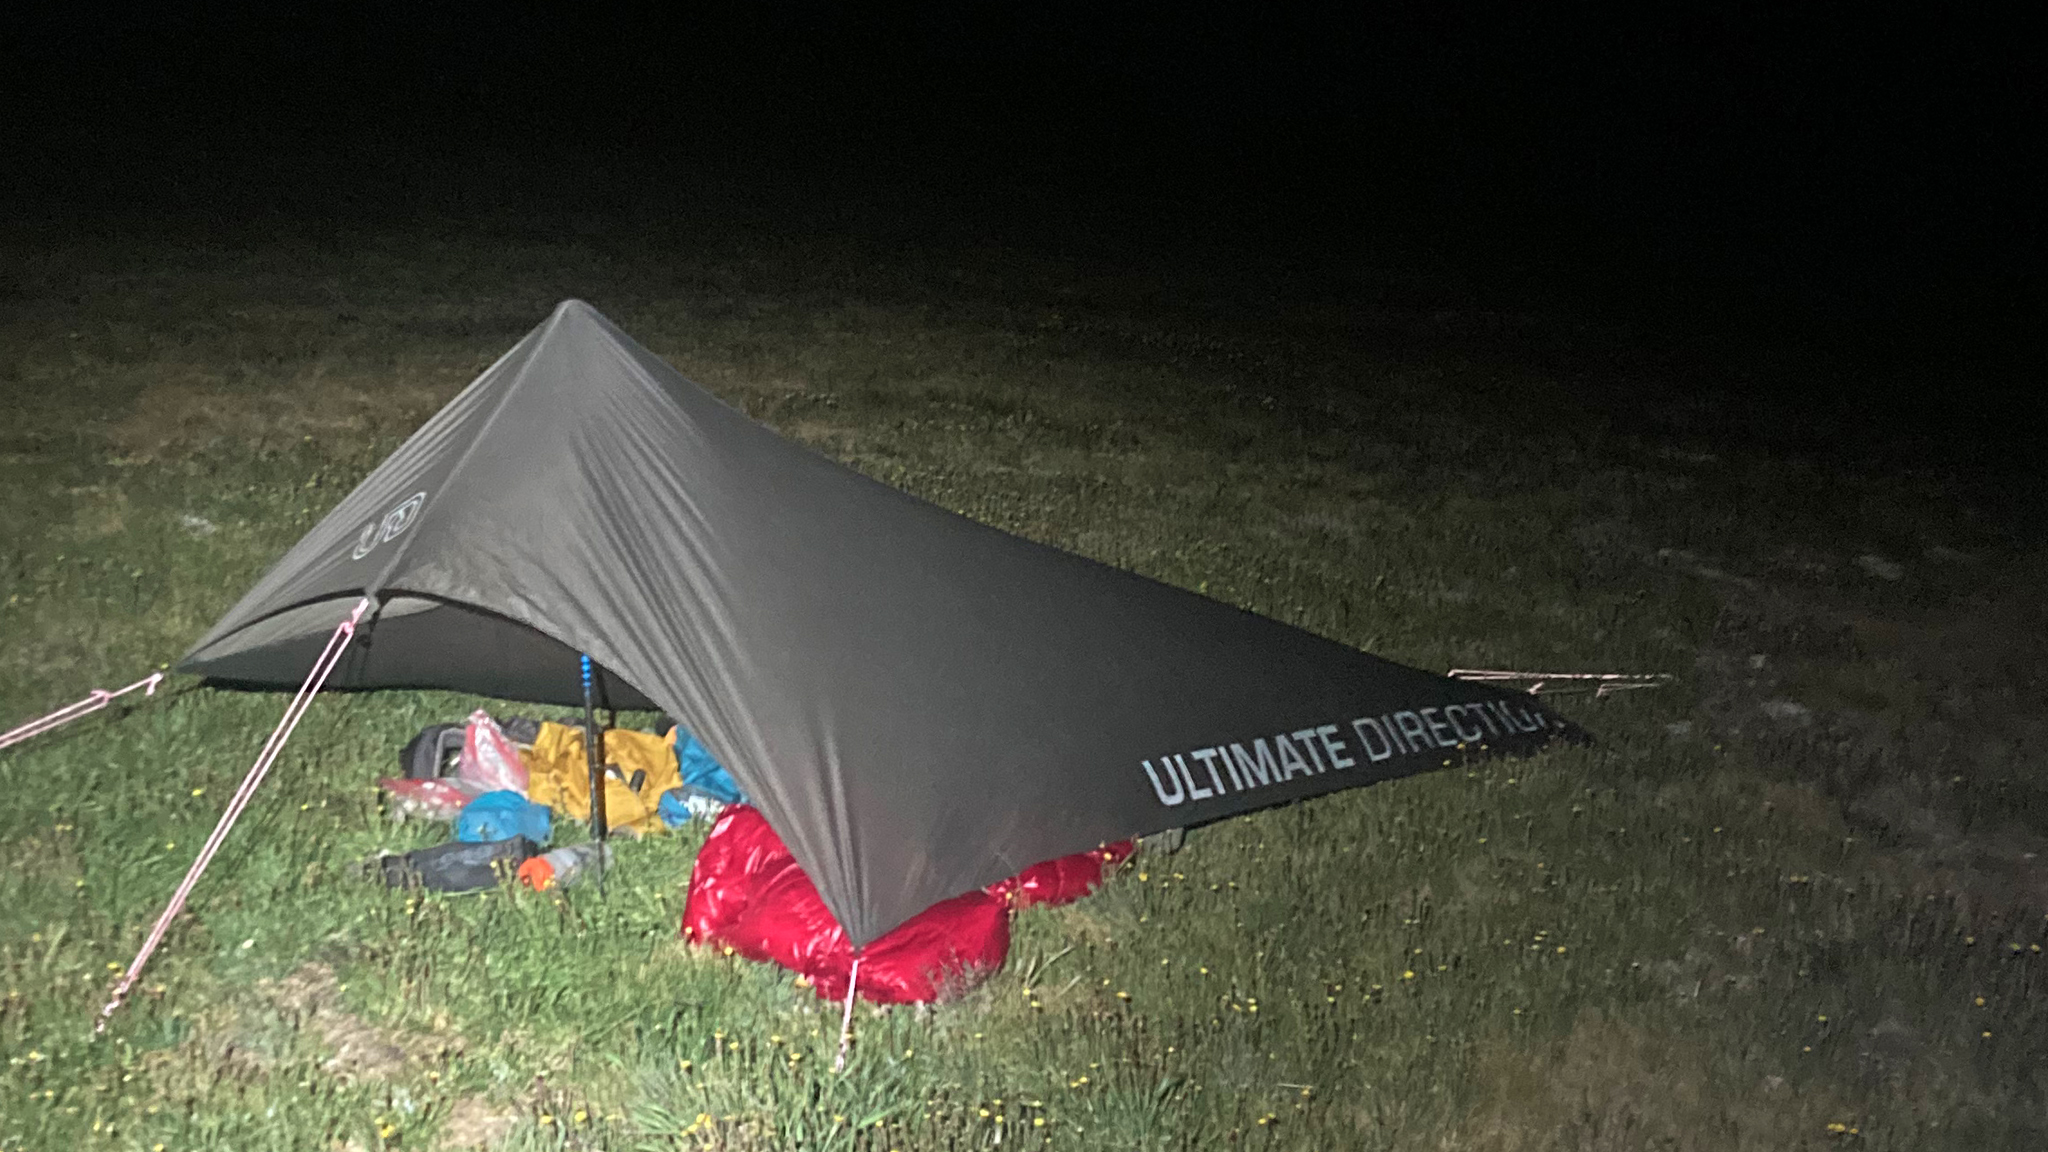
Ultimate Direction FK Tarp, x8 MSR Mini Groundhog Stakes
I’ve had this tarp since 2017, which speaks to how much I like it. I lived in it for 2 months during my 2017 Tour of the Highest Hundred and it proved very reliable then. It’s seen many nights and before this trip, I replaced all the guy lines.
I was hoping to not need to put up a tarp at all and in 2019 and 2022 I did use a lighter tarp, the Sea to Summit 15D Escapist Tarp. But upon needing it and using it, it did get destroyed.
This UD tarp has an excellent design and feels to me far more storm-worthy. My only critique is that it’s made for two people and using it alone seems so… luxurious. If there was a one-pole version with 66% of the footprint, that would be perfect. Being a two-pole design does mean it’s best to use with two poles, so if you break a pole – like I did – it sets up a little less… good, but still usable.
I also didn’t have plans of using this unless I really got into the shit, but I still put it up at least three times, as cutting most of the breezy weather helped with keeping me warmer and boy: were the nights colder than I was expecting.
In the future, if this tarp finally bites the dust and can’t be resurrected with clever use of my needle and thread, I’m not sure what I’d move to. The cat-cut, kite-like design is just excellent for the types of stuff I like to do. A one-person version for fast and light solo missions would be incredible. Needing 8 stakes is a little overboard, but I understand where the designer(s) were going. If they could cut that to 6, I would be pleased. Unfortunately, I don’t know if they’ll ever do another run of these tarps!
Thermarest NeoAir XTherm cut down
- Superseded by the NeoAir XTherm NXT at: Thermarest | REI
I’ve used this pad since at least 2017 heavily – including on my 2019 trip, my 2022 trip, and my 2017 2 month Tour of the Highest Hundred. It’s full of patches, including on the side on on the valve stem itself – repairs that really shouldn’t have worked. I found cutting it down was a good compromise to lose a weight at the expense of a little comfort lost, but I also appreciated that it just took less time to blow up. This Sangres are hard on blow up pads and I was half expecting the pad to develop a leak. I did bring a few Tenacious Tape ready-to-use patches, but they weren’t ever deployed. The pad lives on for another trip!
To be clear, this is the original XTherm, and not the improved (better R Value, thicker, lighter) NXT version that has since been released. I had actually bought that new version, but budget had me return it unused. Using the new version would be an easy way to get similar and even better performance at a lower weight.
I also owned the Large version of the NXT pad over the Winter and I found its performance really admirable, but I later sold it. The Large version is also wider, and wouldn’t have worked well with my bivy. I also did not like how long it took to blow up, even when using the including inflation bag. I’m a little impatient I guess, but the volume of air for the Large version is quite voluminous.
Using just a closed cell foam pad didn’t cross my mind as a good move, despite the weight savings. The bump in comfort and insulation a blow up pad gives is exceptionally welcome on those cold, windy nights well above treeline.
S2S Aeros Ultralight Pillow Large
Pillows work well for me, so I use them. I had little clothes left once I put most of them on to sleep in, so I couldn’t do the old, “bag of clothes” trick.
- 2023 Total: 1855 grams
- 2019 Total: 1733 grams
- +122 grams
Pack + Gear
Gossamer Gear Gorilla 50L
I fortuitously had the privilege of testing out and reporting on a plethora of ultralight packs right before my trip, and this one stood out as the perfect pack for the Sangres for me.
I appreciated its lightweight build and the weight to volume ratio, the 50L capacity was perfect, I didn’t want/need complete waterproofness, and the hip belt + aluminum stays helped with the biggest problem I have with my fastpacks – namely that almost 7 days worth of food is a lot of weight to bear on just the shoulder straps.
The fastpacks I own probably have a reasonable load limit of only 15 to 20lbs, and not the 30lbs I’d have with me on this trip. Even at 30lbs, I’m getting close to GG’s stated load limit for the Gorilla. Even in 2019 with the now discontinued Fastpack 45, I had a stuff sack of my food lashed to the outside of my pack as I had no more space inside for the food!. That problem could be simply solved by going with a larger pack but unfortunately Ultimate Direction doesn’t have a fastpack of that size and the excellent 45L is now sadly discontinued.
I had also recently made modifications to a Fastpack 40, and those modifications very much mirrored many of the features I liked about the Gorilla, including a reinforced center pocket and hip belt (of course). My dream Fastpack would probably be a love child of the UD Fastpack as it stands now and the Gorilla, with perhaps a bit more burly fabric than what the Robic nylon offers. Maybe not go full Ultra (expense, weight, and difficulty sewing being real-world concerns), but something more similar to the All Mountain. The only detail I’m not completely on board with the Gorilla is the knapsack enclosure – I prefer a roll-top.
I did make some minor modifications to this pack, including purchasing Gossamer Gear’s shoulder strap pocket for my phone, and the shoulder strap bottle holder. Those are clutch features I’m so used to have on my fastpacks, I don’t think I could live without them now. In 2019 I wore the excellent UD Utility belt, but I didn’t bring that this year, since that hip belt would interfere with that, and well: the hip belt of the Gorilla has pockets, too. I also shortened a few of the straps like the sternum strap to save some grams and just have the strap be a little less annoying flapping in the wind (chalk that up to minor sensory issues from being a little neural spicy). I also added two small bungees with cinches to the right side of the pack to hold my poles when scrambling.
Finally, I removed the included back pad, and replaced it with the 6-panel Nemo closed cell foam pad, which worked incredibly well as both a back packing and easy/convenient pad to snooze on, do yoga, sit on, etc without having to open up the main pack’s compartment. The Gorilla was obviously designed to do just this. The only downside was that the pad was incredibly hot against my back. I don’t know if it was any hotter than using the pack ships with, but i would guess that if it is hotter, only marginally.
BD Distance Carbon FLZ Poles
- Find the Distances at: Black Diamond | REI
I’m a destroyer of poles so I’ll start buy saying I broke one of these, too. This is difficult terrain for poles no matter how careful you are, so I half-expected it. The slight degree of adjustability really helps with pitching a tight tarp and I would probably buy these again, rather than the fixed length. Also thankfully I had experience pitching my tarp with only one pole rather than the, “required” two, and that didn’t impact my trip.
In 2019, I used a much more burlier model, the Black Diamond Trail Ergo Cork, but at 490 grams compared to the 287 grams of the Distance Carbon, there are tradeoffs.
Julbo Shield Category 2-4 Reactiv Polarized Glacier Glasses
- Find the Shields at: Julbo
These are legit glacier glasses, with full wrap of cover including side panels. For a high-altitude route that has little sun cover like the Sangres Traverse, this is what you want. The Reactiv photochromic (and polarization) features of the lenses work incredible in reducing glare over the entire day, and allowing me to avoid having to take multiple pairs of sunglasses/lenses to deal with changing lighting conditions. Living in Colorado full-time, I don’t take these sunglasses off my face if I’m going outside and I use these Julbos for anything above treeline: Summer or Winter.
In my opinion, the only downside to these particular lenses are that they won’t work the best in low, flat light, given the brown color of the lenses. If those are the condis you find yourself in, you may want to look at a different color, such as amber or yellow. Julbo has a great guide of all seven Reactiv lenses they have available and explain it better than I can.
In 2019, I used another model of Julbo glasses: the Stream. These are also excellent, but the lenses I used, being Category 1-3 don’t get as dark, so didn’t work as well and my eyes were a bit more strained than with the Category 2-4 (20-5% VLT) Shields. Excessive eye strain can accumulate your overall fatigue, so anything I could do to nip that in the bud, I tried to take advantage of.
Items not carried in 2023: Ice Axe
I went without the ice axe in 2023, opting to climb up the North Buttress route on Crestone Peak, rather than the NW Couloir which would have been a snowclimb. In 2019, which I downclimbed the NW Couloir and having an ice axe was very welcomed, but that was one of the only places needed the axe in the 120 miles!
- 2023 Total: 1293 grams
- 2019 Total: 2672 grams
- -1379 grams
Water
Sea to Summit Watercell X 4L Flask
- Find the Watercell X at: Sea to Summit | REI
4 liters is a lot of capacity, and yes: I used this capacity more than once. As an example, on the first day, I started with a full four liters in the Watercell, and two full water bottles to get me through the 28 miles of the Northern Crestones to Hayden Pass. I was also harvesting snow to melt into water, so having more capacity that I would usually need was important, as the snow harvested takes more volume than what it would then take up once melted. There are far lighter water flasks on the market, but getting a leak in them could be trip-ending. The Watercell X’s are burly and I was happy to take a few grams hit for more confidence.
The Watercell has a clever opening which has a small nozzle setting to pour water into a bottle without spilling. I also use this smaller nozzle to squeeze the water out of the snow that was melting within. I can also easily put snow in the flask by fully unscrewing the wide top – it’s the same dimensions as a conventional cycling water bottle.
In 2019, I brought one 3 Liter flask and one 1 liter smartwater bottle, as well as one 20 ounce water bottle, so I upped my water carrying capacity by roughly 1 liter. But in 2019, I also brought a stove to melt water, so the need to carry so much snow or go without a dependable water source was less.
And the real weight savings came from not bringing that stove. That alone saved me 672 grams for the stove and fuel. Conditions this year were so hot that melting snow didn’t take all that long. I also really enjoyed putting the Watercell X in the back pad sleeve of my pack, which did help ice my back down and maybe provided another catalyst towards melting. Sweet relief.
Cycling Water Bottles, x2
I probably got these at the recycler. The hard water bottles are what I prefer; they work well for mixing the powdered nutrition I brought. I find soft flasks are prone to pin hole leaks and don’t use them. There are some 1 liter versions, but most of the flasks given to me don’t have the capacity for how much water I drink, even for my daily runs.
Katadin BeFree 600ml
This was one of my water treatment options, the other being Aquatabs. I used this sparingly, as I didn’t treat any snow, but only water from creeks/springs, which were a rarity on the ridge. For the most part, those water sources were treated with the Aquatabs.
- 2023 Total: 386 grams
- 2019 Total: 907 grams
- -521 grams
Items not carried in 2023: Stove
I went stoveless in 2023, which took out a lot of weight. Melting snow without it wasn’t a huge problem except at night where I was eating more snow that I would have prefered.
Food
Food was comprised of:
- 1x Keto Brick (1000cals)
- Perpetuem (1920 cals )
- 2x Starbucks VIA
- 2x King Sized PayDay (900 cals)
- Trader Joe’s Licorice (500 cals)
Yum!
There was an intense effort to lower the weight of my food, while keeping calories similar. You should look at this list and feel weird about it.
- 2023 Total: 5175 grams
- 2019 Total: 6024 grams
- -849 grams
Toiletries
- 2023 Totals: 324 grams
- 2019 Totals: 318 grams
- +6 grams
Total Weight Savings for 2023
When comparing 2023 to 2019, I saved a total of 3,420 grams/7.54 lbs, which I think overall is a success. Most of the savings came from:
- Clothes: Bottoms, -481 grams, mostly from not bringing insulated pants
- Electronics, -935 grams, mostly from not bringing a camera, GPS, and all the batteries they require
- Water, -521 grams, mostly from not bringing a stove
- Pack + Gear, -1,379 grams, mostly from not bringing an ice axe
- Food, -849 grams, that… that one needs its own post
The rest of what I brought weight-wise – most of my clothes – didn’t change all that much, or even got heavier. My sleep system also became heavier by a marginal amount, but was warmer and more storm-worthy.
Did It Work?
My time difference between 2019 and 2023 is a wash. I’m leaning that going North to South is harder than South to North, but my experience on route in past trips should have also helped me move faster. My comfort while doing the traverse was absolutely improved in 2023. A big improvement, other than a lighter load, was using a pack that’s actually made to haul more than 15lbs: it had an actual hip belt, internal frame, and more internal capacity.
That’s Not Ultralight!
10lbs seems to be the consensus when it comes to an ultralight pack weight, and this pack weight of 14.62 lb seems to readily violate this. Although I don’t think it’s doctrine, the subreddit u/ultralight has an excellent Wiki on how to define ultralight and I do agree with the critiques of the idea of using pack weight as the only item to think about for the definition:
Critique – This weight class model for defining ultralight has limited usefulness. It can certainly help show that you are potentially carrying a pack that is too heavy – but it really fails to deal with all the nuances of individual requirements as well as trip specificity. Different trips will require different types/amounts of gear. Hence, the relative minimum amount of weight to take fluctuates. Bigger people also have bigger clothing, so the weight of the gear fluctuates. These inconsistencies are glaring issues with the weight class approach. A more sophisticated way to look at ‘ultralight’ is as a mentality (mindset), a set of behaviours and as a philosophical approach to hiking.
https://www.reddit.com/r/Ultralight/wiki/index/#wiki_2.2.3_defining_.27ultralight.27_by_pack_weight
I’ve emphasized two passages, the first about how different trips take different gear. The Sangres Traverse is a fairly committing route that really borders on being on multiple alpine scrambling routes that are linked together by off-trail hiking routes, all of which are particularly far from a reasonable trailhead back to civilization. I’ve tried to describe this route in this video.
Hiking over 14,000+ and sleeping at over 13,000’+ does take some specific gear considerations that you may not need on a long trail, like the Colorado Trail. As I explained in my own Slowlans guide, it may be best to start out with a ~10lb pack weight, then supplement for the specific challenges of the route.
One large category of gear I omitted completely from the 2023 trip was climbing gear of any sort. Even day hikers whose objectives (usually the 14ers) and are on the route will take at the very least: a climbing helmet to deal with the objective dangers and perhaps other climbing gear such as an ice axe, rope, shoes, protection, etc. I went without any of this. The risk I took going without was one that I accepted, but wasn’t oblivious of. I did have to rely on my years of experience climbing – something that not every ultralight backpacker may possess. There’s a large difference between groveling down a chossy Class 3 gully to link valleys in a high route, and climbing a few pitches of 5.easy on something like the Sangre Traverse. But no matter how good I think I am at climbing, one loose rock that gives way could have ended my life.
The other passage emphasized is about clothing size/weight scales. As a multisport, relatively muscular athlete, I’m simply not a small person, and some of my gear is just bigger/heavier as well. Unless I want to severely changed my body makeup (which I don’t), I won’t be fitting in smaller/lighter clothing.
I feel like my experience/resume (abr.): racing across the country on a bike twice on the Tour Divide, racing a bike across the Colorado Trail, my multi-week 14er and my multi-month Centennial duathlons, my guiding in California and Alaska, and my job as a gear tester and reviewer in the ultralight categories all help to consult my gear choices (to put lightly).
As seen above, even with my sponsorships/partnerships, I’ll choose gear that performs first and foremost (my sponsors also do not put heavy requirements on what gear I can and cannot use). If my weigh outs seem heavier than the status quo, it may be worth studying again why it is I brought what I bought and my explained reasoning.
This doesn’t mean critique isn’t welcome, but I would suggest doing so within the parameters of the route. This is very difficult to do outside of being simply theoretically, as only a handful of people have done the route unsupported.
Room for Improvement
As noted in the above breakdown, there are a few items I could have easily swapped out to get some more gram savings. Taking advantage of the newer Xtherm NXT, using a lighter battery pack, using a lighter weight waterproof top, and maybe even finding a smaller tarp are all on my list of easy changes to make, when I can afford them.
What Do You Think?
What gear would you use on your own Sangre de Cristro Range Traverse? Anything you would bring as essentials, or items you’d leave back home?
