Like this? Follow me:
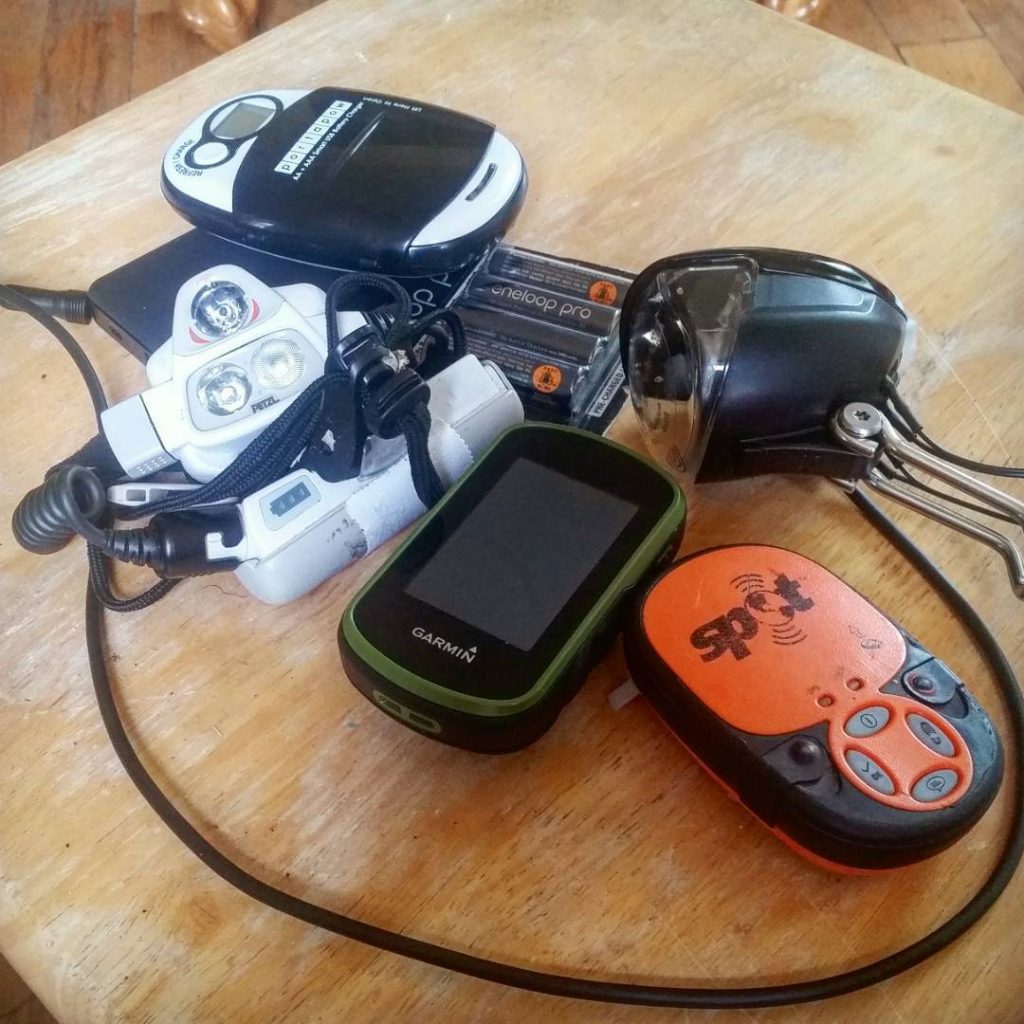
The electronics gear kit list! Bringing any sort of gear – especially electronic gear, is a fine balance between the convenience of having the resource, and the burdens of carrying it all with you. Doubly so with electronic gear, as it all requires some sort of power source to charge it all up.
Choose wisely.
For the Tour of the Highest Hundred, I brought more electronic gear than on any other ultra racing/FKT trip in my life! It was a lot to manage, but I made all my choices after much deliberation.
Here’s the rundown:
Garmin eTrex Touch 35t
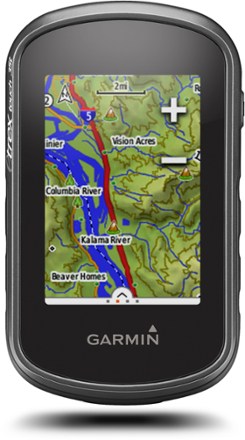
Garmin eTrex 35t
A standalone GPS, like the Garmin eTrex 35t was absolutely critical to my tour. Without needing an internet connection of any sort, I could tell where I was, how far other landmarks were, what the lay of the land was (even in low vis. weather), what direction I was going, how far I had gone/elevation gain, and what the current elevation was. The unit features many more features than that, but I would have to take a long, cold, winter night with the manual to discover them all. Battery life is good (~16 hours on one pair of AA’s) and the unit is bombproof in most all weather conditions (with a big asterisk, which I’ll get into, below).
A dedicated GPS unit like the eTrex 35t is also important for an FKT attempt, as it saves the locations you visit in GPX tracks you can then download off the unit. Turn it on, and it starts saving your locations in a list of timestamped coordinates (a track). Semi-regularly while on my tour, I would export these tracks off the unit. The 35t supports connecting to my phone wirelessly over Bluetooth. The Garmin Connect app on my phone would then upload my tracks to Garmin’s own service, as well as Strava. This was all done fairly smoothly by just turning Bluetooth “on”, on my eTrex and phone, and opening up the Garmin Connect app. Of course, I needed a network connection as well, so this was a Town Time activity I would start while eating dinner, or something.
The ability for the eTrex 35t to store and save a pretty much inexhaustible number of tracks (200 tracks, up to 10k points each) was an important feature consideration. Before setting out, I loaded a ton of GPX tracks I had created for most every hiking portion I was planning to do, as well as the entire cycling route I planned on taking – along with some alternatives for everything. I could then load the specific track I needed for that day, and just follow the line on the unit’s map, being pretty sure I wouldn’t get sensationally lost, saving me a ton of time in guesswork.
The only real gotcha was track sizes having to be less than 10,000 points. In reality, this isn’t a problem with precision/navigation, but sometimes the tool I would use to create the track would make one with > 10,000 points. If that happened, I would need to filter the tracks and modify it so it worked within the constraints of this unit.
The eTrex 35t also supports loading detailed third-party maps, that can be viewed and interacted on screen. I use the Above The Timber Colorado Maps that I purchased separately. These maps feature most every standard 14er route and most other popular trail in the state, National Forest/BLM/Wilderness boundaries, locations of streams/water sources, USFS campsites, mines/mining claims, all named peaks in the state – the list goes on.
For example, when I needed to bivy for the night, I could double-check the area I wanted to camp on was on public land, making sure I wasn’t camping illegally and respecting private property. Sometimes, the only camping available was a patch of public land surrounded by private land, and it’s almost impossible to know which is which without a tool like a GPS with a good map loaded. When I summited a peak, I could double-check that the summit I was on was actually the right peak, and not a subpeak – don’t laugh, but that’s not so easy with the Centennials!
The eTrex 35t is powered by a pair of two AA’s. I kept a few pairs of rechargeable AA’s with me at all times, which I could recharge at a wall outlet, or via my bike’s front dynamo hub. If I had no batteries charged up, or I anticipated that I would need more than I had with me, I could always buy some more at literally any grocery store, outdoor store, or gas station fairly cheaply. One pair of AA’s lasted about a day (more for a pair of lithiums), so it was easy to guess how many pairs of batteries I needed.
To save power, I found that setting the screen to automatically turn off after a few seconds, and keeping the backlight low had the most impact. To save a little weight, lithiums are a skosh lighter and they last longer than alkalines, so if I was going out for a few days, I could take less. Downside? Way more expensive.
In normal use, all I really have to do is turn the unit on, make sure it was tracking me, and place it back in a pocket or on my handlebars. When I needed to check my position, I just turned the screen back on to see where I was by tapping the screen with my finger. At the end of my cycling/hiking for the day, I saved the track. It did it’s thing recording my position; I did my thing of traversing over the terrain in front of me. The less I need to think about managed an electronic piece of gear, the better.
The eTrex 35t isn’t perfect. My main complaint with the unit is its touch screen: don’t get it wet. When dry, it’ll usually work adequately enough, but if it does gets wet, the screen will respond in a somewhat random fashion. Sometimes, the entire screen will be unresponsive making it almost impossible to navigate through menu items or on the map – not the best thing to have happen, when the weather is less than ideal, and you need to get somewhere fast.
Sometimes, the opposite will happen: even when I’m not touching the screen and the unit is just inside a pocket, the device will act as if a ghost finger is pushing buttons on the screen, which will then perhaps change settings, save/delete tracks. One time, the entire unit completely factory reset on me! I thought all the tracks I had loaded were also gone! Thankfully, they weren’t, although I lost a few hours of tracking data. Here’s how to lock the touch screen, so these sorts of problems are far less likely to happen.
This isn’t to say the unit isn’t waterproof – you won’t have to worry about it getting damaged when wet. I rode through many rainstorms without a worry.
Even though the touchscreen has these limitations, it’s world’s better than the eTrex 20’s or 30’s mini joystick button nubbin, which is absolute torture to use, when navigating a map. No thanks.
The eTrex 35t is not runnable or rechargeable when plugged directly into a USB cable to a power source, like some of the other Garmin units. That feature would have save a lot of hassle of needing to replace spent batteries – I believe the Oregon series does have this feature, and comes in a similar form factor, but is much more expensive, and may not run on AA’s, depending on the model. Maybe in the future, an upgraded version of this unit can be runnable from an outside power source, and if I have rechargable batteries, they’ll get charged in the process as well. That would be a big wish list item for me.
If I was only doing a bikepacking race, and didn’t have the hiking element in my tour, I would consider a Garmin unit that didn’t rely on AA’s. Some units are much smaller/lighter, with more secure attachments to your bike. But, I was going to be out as much as 5+ days hiking at a time, and I needed a way to have that much battery life available. Being able to simply swap out spent batteries for fully charged ones made sense.
Another downside to this sucker is that it’s very easy to lose. When I get tired, I get clumsy; and then I forget important things, I trip, I fall, and gear goes everywhere. Getting some sort of lanyard for a GPS unit is essential. A separate lanyard can be found online for many dollars, but you can just build your own – even in the bush, with a keychain ring and some sort of chord – even a shoelace will work. Always, always have it tied to either your pack, yourself, or your bike. If it drops in talus, off a cliff, or off your bike while you go down a bumpy road, there’s a good chance that it’s gone, man. I’ve lost three previous GPS units this way.

a simple lanyard for the Garmin eTrex 35t using some accessory chord, and a keychain ring.
The unit can now be girth hitch’d to anything solid, like handlebars, or a pack strap. BEHOLD! The power of knowing a few knots, like the Fishermans.
Despite some of its shortcomings, there’s no other unit I’d use if I was to do this challenge again. The price is realistic for the unit and only needing AA batteries is clutch. Garmin has fancier units, with nicer displays, but nothing that hits the sweet spot for me like the eTrex 35t.
If you would rather not go with a dedicated GPS unit, some alternatives exist, like apps for your phone. As a backup source of GPS/positioning data, I did have Backcountry Navigator Pro loaded up on my phone with CalTopo maps. It worked well enough, but I did enjoy the simplicity and battery life of a separate GPS unit. I mentioned already losing things I’m holding in my hand – I’d rather not lose my phone!
SPOT Gen 2
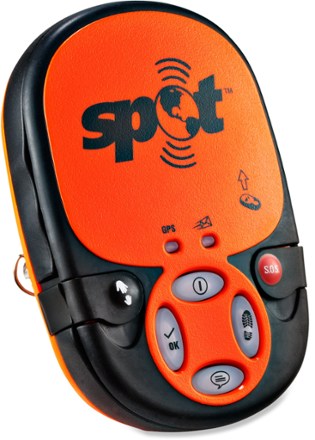
SPOT Gen2
A GPS personal location device like the SPOT units report your current position using a series of satellite networks: one to get your position, and a separate one to send messages out. This data can then be used for others to track your position in almost real time via a web-based map. The SPOT Gen2 supports sending out your position every 10 minutes. These units also allow you to send custom messages, and even alert emergency personnel that you may actually need assistance right away. In FKT attempts, it allows one to be constantly monitored, showing your position, and verifying that the history of movement jives with what you say you’re doing.
Using the device is easy. Turn it on, push the tracking button. Turn it off when you don’t want to be tracked, like when you’re camping. Like a standalone GPS, you can lose this thing easily, so make and use a lanyard of some kind.
I’ve used my own SPOT Gen2 GPS Tracker since 2011, when I rode my first attempt at the Tour Divide, and have used the exact same unit all the way into the Tour of the Highest Hundred, but I’m retiring this specific unit effective immediately. Why? It kinda stopped working!
Instead of reporting my position every 10 minutes, it seemed to report my position every 10 hours or so. Kind of a bummer, as an interactive map was set up for people to follow me in real time, but really: the safety features of the device were really nullified: I couldn’t reasonably expect to send out an S.O.S. message of my position and think that it would be received. My guess is either that the device is defective, or I myself have broken it in the 6 years of hard ownership. It was just surprise to me to find it basically inoperable after being so reliable for so many past races.
There’s no reason I think that you should get the Gen2 – get the Gen3, instead. The Gen2 has a lot of limitations that have been addresses in the Gen3.
Gen2 only supports running on 3 AAA lithium batteries, which are sometimes hard to come by and are very expensive in most all the mountain towns I visited. The Gen3 is much more flexible: it’ll run on any type of battery, and can be plugged in via an external USB port to be powered. Seeing that I had designed the rest of my electronic gear to use rechargeable batteries, it would have been nice if my SPOT unit also fit into this, but sadly, it didn’t. I could have/should have bought a Gen3 before my trip, but: budgeting.
The one big gotcha to any of these types of units is that tracking is a subscription-based service, – as I write, it’s $149.95/year and the service seems to cost steadily more as time goes by. If you’re like me, where you want to use a SPOT for a big month+ long project a year, and then never again, it can seem like an expensive service, indeed.
The real power of the SPOT units is when paired up with a tracking service like Trackleaders, which provides a ton more features then SPOT’s own lame map. Most mass-start bikepacking races will already use Trackleaders to do their tracking, but you can also ask them yourself to track your own project (like I’ve done). Trackleaders also rents out SPOT units for bikepacking races like the Tour Divide/Colorado Trail Race, in case you want to be tracked using their service, but don’t own a unit yourself.
Some alternatives to a SPOT unit exist, most notably the Garmin inReach line,
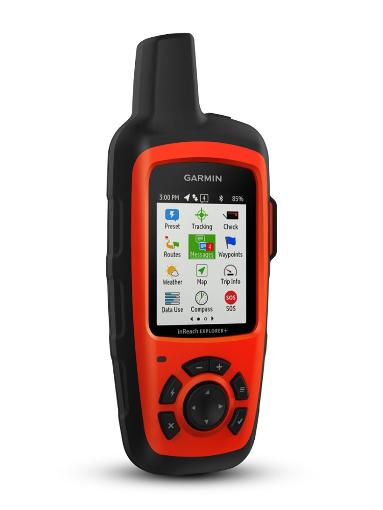
Garmin InReach
Big differences between a SPOT/inReach that should be fairly apparent right away. First, the inReach has an actual screen, rather than a small array of buttons, and also has most of the features of a standalone GPS unit, while also supporting live tracking, calling in an emergency, etc – as well as two-way communication.
It’s possible/probable that you can replace a standalone GPS unit with the inReach, but there’s still a few characteristics of the inReach that aren’t as attractive to me, that make me want to stick with a standalone GPS + a SPOT.
One is cost: the inReach is much more expensive than a SPOT, but you still need to sign up for an additional monthly service to use the live tracking ability. Another is battery: the inReach uses a proprietary internal lithium battery, which you can recharge by plugging the unit into a power source via USB. I prefer AA’s. Yet another is the problem of what happens if you lose the device: you’re out both your GPS, AND a piece of safety equipment. I haven’t played with an inReach unit extensively, but it’s something I’m keeping my eye on, if future units solve some of the blocks I currently have it, and perhaps if SPOT stops innovating on their front.
For now, look at Andrew Skurka’s reviews of inReach devices, as he has had much more real-world experience with them than I do.
Schmidt SON 28 Generator Front Hub

Schmidt’s Original Nabendynamo 28
The SON 28 hub! A total game changer for me. Dynamo hubs like the SON 28 allow you to produce a few watts of electricity while your front wheel is rolling, which can then be harnessed to power a fairly large light, or be used to charge batteries for all these fancy electronics. Friction caused by the dynamo is extremely minimal – it’s nothing to even think about.
I had my front wheel built up by Chris Murray of Elevation Wheel Company. I highly recommend Chris for your own wheel builds! In general, I would always suggest getting wheels hand built by a wheel builder you trust. For long distance tours, you want no-nonsense and strong wheel builds without using proprietary spokes.
There’s a few different dynamo hubs on the market, and I was initially going to ask Chris to build a wheel up using a Shutter Precision hub, since it’s the most inexpensive dynamo hub on the market that’s worth using and I’m on a budget. But, Chris steered me away from the hub, citing that it tends to have maintenance problems after a few thousand miles (given the type of terrain I ride, and how hard I am on gear in general), and isn’t serviceable outside of sending it back to the factory. So like many less expensive options, it’s cheaper up front, but you’ll pay more in the end.
I had 0 problems with the hub, and I wouldn’t second guess getting Chris to build up a wheel for every single bike I’ll ever own. The convenience of a dynamo hub is definitely worth it!
Busch & Muller Lumotec IQ2 Luxos U Senso Dynamo Light
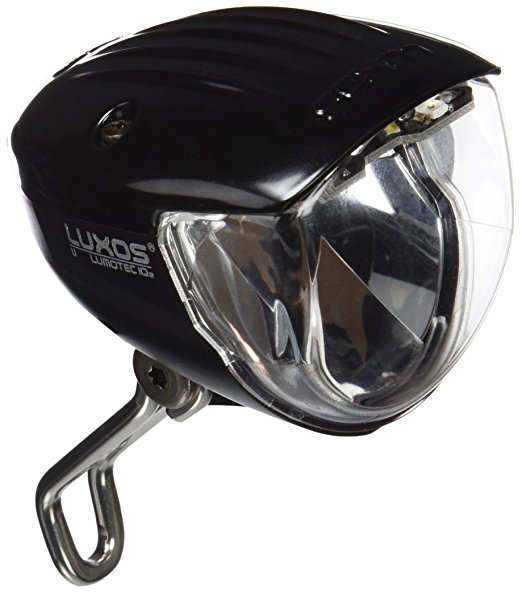
Busch & Muller Lumotec IQ2 Luxos U Senso
purchase at: Amazon
Along with the dynamo hub, I wanted a dynamo-powered light, since what’s the point of having a dynamo hub without one? Paired together, I have the ability to have an always-on, BRIGHT front light that never runs out of batteries. Bright lights (>300 lumens, say) usually only last 3 or 4 hours even when the power source is comparable to a battery pack made of 2x 18650 lithiums. Those batteries also have an upfront expense, are impossible to find anywhere except a battery store or online, take a while to charge, and would need their own charging accessory to plug into a wall, backup batteries – it adds up.
The B&M Lumotex IQ2 Luxis U Senso also comes with a USB connector plug, allowing you to charge any of your USB-compatible electronics easily – just plug into it! You won’t really be able to charge electronics, while also using the light; you’ll have to choose.
Most of the time, I would either charge my phone directly off the unit, or charge a external lithium battery pack. I consciously thought about not charging the battery pack, to charge my phone – there’s power/time lost every time you charge a battery with another battery – in such a low-power environment, it adds up!
Using the light is easy: there’s a button the light itself to turn on the light; when the light is off, it’s in USB charging mode. The light comes with a chord to plug in any of your USB accessories.
I chose this light specifically because of it’s cost, (it was lower), and the reputation of B&M gear (it was good!), when compared to other offerings at the time of my purchase. Getting both features (light + USB) was well $100+ less than any other dynamo lighting system I could find.
One problem I had with the light is at very, very low speeds. The light does a good job with adjusting to the power output it’s receiving, until a certain very low threshold. After that, you’ll experience noticeable flicking of the beam of light. This would only happen at, or below 1-1.5 mph, so not having a strong, bright light source wasn’t the end of days for me. This is mitigated by just having along a secondary light source, like a head torch, you can just turn on when going at a snail’s pace.
Another problem was when charging via the USB chord. Plugged cords seemed to easily unplug themselves, especially if going down a rocky track – the pairing of the two cords is just not very dependable. This can be mitigated by a bit of tape to secure the connection.
There’s also a certain speed threshold you will need to attain before USB charging really works – around 10mph or so. Anything lower, and you just won’t be producing enough juice to power anything. Since a lot of my riding was on off pavement tracks and a whole lot of it was climbing, there were many, many hours where I just wasn’t able to charge any of my electronic gear while on my bike when I would have wanted to.
There are some really intriguing alternatives to this B&M light. One option is the Sincewave Cycles Beacon light, which has integrated USB support, as well as allowing you to run it off of an external battery, either solely or paired with a dynamo hub source. Consider the problem I had when I just wasn’t going fast enough to have a flicker-free light. The Beacon solves this by powering the light from an external battery at these low speeds.
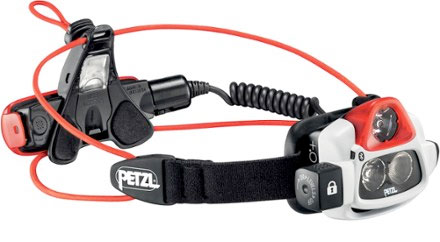
Petzl NAO
Because I was planning to hike in the dark, I needed a head torch, but I would bring along a head torch regardless of my nocturnal intentions, just in case I got stuck longer than I thought out in the sticks.
I already owned the Petzel NAO – a few models behind the current offerings, and there’s a whole lot of things I like about the light:
BRIGHTNESS: The thing is damn bright. My unit was 575 lumens bright; the latest is 750 lumens. Compare that to anything else that completely sits on your head.
Reactive lighting: Brightness has its cost, though. You’ll burn through your battery power FAST, and looking at anything up close on the brightest setting will cause you to go blind/ruin your night vision from all the light reflected back to you. The Reactive lighting solves this by computing the distance light is reflecting back to the unit, and adjusting the brightness of the light.
Look at something in the distance: light is bright; look at something close to you, light dims down. You get used to this, and then you miss it on every other light you may also use – it’s very obvious your eyes get strained without the Reactive lighting. It also saves on battery power, since the light’s not on the brighter setting when there’s no utility to it.
Burn time: because of the reactive lighting, and the beefy battery, burn times are realistic and useful. I’ve had problems with smaller head torches that try to be bright with little battery packs and all this does is sacrifice major burn time.
Lock: there’s a lock on the light itself, so if you want to keep the unit on OR off, it’s easy to do. Nothing is worse than finding that your head torch has been in your pack for hours, already on.
Battery charge gauge: I know how much juice is left in the unit because it tells me so. That’s nice.
The Petzl NAO ticks a TON of boxes for me, but it’s FAR from perfect. Here’s some things I dislike:
Size/Weight: Not exactly a monster, but the NAO is big and bulky, with a ton of straps and wires to make it all work.
Not bike helmet compatible: You can’t ride with this light on your bike helmet – it’ll just slip off, unless you affix it with something like additional zip ties. It will work fine on a climbing helmet that features tabs to put the straps underneath, but I’ve never found a bike helmet with that feature. Since I’m riding a bike so much, this was a big issue for me.
Epilepsy-inducing blinking when battery is low: I’m not sure who thought it a good idea to have a head torch blink on and off in rapid succession to tell you that the battery is running low. I’m using the light to see, don’t drastically change my light source to notify me or anything! The unit has a battery indicator on the back of the battery pack, so the job is already covered. If the light seems very dim, that’s what I would check.
Proprietary battery: This is the stupidest part of the whole design, when looking at this piece of gear from a consumer perspective. The Petzl NAO is charged with what is essentially a 18650 lithium rechargeable battery, that’s then surrounded by some hardware that does the magical things, and a USB plug, so you can recharge it. It’s a big bulky monstrosity. An extra proprietary battery costs $70 or so; but a lone 18650 lithium costs about $7- ten times less! Why did Petzl decide that you can’t just swap out the battery itself? Good question, and I don’t have an answer.
What I can tell you is that when you do lose the battery in the bush, you’re SOL, as there’s no retailer on earth that’s going to stock a Petzl NAO battery. What’s worse, if you have a previous model (like I do), you’re going to have an even harder time finding a battery at all from Petzl that’s compatible with your specific model, since – even though they’re all the same size/shape, they don’t work across models.
The battery is easily lost, since you will need to remove the battery from the rest of the unit to charge it – the USB plug can only be accessed in that way. What’s more, it requires a female to female USB chord to do the charging. a micro USB cord to female USB cord is easily found most anywhere, but a female to female cord is just, not. That forced me to bring a different cord than every other piece of electronic gear I had; then I had to make very sure I didn’t lose it.
I lost my Petzl NAO battery in Lake City, and I still haven’t gotten a replacement battery. I have the choice of spending $70 on a new battery, or $200 for a new, updated Petzl NAO. What to do?
But the fact remains, you’re not going to find a better head torch than the NAO, despite its misgivings. The design is just not very well thought through – Petzl needs to redesign this thing from the ground up, starting with the battery pack.
Petzl Actik Core Headlamp
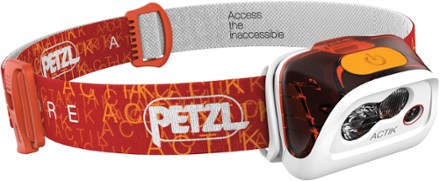
Petzl Actik Core Headlamp
This was the second of two replacements for the Petzl NAO, which I lost the proprietary battery for. The first was so terrible, it’s not even worth mentioning. Moral of the story is: small mountain towns aren’t always the best equipped, and they’ll totally try to sell you outdated gear at high prices to turn a profit. Some places are truly great; some places are a bit on the scummy side.
What initially attracted me to the Petzl Actik Core was its relative brightness, 350 lumens; and that it came with a rechargeable battery pack. Although probably the best pick in the limited choice I had, there’s nothing about this light that I think really stands out, and I don’t suggest it to you – I’m adding it here for completeness. There’s better choices, and I’ll suggest one that I like a whole lot better, below. Let’s get started:
Short burn time: at 350 lumens, this unit lasts for a few hours, if you’re lucky, then does the blinking song and dance that I just cannot stand, similar to the NAO. There’s also no separate battery charge indicator, so you’re SOL knowing its status, until the thing blinks. Any other setting except the high setting is almost useless, except in camp.
Rechargeable battery pack: in theory, this sounds like a good idea, but the way Petzl decided to implement it is a head scratcher. The rechargable battery pack takes the spot of 3 AAA batteries in the light itself, so if you don’t use the battery pack that comes with the torch, you can just use 3 AAA’s. That’s off to a good start, but – why three AAA’s? Why not four? Four would give you a brighter light/longer burn time and batteries are usually bought in groups of 2 or 4, etc. What am I supposed to do with the one extra battery I bought?
Secondly, to recharge the battery pack, you must take the battery pack out of the head torch itself. The mini USB plug (better than the female to female USB plug of the NAO, I’ll grant you) plugs in perpendicular to the flat side of the battery pack itself. That’s just moronic. It causes a bulky and fragile setup, so you have to be very careful while charging so that you don’t break the cord itself. Also, removing the battery from the unit will guarantee you’ll lose the battery pack itself.
If you asked me where my battery pack is for this light, to be completely honest, I do not know! It’s lost. A replacement is $30. $30! A 4-pack of rechargeable AAA’s is ~ $10 (and you get four, not just three!), so again, Petzl’s proprietary battery pack costs many times the thing it’s trying to replace and can only be used in Petzl’s own product. Good idea, but because you need to remove the battery from the light to use it, it guarantees you’ll lose it.
So, avoid: under powered, the battery pack is weak-sauce, and the rest of the unit is lacking useful features. What should you use, instead?
Black Diamond Light Storm Headlamp
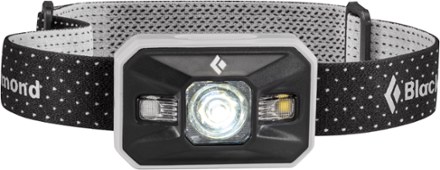
Black Diamond Storm Headlamp
Everything the Actik Core lacks, this baby has. I owned this head torch already, but just couldn’t find it in time for my tour, so I didn’t bring it. Of course, afterwards it was found in a very obvious place – I’m happy about this! Since even riding at night in town, the Actik fails to be super useful – the burn time is just so short that if I forget to charge it up after two days or so, it’s too dim to be useful.
Things that I like about the Black Diamond Storm: four AAA’s, instead of three; rechargable AAA’s are cheaper than a proprietary battery pack, battery charge indicator, longer burn time, locking mechanism, cheaper than the Petzl Actik Core.
Niterider Solas 100 Rear Light
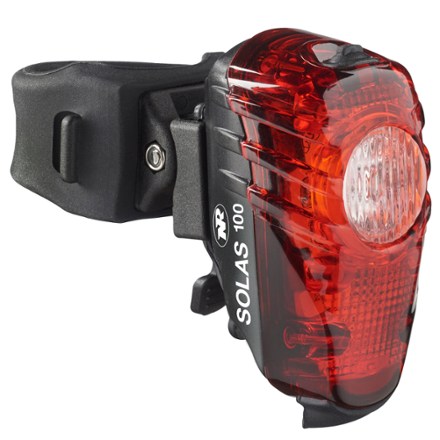
NiteRider Solas 100 Rear Bike Light
Riding a bike at night requires you to have a rear facing red light (at the very least, while riding on the road). I’m personally willing to bring along a big, heavy light if it means I can be seen by motorists easier and farther away – and that’s why I picked this hulking thing.
I have a lot gripes about this light, so I don’t suggest it for you. The design is absolutely terrible.
Let’s begin with the USB port: it’s located on the bottom of the light. That means, if it’s not properly sealed with the rubber nubbin’ that comes with the light, water will enter the unit sprayed up by say, your back wheel. The USB port let’s in all this water into unprotected hardware inside the light itself, and that causes havoc. The light will not want to turn on, switch modes, or turn off – you know: depending. When did this happen to me? Constantly: it’s late, I want a rear blinky light on but, nope: this thing seems to be busted half the time.
Internal Rechargeable Battery Problems: I didn’t run a rear blinky light constantly, but when I wanted it, I needed it to work. Another problem I found out the hard way was that the internal battery would actually lose it charge after a few days! This never happens to a blinky light powered by say, some AA’s, but it seems to be a problem with internal rechargeable blinky lights. This light made me constantly charge it whenever I had Town Time, which got tiring, as I had enough things to charge, already.
Finally, I couldn’t figure out how to cycle through all the different light modes. There’s just one button, which is used to turn the light on, cycle through modes, and turn it off. I still have to guess how to turn it on/off, given the problems of: sometimes it just doesn’t turn on and off, and the internal battery may just be dead.
As soon as I could mail it back to myself, I did. It wasn’t worth the weight and bulk of this badly design light.
Cygolite Hotshot Pro 150 Rear Bike Light

Cygolite Hotshot Pro 150 Rear Bike Light
I brought this light along as a backup to the larger Niterider Solas, but because the Solas didn’t work all that well, this instead became my main blinky light.
The mini USB plug is still located at the bottom of the light, but taking off the rubber shield doesn’t expose the rest of the light’s hardware to the elements, so it’s a better design in that sense.
Still, I had the same problem I had with the Solas, in that if left alone, the internal battery would quickly lose its charge, and I was left with a dead light. Infuriating. It would have been massively easier just to bring along a rear blinky that ran on a pair of AAA’s/AA’s, and just charge them instead, having as many backups as I could want.
In a pinch though, I could hook up this blinky to one of my external battery packs, and run the light that way. That turned out to be the way I would normally run this light, unfortunately.
Blackburn Click USB Rear Light
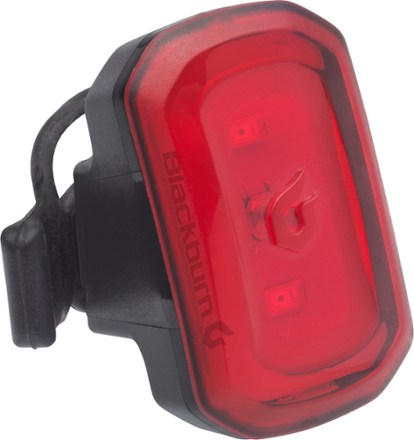
Blackburn Click USB Rear Light
Bringing along three rear blinky lights seems excessive, but my main light just didn’t work, the backup to that only kind of worked (if it was charged), so this became my redundant rear blinky light. I’m glad I brought it though.
Compared to the other lights I brought, it’s teeny-tiny. I actually just had it attached to the back of my helmet and wanted to use it just in case I needed that little bit more visibility. But the damn thing has a good run time for how small it is, and I never had the problem of finding its internal battery surprisingly not charged. It also charged back up in little time.
Now it’s a permanent fixture on my bike helmet for when my main red blinky craps out, or I just forget it. Totally recommended – you can get it alone, or with a white version for the front. The front one especially isn’t bright enough to ride alone with, but I can see its utility, if you run a dynamo front light that may lose its brightness when you’re slowed down/stopped.
Alternatives?
Seeing how less than satisfied I was with most all the blinky lights I had, what should I have used, instead?
Compass Taillight

Compass Taillight
Just like my dynamo hub supports running a bright front light, it also support running a bright rear light, like the Compass Taillight. Why didn’t I get one? Cost, mostly: This particular light costs $169, compared to around $40 for a 100 lumen rear blinky. Not cheap, but wouldn’t have been nice to not ever worry about my rear light not working?
PortaPow Smart USB Charger for AA + AAA
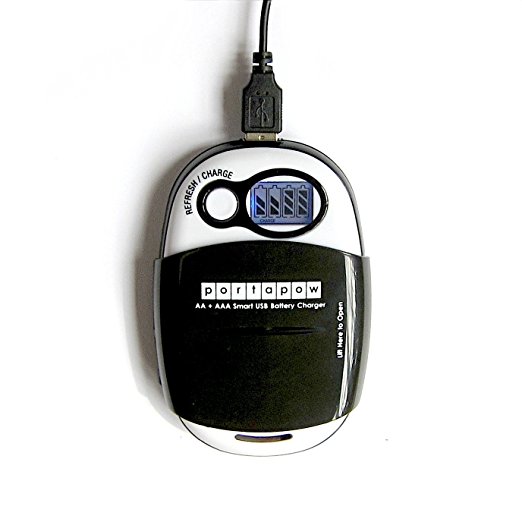
PortaPow Smart USB Charger for AA + AAA
To offset how many AA batteries I was going to go through, then throw out on my trip,
I got this AA/AAA battery charger, so that I could just bring along a bunch of rechargeable AA’s. It also connects via USB, so it’s compatible with my dynamo hub, or just a external battery pack. Some features I liked about it:
- Cheap
- Low Profile
- Battery charge indicator
- USB-compatible
- Cover around batteries, so they don’t fall out
I had somewhat low expectations for this particular piece of kit, but it worked just perfectly. Normally, this would be plugged into a wall; batteries would take a few hours to recharge, and it seemed unrealistic to power it via my dynamo hub. In a pinch, I could use an external battery to power this, but it’s sort of wasteful to charge a battery, only to charge a different battery, so I tried to keep that to a minimum.
I never really tried to charge any AAA’s, just AA’s- but there may be an issue with the AAA’s just not fitting in correctly, without a bit of janky modification. Happy to still have this piece of kit though, and I have no plans on replacing it. I think during the two-month trip, I saved myself at least $100 in buying disposable batteries, so the charger paid for itself + the rechargeable batteries I still have, and can continue to use. If you have gear that needs AA/AAA’s, and you’re not using rechargeables, just what are you doing?!
Anker PowerCore II Slim 10000
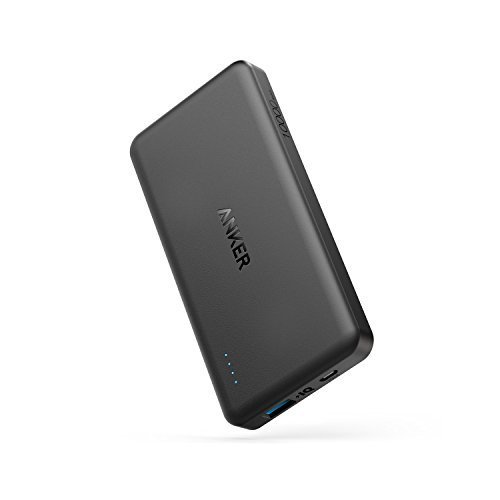
Anker PowerCore II Slim 10000
Utilizing a dynamo hub and wanting to charge batteries, well: I needed a battery to charge! The Anker PowerCore II Slim 10000 is the battery I picked. It has a fairly large capacity (can charge my phone ~3x when it itself is fully-charged), a fairly low profile, and a simple battery charge indicator.
Anything smaller seems to just not have the capacity to really do anything; anything bigger and weight starts to become an issue. This thing already weighs over half a pound!
After the tour, it’s still working strong and looks almost brand new.
Outdoor Tech Kodiak Mini 2.0 Power Bank
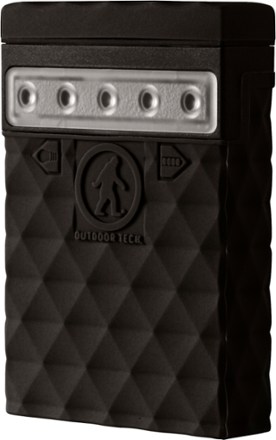
To complement my larger Anker external battery (and as a backup), I also had a Kodiak Mini. To be perfectly honest, I just brought it along since I already had it, but it proved its utility: I could charge two things at once, instead of one; or charge something off of it, while my other battery was being charged.
It has less than a third of the capacity as the larger Anker, but it’s far more than a third of the price – and about half the size. The blinky red lights and solid white lights on the unit are cute, but other than being there to find a random thing while camping, weren’t really useful. If I was to bring 2 external battery chargers for redundancy, I may just bring 2x Anker 10K’s.
Saying that, after the trip, it still works perfectly, and looks brand new.
My Charge Power-Base 3

My Charge Power-Base 3
When in town, I needed a charger to charge all my USB-compatible devices, so I picked up a My Charger Power-Base 3. It has 3 USB ports to charge three USB devices at once, without blocking an outlet from at least one side of the charger itself. I don’t know why they don’t make chargers like this, where the plug is perpendicular to the outlet, so no outlets are blocked, but this is what I found and it did its job well. Still looks new, still works perfectly. It does have a small indicated to tell you, “yeah, I’m plugged in”, which is actually really useful, when you don’t expect every wall outlet you come across to be live.
I also picked up a random USB wall charger with two USB ports so I was able to charge 5 different things with two outlets at once. Even though I wanted to LOVE my dynamo hub, I found it more convenient to just charge things up on a wall charger – especially since I could charge 5x the gear at once (and usually, when asleep!), than one thing while riding.
Samsung Galaxy 5 + 2x extra batteries

Samsung Galaxy 5
My phone is ancient when it comes to fancy smart phones these days, but it was cheap ($250!), and also has the added convenience of allowing me to swap out batteries, so I brought 3 batteries for it in total. The Galaxy 5 is in no way/shape/form waterproof, and I did run into problems of falling into creeks and having it not work… well. A little alchohol swabbing and I was back up and running, but I was pretty sure I was SOL a few times on my trip.
In the future, I doubt I’m going to find a phone that allows me to swap out its battery, but I’ll get better water resistance. Another external battery pack I guess will fit the bill. I prefer a dedicated GPS unit for GPS’ing, so my phone was mostly used for calls/texting/web browsing and its camera. I did have Backcountry Pro loaded, as well as all my tracks, just in case.
And, That’s It!
Except for a few micro USB chords ,some random headphones, and a legion of rechargeable AA batteries, that’s all the electronic gear I brought with me on the Tour of the Highest Hundred. Let me know what you think, if you yourself have any questions, or have some opinions on gear that you think would be better to have brought than what I had.
