Like this? Follow me:
One of the main attributes that differentiates The Highest Hundred from other ultra-endurance FKTs is the technical nature of some parts of the route.
For example, the Appalachian Trail is indeed longer, and has more elevation gain than The Highest Hundred (many of the stats of the AT may surprise you), but I think it’s comparable to this challenge in a, “how much blood/sweat/tears will you go through” if done as a self-supported FKT. As I write this, the FKT is held by Heather “Anish” Anderson at 54 days, 7 hours, so the time to finish is similar to what I expect to do to set a self-supported FKT.
But, how can the AT – a longer track, with more elevation gain be done quicker than the Highest Hundred, where the majority of the mileage in the HH is done by pedaling a bike?!
One big reason is that the AT is on a well-established trail for its entirety and much of the Highest Hundred has large sections that are trail-less, where one is going to face Class 3, Class 4, and even Class 5 mountaineering routes. On the AT – except for one, one-mile section (Mahoosuc Notch), you’re simply hiking, following white blazes. Whatever scrambly bits there are, there are 10x more Class 2 sections on the Highest Hundred to keep you busy. I’m not saying sections like Mount Washington are easy, I’m saying that sections like Mount Washington are par for the course in the HH. The Highest Hundred requires knowledge of rock scrambling and rock climbing techniques/experience.
That’s what I’m going to focus on in this post.
And yeah, there are also some gnarly cycling sections if one elects to take them, but it’s easy enough to bypass riding those sections, by merely walking your bike across them. The on-foot (and on-hands, I guess) technical sections I may not have any workaround: you are required to do them to summit – or at least summit efficiently.
So let’s take stock of some of the big ones:
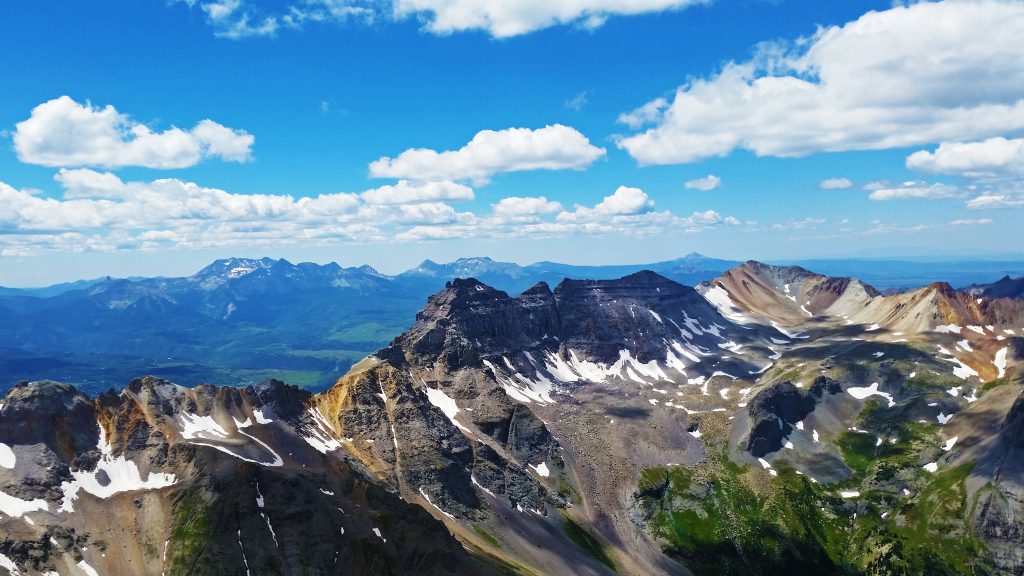
Dallas Peak, 13,809′, 5.3
Dallas Peak has a reputation of being one the hardest Centennials with legitimate technical climbing – the last pitch goes at 5.3 and usually a rappel is done from the summit to avoid downclimbing the last pitch. To just get to that last pitch takes some devious route finding on loose rock and many more Class 4 sections on the approach.
For my entire trip, I’m not planning on taking any rock climbing-specific gear at all with me: no rope, no pro, no shoes – and certainly no partner; so the technical pitches will be done simply in a pair of burly trailrunners, then downclimbed. For Dallas, usually, a rappel is done from the summit to avoid downclimbing the last pitch. I’ll have to safely downclimb that, as well.
This last pitch is mandatory, as there really isn’t any easier route up the mountain in summer conditions. The rock that makes up Dallas can be of questionable quality and reports of finding dinner plate rocks stacked on top of each other waiting to topple are the norm when trying to ascend Dallas from it’s connecting ridges.
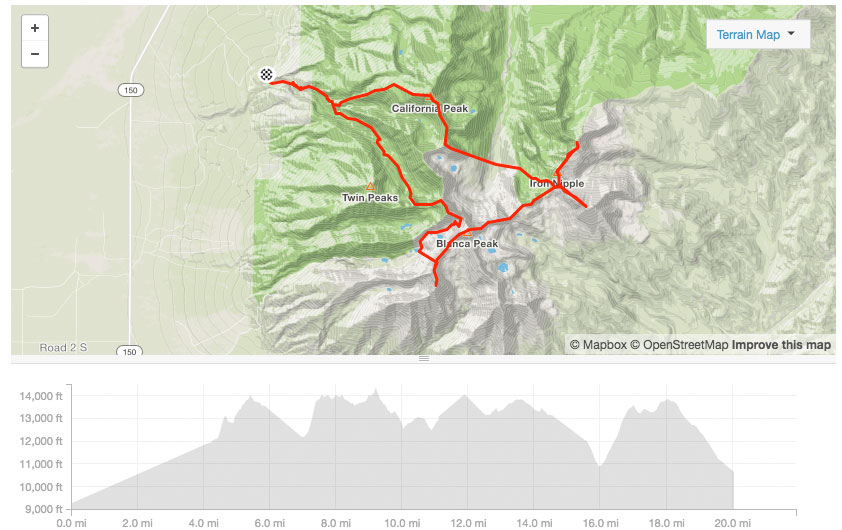
Little Bear/Little Bear – Blanca Traverse/Gash Ridge to Lindsey
Update: the full route I ended up taking is described in the blog post, Fastpacks From Hell: The Colorado Sierra Blanca Centennial Enchainment!
The Sierra Blanca in general poses a huge puzzle on how to negotiate all the peaks quickly – I still don’t know if I got it right, or what I’ve got is reasonable! If you do everything by their standard routes, this section could take many days to a week, and be done from at least two trailheads. The routes I plan to take are not going to be the easiest ones, and this line is a prime example of taking more technical routes to improve efficiency.
Little Bear
Little Bear itself is known to have one of the most dangerous standard routes of any Colorado 14er: The Hourglass Couloir. There are easier ways to ascend the peak, but but none of them are available without getting permission from private landowners (good luck), and none really work well with connecting large routes together, like I would want to.
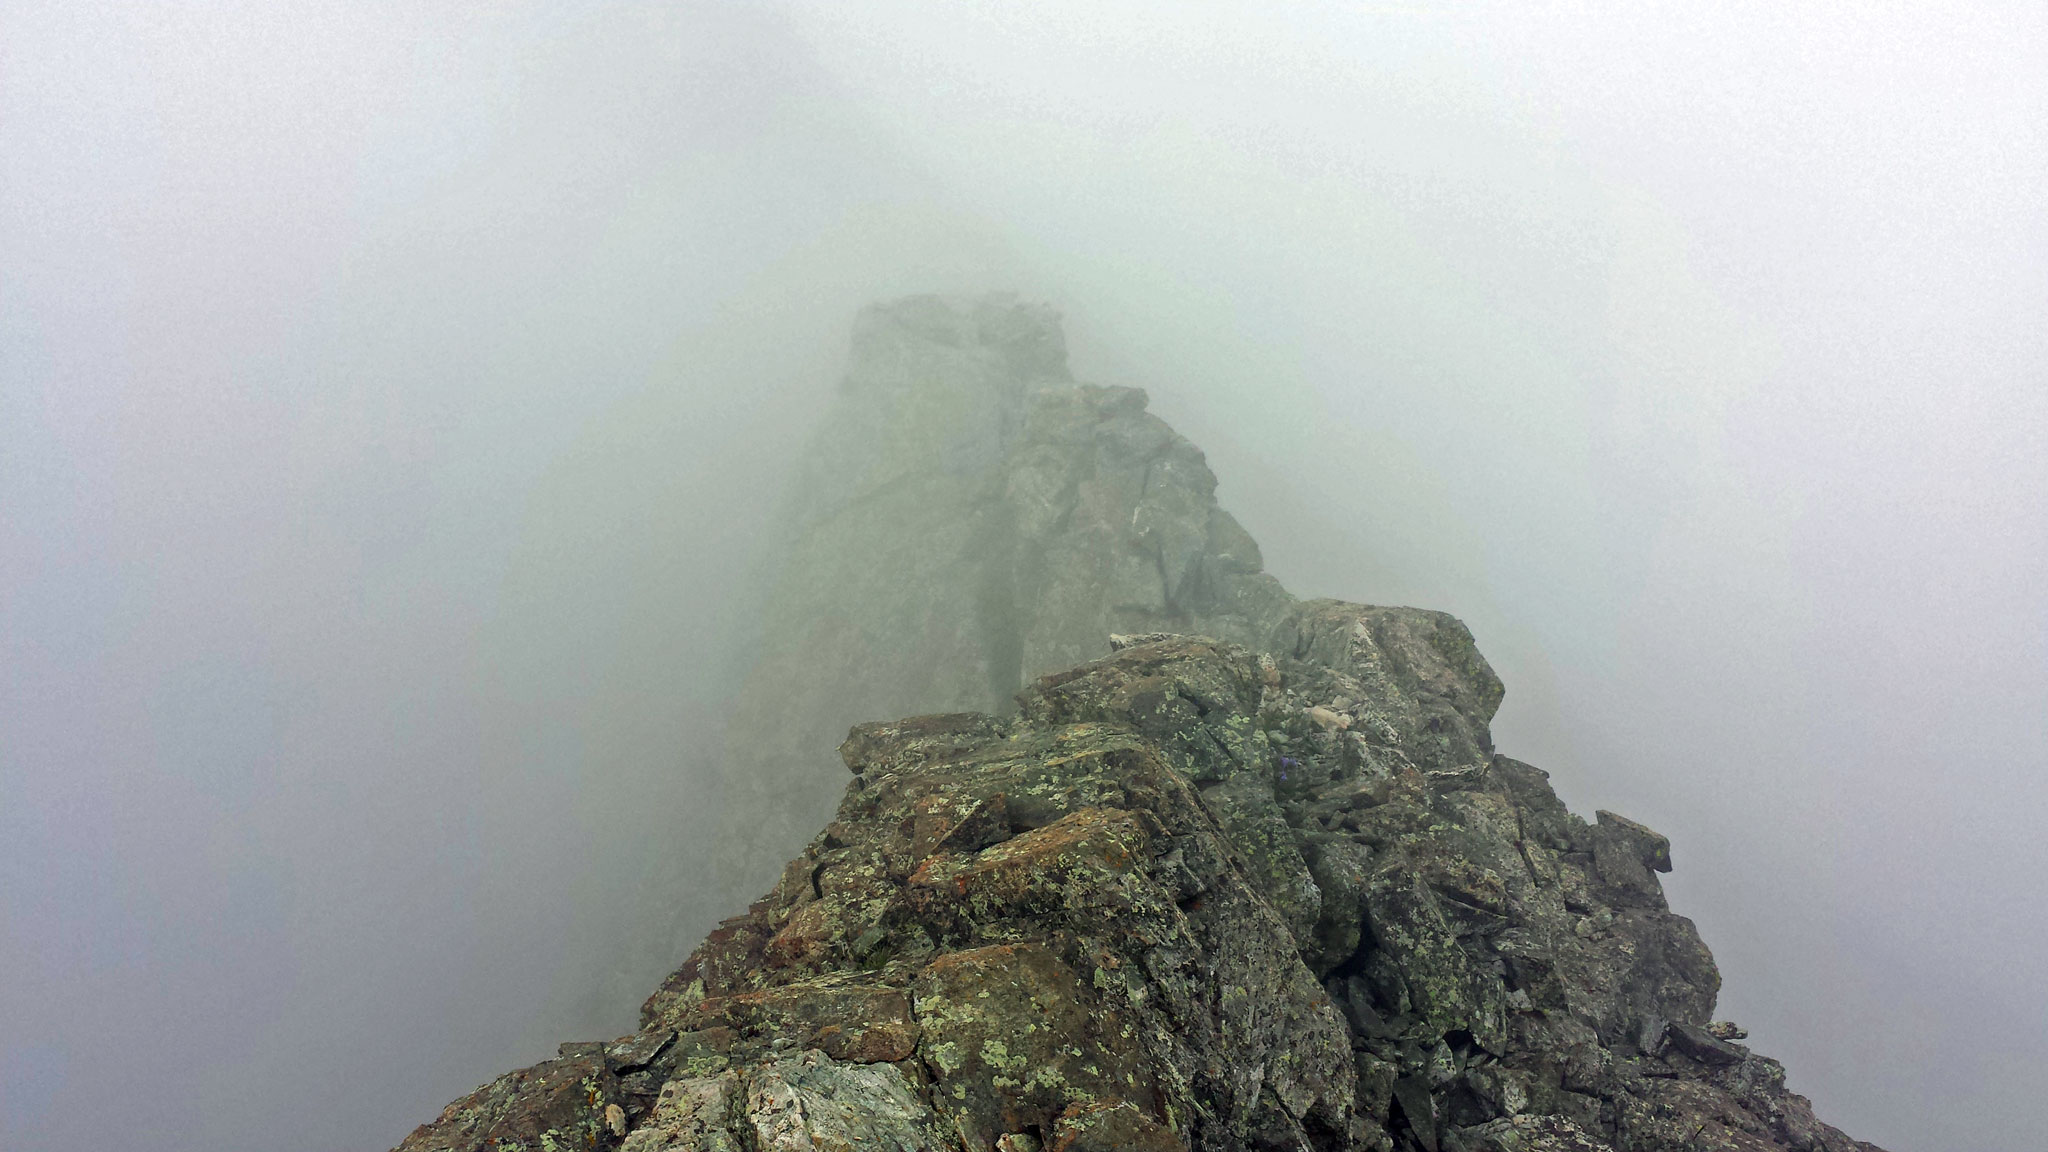
In 2014, when I ascended the Hourglass Couloir in my Tour 14er, I woke up to a light hail with accumulation on the ground, and a dripping wet Hourglass shrouded in fog.
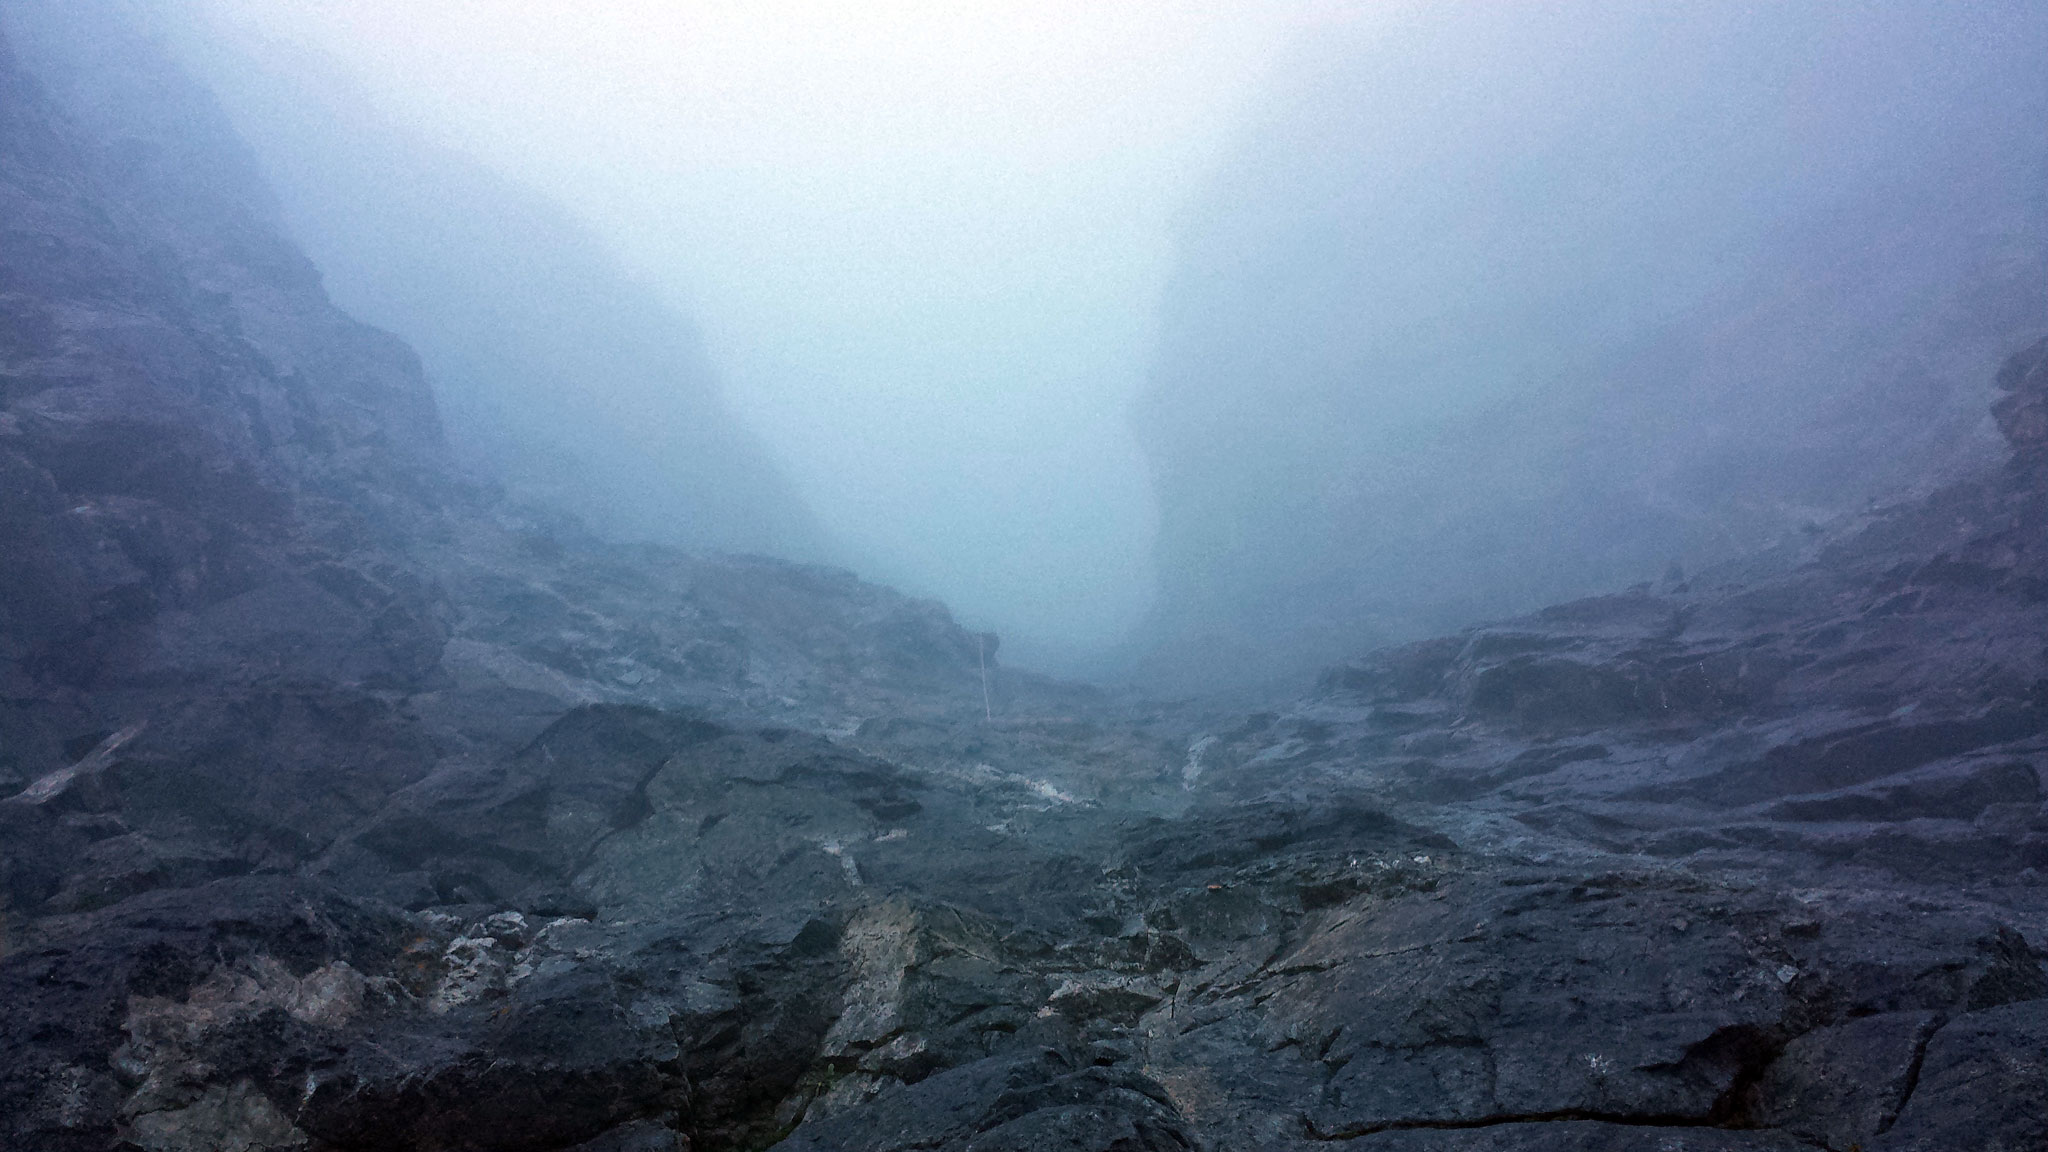
Not ideal. The center of the couloir was a running waterfall, and the slabs to the side were slick and not so wealthy in the Holds Department. You may be able to make out a rope in the photo above – many who climb Little Bear then descend the Hourglass using these ropes left by other parties. I think this is a terrible idea (fixed rope left by anonymous parties in general is in my opinion poor form, and a bad idea to trust with your life!) – but I won’t be descending the hourglass – I may not even ascend it, but rather take an alternative Class 4 route called The Northwest Face.
The Northwest Face is a little harder than the standard route at Class 4, but has less traffic, so less of a chance of getting rocks rained on me from parties above. It also features ever so slightly less mileage. I may/may not have time to recon this route before going for it on this tour.
Little Bear – Blanca Traverse
The Little Bear – Blanca Traverse is one of the four great 14er traverses, as described by Roach, and it’s an awesome way to link these two mountains together. Taking this route would save a ton of mileage, time, and elevation loss if you were to do it – so we’re doing it.
The traverse is rated at Class 5.0, and is about a mile long. There are few bailout points on the ridge, and it’s not a very good place to be in an electrical storm. I did this traverse during my Tour 14er, right after summiting Little Bear via the Hourglass Couloir. The weather was still cloudy, and I did almost the entire traverse with a visibility of only a few dozen feet:
I’m hoping for better conditions next time around!
Gash Ridge to Lindsey
Gash Ridge from Blanca is the key to accessing the Huerfano Valley from the West. Blanca and Ellingwood’s North Faces are true Nordwands with very steep and loose technical climbing of dubious quality. Gash Ridge is rated ~ 5.4 and will “only” have to be down climbed. Once in the Huerfano Valley, one 14er and one 13er will be summited, then the other side of the mountain range will be re-accessed via a ridgeline far to the north of Ellingwood Point.
Weminuche
Update: the entire route I took to summit the nine peaks in the Weminuche is described in the blog post, Fastpacks From Hell: The Weminuche Throwdown
Jagged Mountain
Jagged Mountain’s standard route is rated 5.2, but it’s its remoteness that really makes it a standout. One has to be completely committed to climb this technical peak solo. I’m actually more stoked than scared of this leg of the tour – all I can really think of is the intense beauty of the peak, and what the view must be like from the summit.
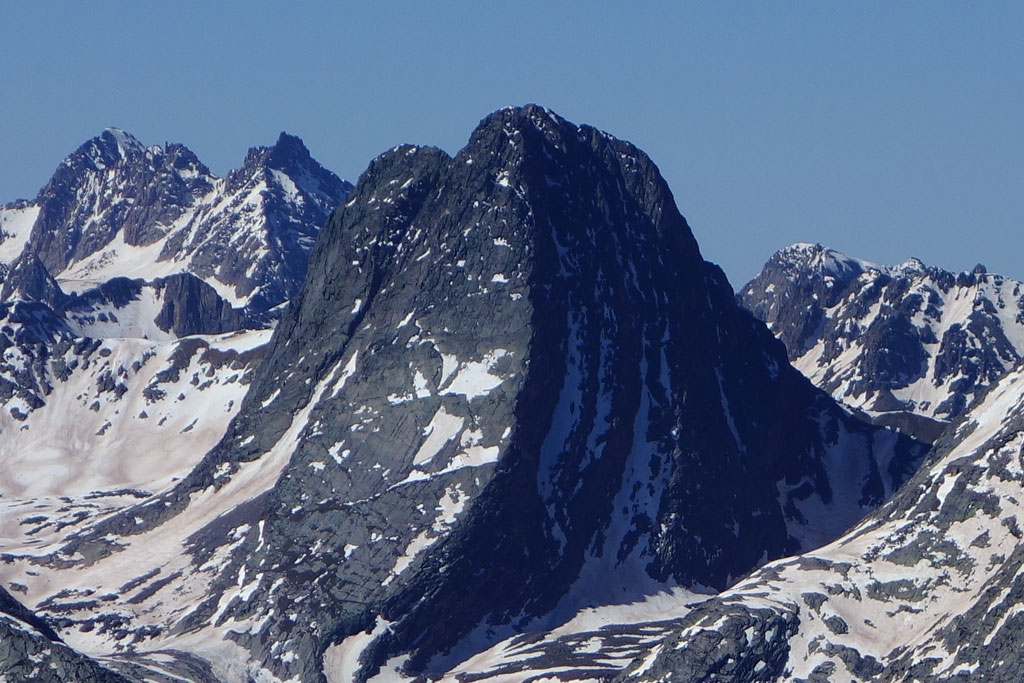
Wham Ridge, Vestal Peak
This is absolutely extra credit, but does highlight another strategy in making a successful tour: keep the stoke high by doing interesting things – what’s the point of climbing 100 mountains if it’s just a big grind?
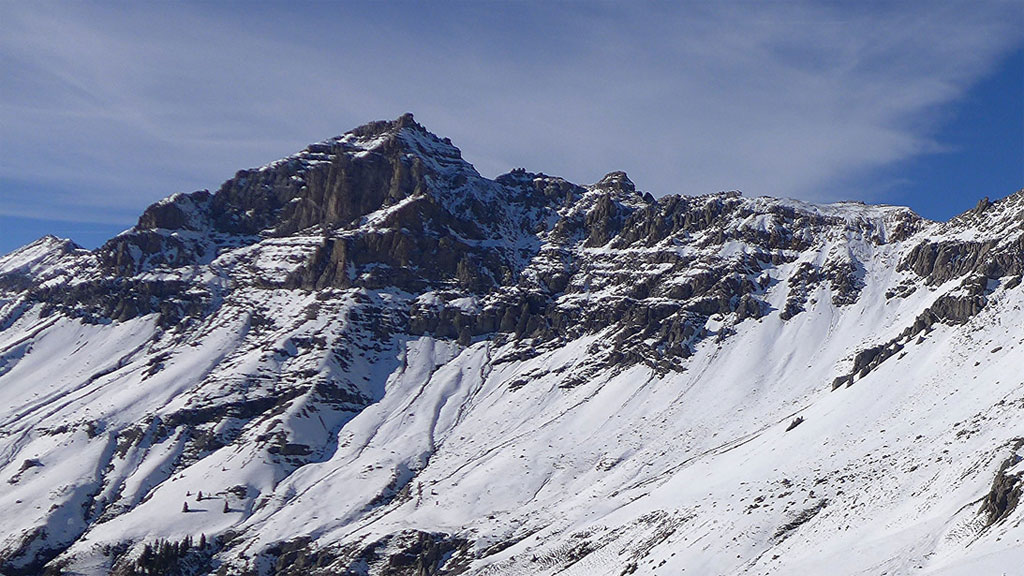
Vestal Peak by its standard route is merely rated Class 3, but it’s impossible to look at the mountain without noticing it’s incredible north face, where the Wham Ridge, 5.4 route is found. I would be totally nuts to pass the opportunity to climb this route for my tick of this mountain, and look forward to it being one of the many, many highlights of the trip.
Ring the Bells/Thunder Pyramid
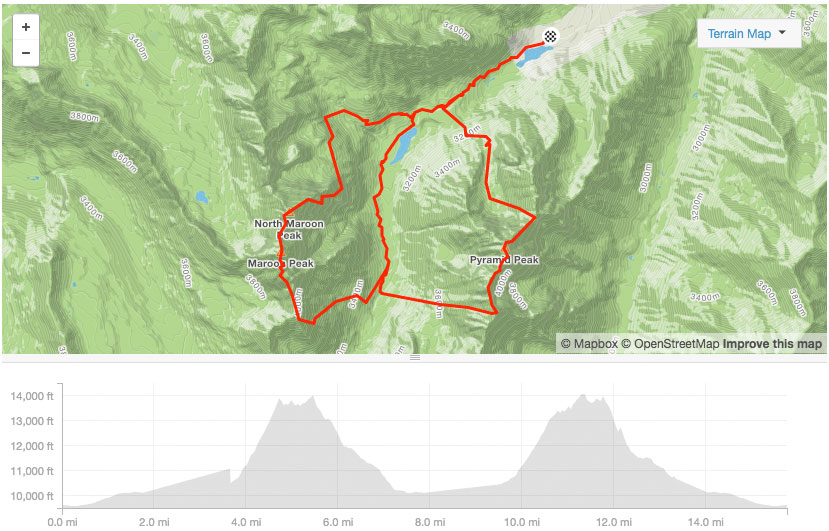
The Maroon Bells Traverse goes at ~ 5.6, making it one of the most technical routes I’ll be doing on my tour. I’ve done the traverse before, so I’m not so worried about doing it a second time.
What I am worried about is descending the route afterwards. On my Tour 14er, I had a particularly nasty spill going down a small gully, where a rock shaped like an ironing board gave way when a put pressure on it with my foot, leading me to fall down the gully itself. Time slowed down, as my life flashed before my eyes. Once I hit the sloping talus, I immediately checked my body for grave injuries. I was expecting at least a broken leg – my hands were a bloodied mess. A broken leg usually means at the very least a night out in the open as Search and Rescue – at the very best estimates, would have to wait till the next day to be able to reach you.
To my incredible surprise, most of the blood was coming from superficial cuts from my hands and a small one from my knee. My groin had a slight pull but… I was ultimately fine. I’d like to not recreate this incident again.
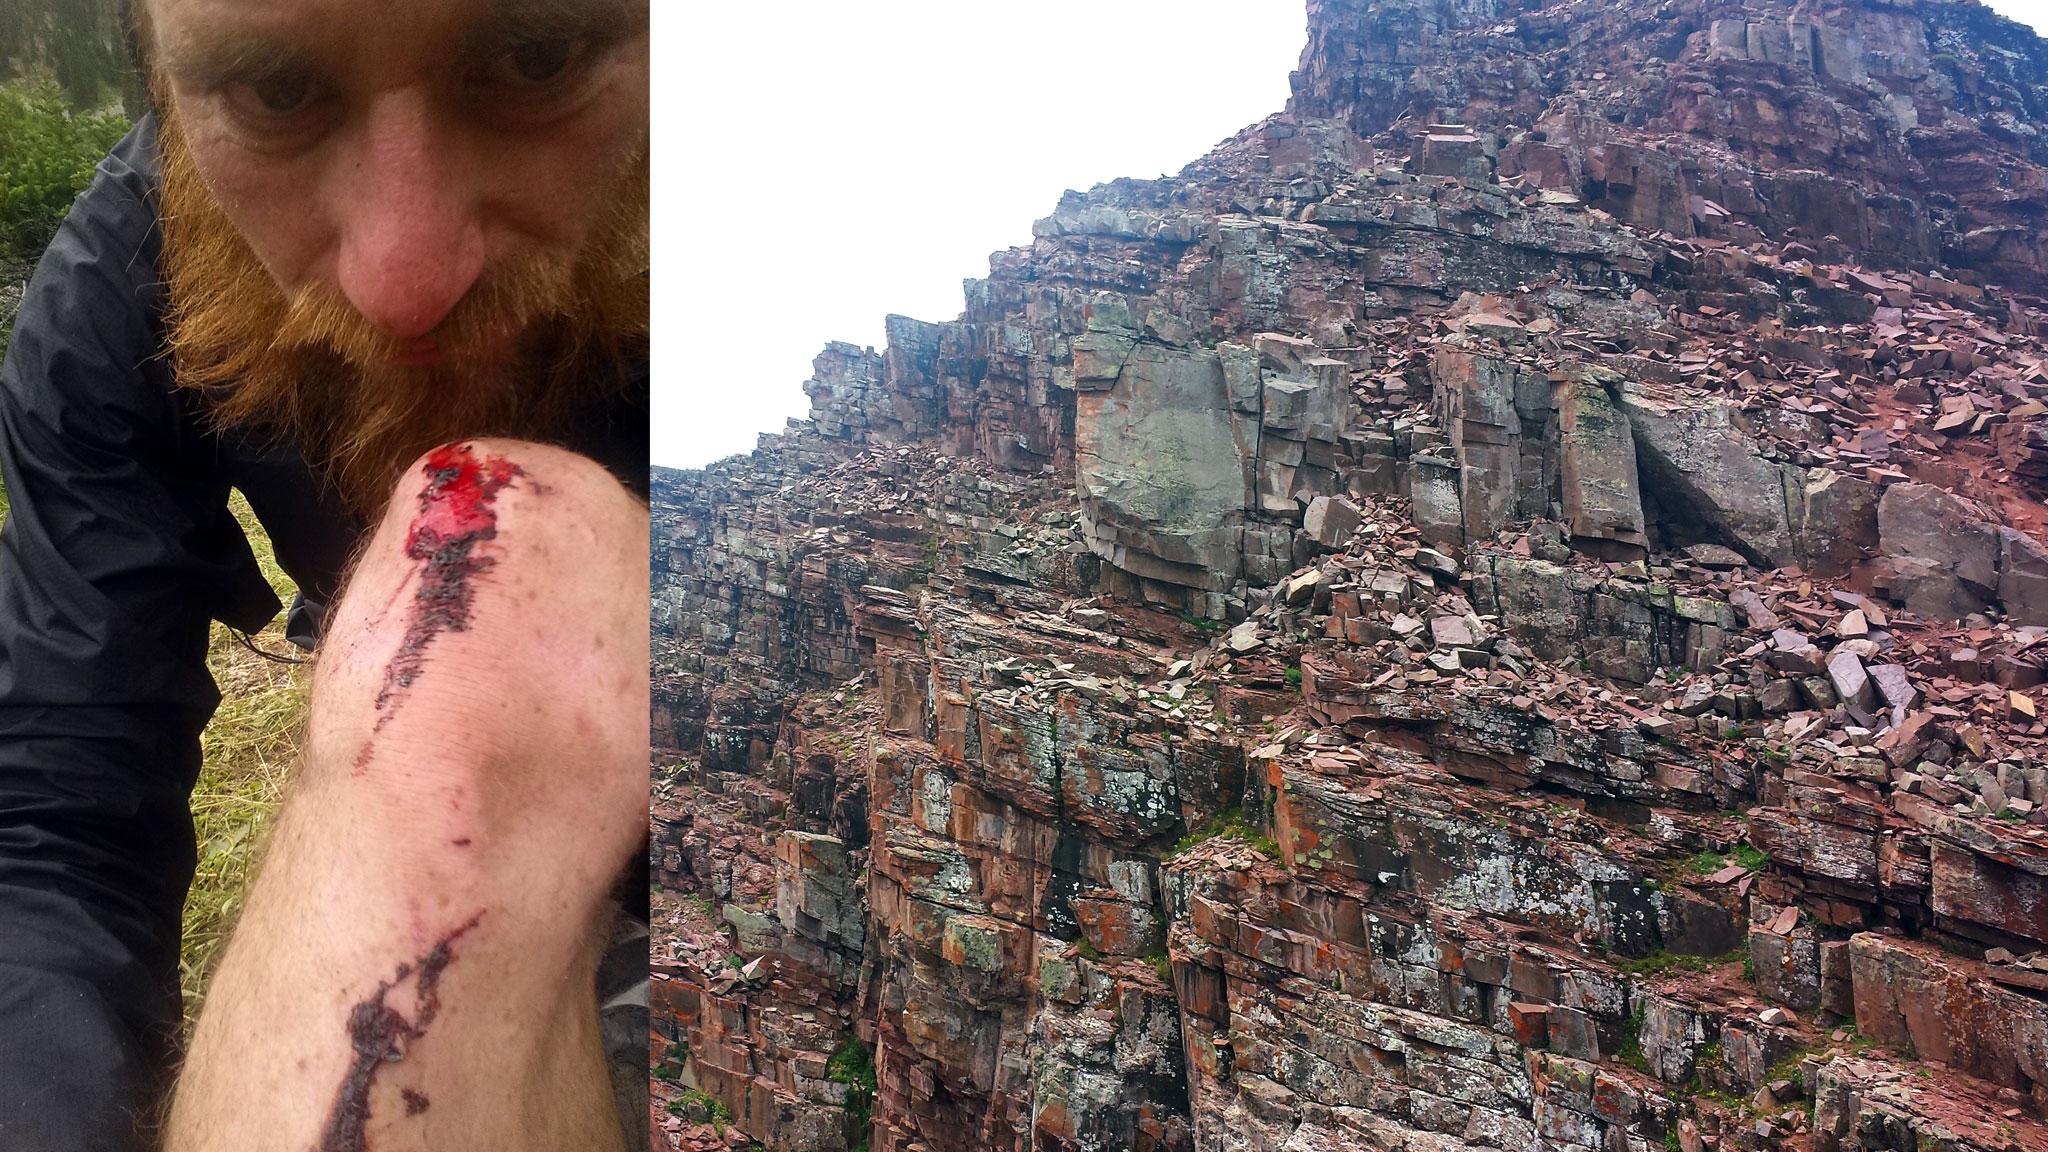
And this is where the true danger in some of these routes are found: not in the technical level of climbing – I can train for that; rather, it’s in the loose and sketchy nature of some of the rock on the routes themselves, regardless of grade. This is where my worry exists in large doses, and I think I’m justified in at least giving these routes the respect they deserve.
If the Bells are chossy, loose, and dangerous, Thunder Pyramid is Crazy Town. I am not looking forward at all for climbing Thunder Pyramid, and would rather just get it done quickly. The standard route clocks in at only Class 4, but it’s loose, and very, very dangerous.
I won’t be descending the standard route on Thunder Pyramid, but will be traversing to the 14er, Pyramid instead. This traverse should make the Bells Traverse look like child’s play, and will be the very next item on my, “not looking forward to” list. This is a traverse I’ll only do if feeling up for it, and will happily do Thunder Pyramid and Pyramid separately if I do not feel 100% up to the task. This doesn’t make things much easier, as the amount of loose rock I’ll have to face will be greater doing these two peaks separately. It’s damned if you do, damned if you don’t.
Ice Mountain
Completely out of style with the rest of the Sawatch, Ice Mountain has a reputation for being loose and dangerous – much like the Elks I just described. Ice is a bit more remote as well, leading to a bit more anxiety that could be felt while doing the route. I’ll most likely be taking the Northeast Ridge, as the Refrigerator Couloir will sadly be out of condition by August. This will be an easier mountain to recon, which gives me some piece of mind – if I do, in fact, manage to recon it!
Atlantic Peak to Fletcher Peak Traverse
Update: I skirted around the Atlantic/Fletcher traverse on the Tour of the Highest Hundred, but took it on as directly as I could during my Mosquito/Tenmile traverse, which you can read about, or watch my video diary.
Finally, I’ll try to cover the Atlantic Peak to Fletcher Peak Traverse, but there’s quite a bit of unknowns about it for me – some trip reports call the finger crack crux at up to 5.7 (perhaps I’m wrong about this?). This may be a bit too futuristic for me to reasonably take on, during the last leg of my tour, so I may have to recon the route to find a sneak around this, or bail on my idea of enchaining all the Centennials in the area together.
And that’s about it for, “hardest part of a really hard adventure”! I may have spaced a few mountains – I purposely skipped over the Crestone Traverse – the climbing is exhilarating and the real threat is afternoon thunderstorms like much of the rest of the mountains. I have also skipped over Longs, as Longs is my backyard mountain and I am deeply entrenched in a long-term relationship with it. I look forward to many challenges it presents to me. I skipped over some optional routes like the Harvard/Columbia traverse, which goes at 5.7. I don’t know yet if doing the high traverse is worth doing, rather than the standard – and much easier lower traverse.
