Like this? Follow me:
- Pros: BRIGHT, dependable, replaceable batteries AND charging via USB supported, weatherproof, battery charge indicator
- Cons: Mounting system needs work, best to use something like the Magicshine Out-Front Bike Mount accessory
- Weight: ~194 grams /~6.8 ounces
- Battery Life/Runtimes:
- High 1.55 hours
- Medum 3.35 hours
- Low 5.55 hours
- Blinking 6.35 hours
- Interesting To: any cyclist that wants to be seen: commuters, bikepackers, long-distance riders
- Best For: city commuting
- Price: MSRP: $99.99
- Purchase at: Amazon
- More information: https://magicshine.us
It’s rush hour. I approach the busy intersection cautiously. I’m in a bike lane, but my side of the road is choked with cars that want to make a right turn. Once our light switches to green, I feel it’s a race to get out in front, before I get side-swiped by someone that wants to make that right turn, crossing the bike lane I’m in. Then, I hear someone yell out their car passenger car window. My anxiety heightens:
“HEY!”
“HEY! NICE LIGHT! I CAN ACTUALLY SEE YOU!“
My stress levels return to normal, and I’m relieved that the car besides me not only knows I’m there, but acknowledges my presence with a compliment! The light I’m using? The Magicshine MONTEER 1400.
As Fall turns to Winter, and a lot of my riding happens now at night, it seems fitting to investigate some lighting solutions I’ve been looking at. I’m willing to invest in a nice light, as my main form of transportation is my bike. My main goal is to see, and be seen. I’m usually either riding the streets at night, or riding trails bikepacking, but both scenarios need the following for a good bike front light:
- Long Lasting and Dependable. For the majority of riding, I want a light that can be on for a long while between recharges. I want it to Just Work, to not fall off, to not turn on expectantly (while stored in a pack, say). Seems like an obvious wish list, but you won’t believe how many times this gets done wrong.
- BRIGHT! If I want to flood my immediate vicinity, give me that choice. When I’m going Mach 5 down a winding road, I wanna see every piece of sand on said road. If I’m in a busy intersection, I want the light to scream: “Here I am“.
- Rechargeable. Make it easy to recharge the batteries without making me carry half a toolbox of cables and chargers. Make it easy for me to swap out batteries with freshies if need be.
- No Nonsense. I don’t want external battery packs and wires running all over the place – these just get in the way and get broken. External battery packs just hide the fact that the batteries inside are ones I can buy off the shelf cheaper than buying an entire battery pack.
There’s many different lighting solutions out there, including battery-free, dynamo-powered lights. The fact still remains that a battery-powered light is going to be brighter than a dynamo-powered light. A dynamo-powered light is also going to be more expensive. In the end, it’s convenience of not needing a external battery source (outside of the dynamo wheel, of course), may make it a fine solution. But, if you have more than one bike and you wanna fully invest in dynamo lighting, you probably need more than one of everything. With a battery-powered light, you can swap things out.
In this review, I’ll be talking about the Magicshine MONTEER 1400 USB Bicycle Light, and why I picked it.
Features
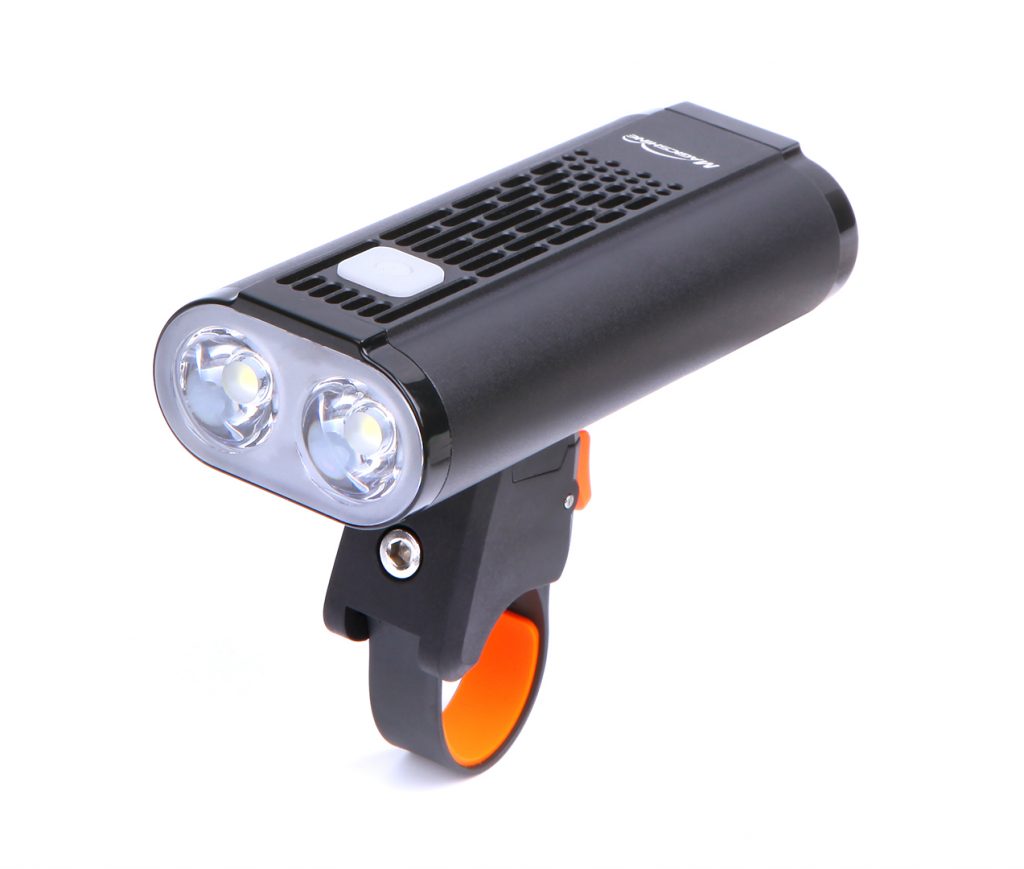
The Magicshine Monteer 1400 is an all-in-one unit – no annoying wires leading to heavy, external batteries packs to break or get lost, and is powered by two 18650 rechargable lithium-ion batteries. It has four no-nonsense settings: Bright, Medium, Low, and Blinking that control its dual LEDs. These settings are controlled by a single button on top of the unit. This button also has a faint embedded colored LED light to tell you if the batteries need recharging:
- Green: 100% – 20% Charge
- Red: 19% – 6% Charge
- Flashing Red: Red: 5% – 1% Charge
The entire unit is attached with a included mount to fit onto your handlebars. The unit seems fairly weather-proof, so don’t worry about riding in the rain (IPX4).
All fine and well. Here’s where it gets interesting:
Battery Flexibility
The light can be used with only one battery! Remove one of the batteries, and only one of the lights will turn on, with all four settings intact – just you know: with one light instead of two. Allowing this allows you to double your run time. That’s K.I.S.S. brilliance for you. If you’re out in the field and can’t find a 18650 light, you can swap it out for two, non-rechargable CR123’s, which you can usually find in most well-stocked gas stations. 18650’s can be found cheaply in bulk online (I go to a specialty battery store here in Boulder if I need a quick fix).
I’ve also invested in an array of lights that use this same 18650 battery, like the Zebralight H600Fw Mk IV Headlamp. For off road/pavement night riding, I often will run a bright, handlebar-mounted light as well as a helmet-mounted light that I can use to easy change the direction of the beam of light by simply moving my head. In a commuter setting on the pavement, this also allows me to shine a light at traffic that may be coming from a street I’m crossing, to let them know, without a doubt, I’m there (and very visible!).
Charging
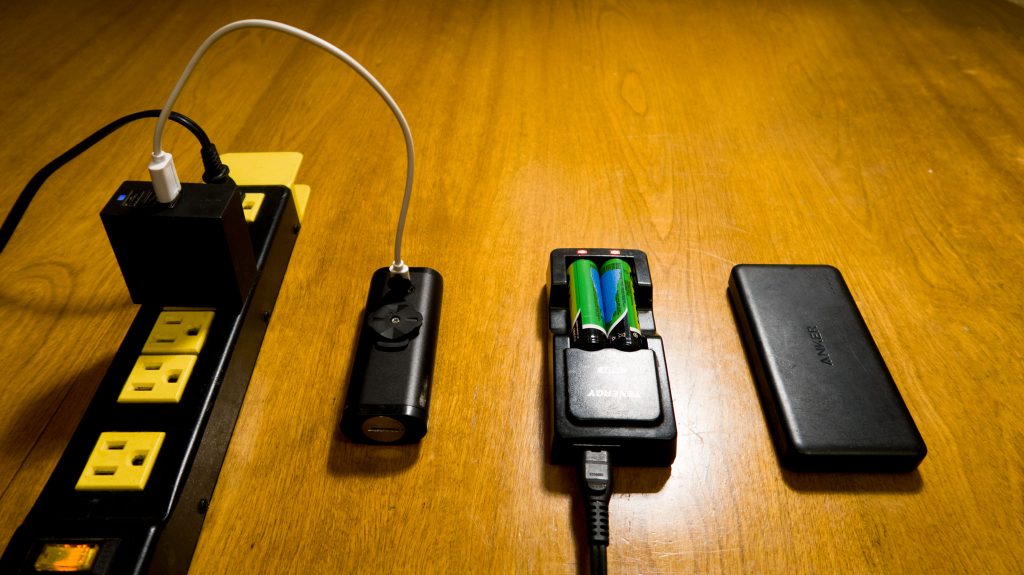
The light also has a built-in charger via a mini-USB plug – just plug the entire unit in! This makes the light bikepacking-worthy as far as I’m concerned, as you can plug the light right into a USB port to charge on a wall socket, or external USB battery. You can also use this as a general 18650 battery charger, by swapping charged batteries for ones that need some juice. This negates the need to carry a standalone and bulky 18650 battery charger. That’s a huge win over other models I’ve used.
Mounting
The included (Eagle) mounting system needs work, unfortunately. Major problems are that most of the mount is made of plastic, and when put under the amount of torque to properly keep the light from bouncing, it’ll simply sheer off. Below are two examples of how I’ve destroyed the mount:
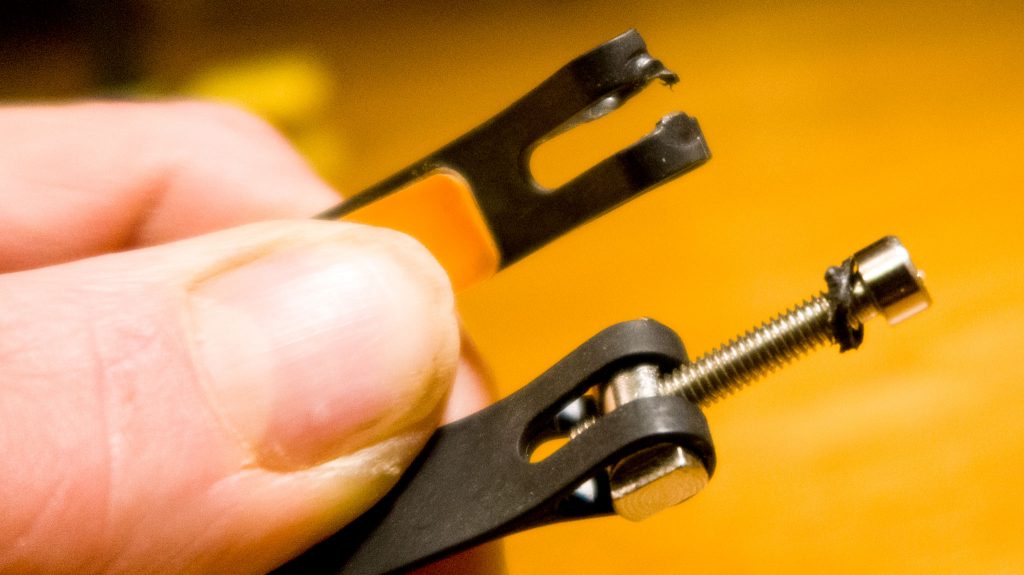
On the top, the plastic that surrounded a bolt gave way, allowing the bolt to slip; on the bottom, a different bolt ripped through the plastic of the body of the mount.
Instead, I would suggest getting the Magicshine Out-Front Bike Mount, to gain some piece of mind. The light with two batteries in it is not lightweight, and bumpy roads will make quick work of your attempt of keeping the light in place with the included (Eagle) mount.
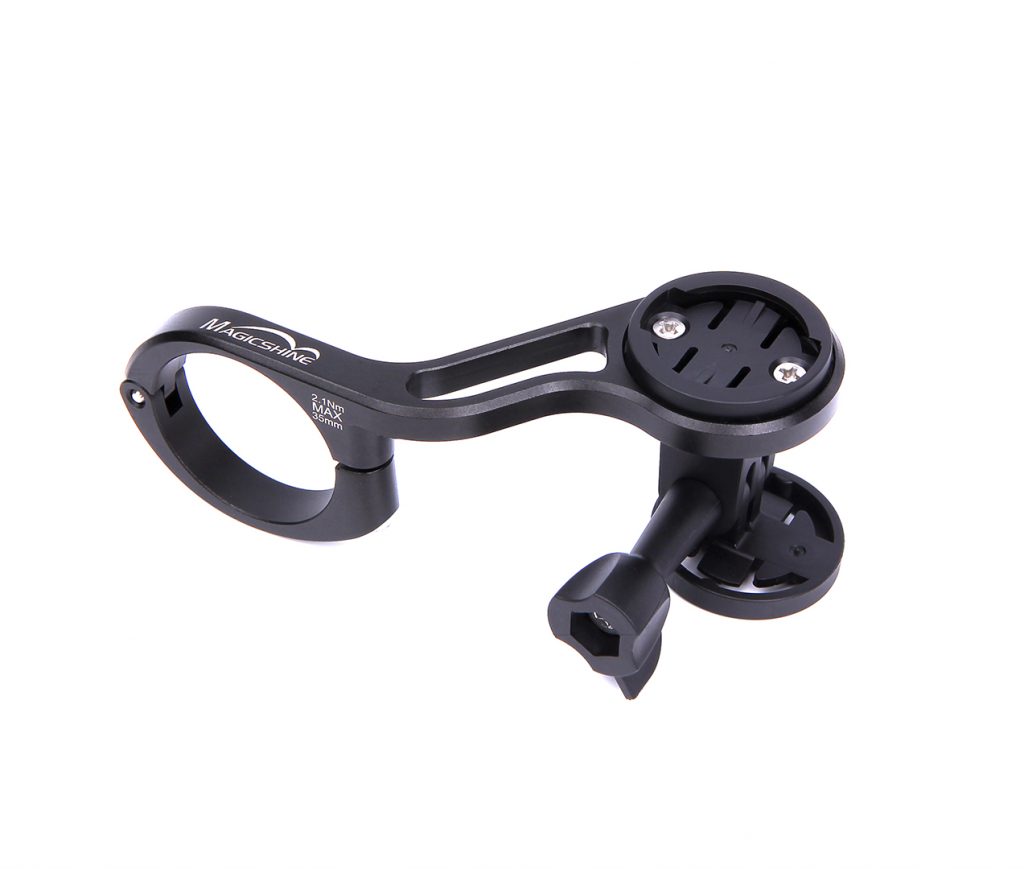
The light will fit on the Out-Front bike mount much like a Garmin GPS unit, twist-locking in place. This mount will also allow you to run an action camera, garmin unit, etc, while also allowing you to run the light at the same time. Swapping out various accessories is also easy, once you’ve set things up. This mount itself feels very sturdy, completely made from aluminum (rather than plastic), and is light-years better than the included Eagle mount.
You’ll have to switch out the base on the light itself, so once you go for the out-front bike mount, you can’t switch to the Eagle mount easily. Why front light bike mounts haven’t been thoroughly standardized is beyond my comprehension, and perhaps: a bit over the pale of this review.
Sadly, if you already have a mount that looks similar to this for say, a garmin unit, you can’t just buy the mounting adapter (cheaply) for this light separately from Magicshine. In a pinch, you could find a garmin mount adapter, drill a small hole for the bolt that goes into the light itself, and DIY it. I decided not to go this route, since I didn’t have a Garmin-style out-front mount to begin with. Garmin’s, as well as third party offerings, were about the same price as Magicshine’s solution, so I just went all-in, and have been happy with that decision.
Weight
Magicshine lists the weight of the unit at 104 grams. Two 18650 batteries will weight about 90 grams, so 194 grams total for the light (.43 pounds).
Enclosure and Design
The light itself is made of an aluminum body, and feels plenty ready for a bit of abuse. There’s no visible screws in case you want to do some self-maintenance, except for the base for the mount. I’m not sure what you could repair if something on the light breaks. In my experience, the only thing that breaks on these types of lights are wires from the batteries to the LED lights, and since this light doesn’t have any, that problem is negated.
The power button is located on the top of the unit. Pressing it will turn the unit on, and additional presses will cycle through the different power levels/modes. Pressing and holding will turn the unit off. I haven’t had problems with this light turning on by itself will being stored in a pack – the light needs a pretty good push to turn on (with a nice “click” as tactile feedback). If you’re anxious you may turn this light on by accident, putting a small bit of paper on the negative side of the batteries at the back of the unit on both batteries should provide a simple way to lock the unit (the light itself has no lock). I wouldn’t suggest putting the batteries in the wrong way!
Internals
Batteries – if you ever need to take them out, are easily accessed from the back of the unit. You’ll need a quarter, or a knife, or some type of similar tool to twist the back off. Curiously, it’s a turn to the right to unlock. Both sets of lights go in positive-first, rather than one positive; one negative. The back panel has some fiddly little bits if metal that you want to make sure are aligned correctly. If they’re not, one or both lights will fail to work, as the battery circuit isn’t correctly completed – it’s honestly a little delicate back on the back panel, so do be careful not to damage things. If everything is set up correctly, one shouldn’t hear any rattling.
The mini USB port for charging is located at the bottom of the unit, and is plugged up with a rubber bit. It does fit back on snugly, once you’re done with the port itself.
Run Times
According to Magicshine, the following run times should be expected:
- High 1.55 hours
- Medum 3.35 hours
- Low 5.55 hours
- Blinking 6.35 hours
In normal use, running this on, “Low” is what you want to do – it’s plenty bright. When I approach a busy intersection, a particularly nasty stretch of road, or technical singletrack, that’s when I bump this thing up to, “high”. Only if I have an additional light, would I use the, “blinking” setting (hmm, or even then…)
Price
As I write this, the light itself running around $99.99. The light that I suggest runs itself around $39.99. This is a serious light for bikepacking and commuting, that puts out some serious lumens. It’s definitely an investment. This isn’t a light I’d leave just hanging out on a locked bike in a high-theft area, but either the included mounting, or the additional mounting solution are so easy to use, you shouldn’t have a problem keeping it with you, in your pack.
Do I suggest it? It ticks a lot of boxes for me: it’s affordable enough, puts out a lot of lumens, is flexible on what it takes as a power source and seems dependable. What I wouldn’t suggest is riding a bike – especially commuting, with a dinky hiking-style head lamp. Don’t fool yourself: it’s not enough light to be legitimately visible to drivers at night. Get a real bike light, and the brightest one you can afford. The Magicshine MONTEER 1400 might just be that light!
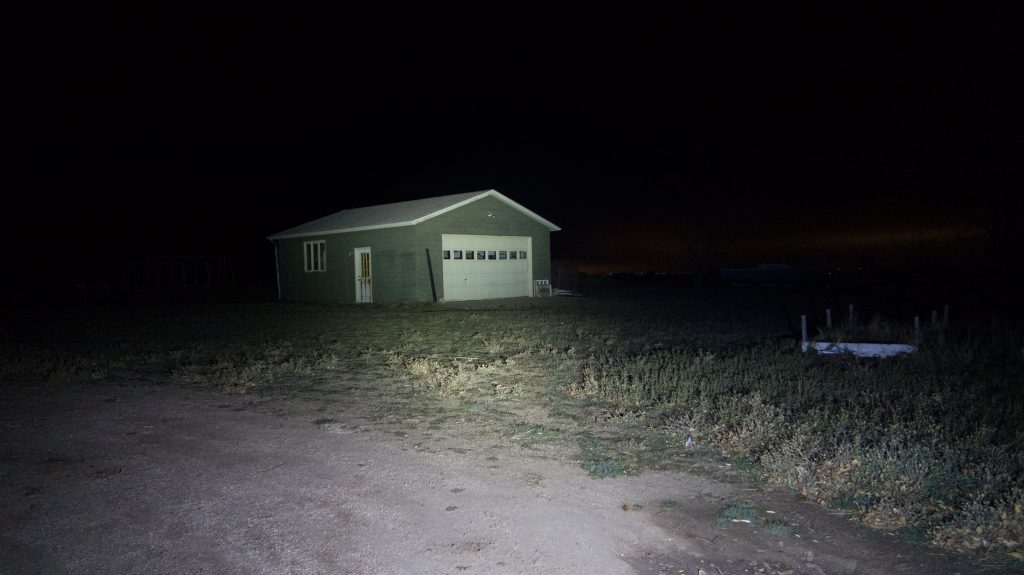
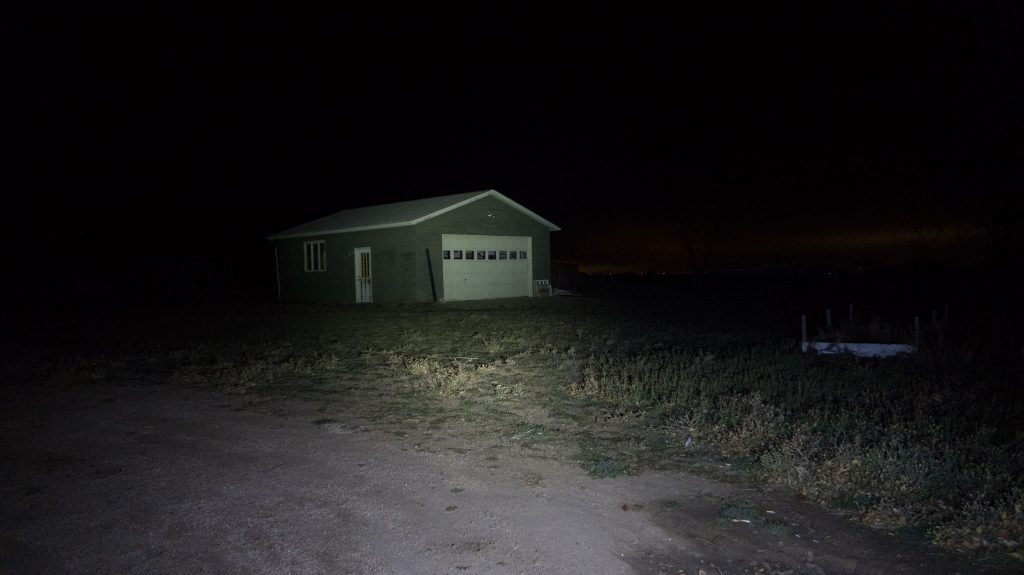
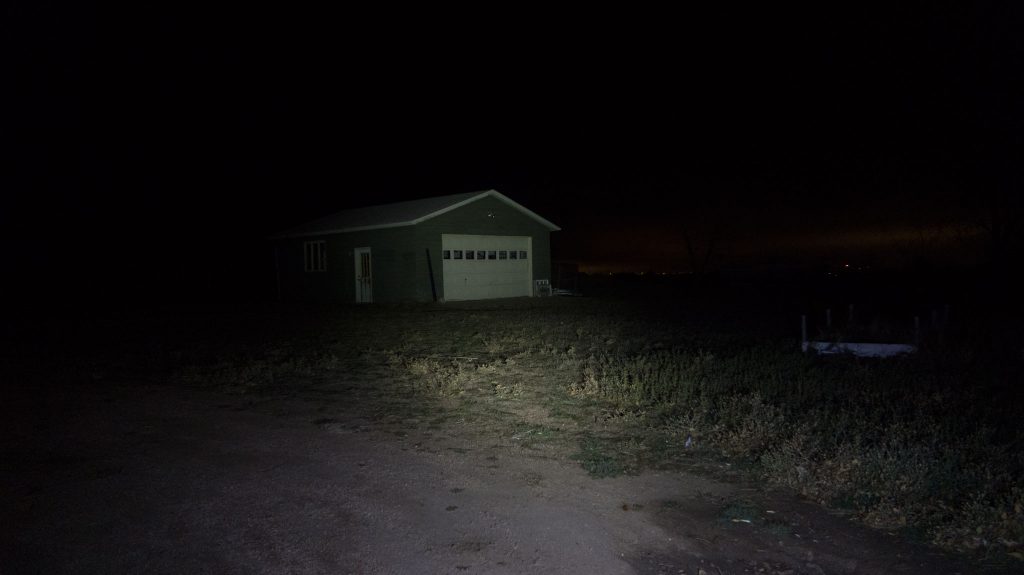
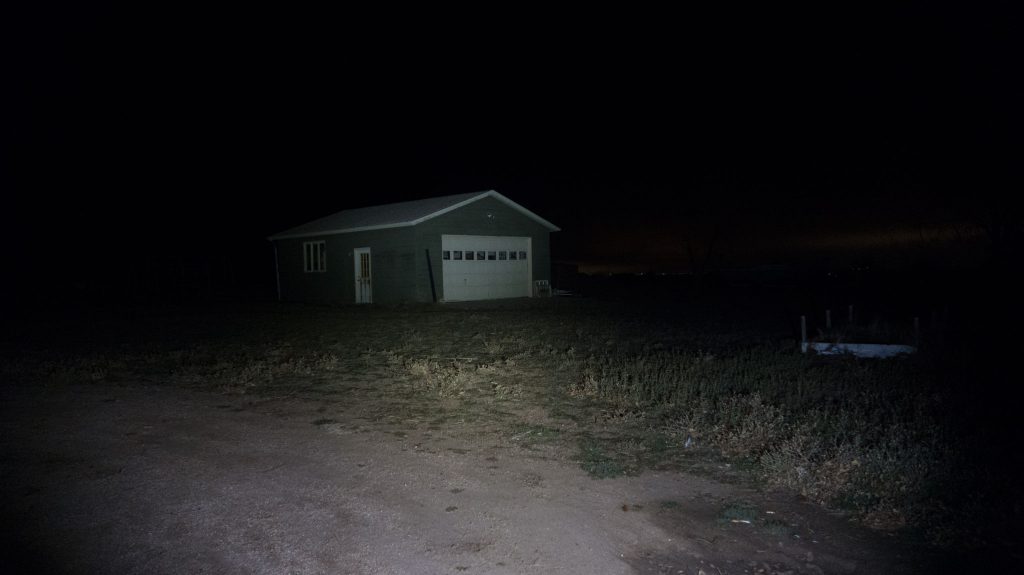
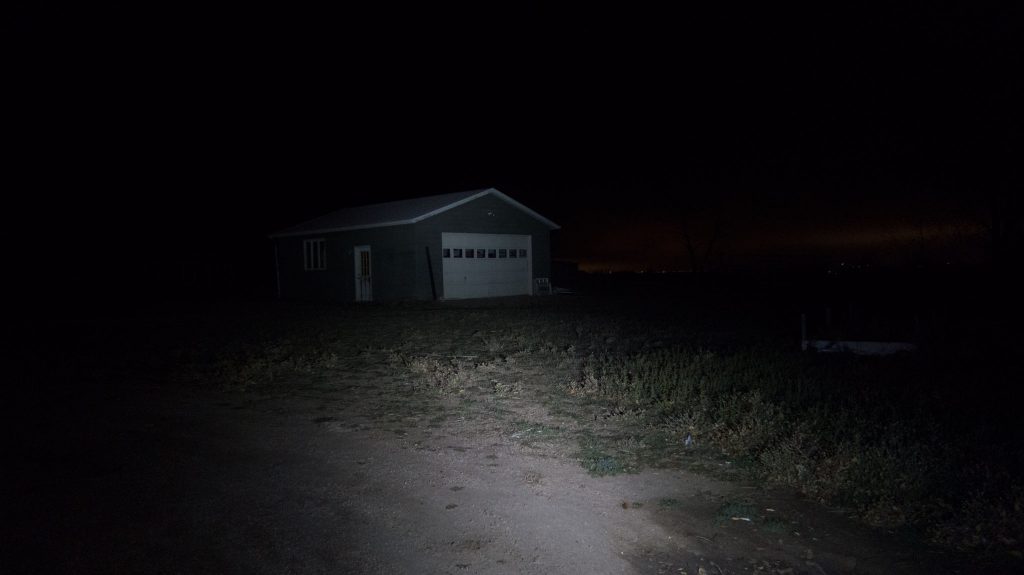
Examples
Each of these images is shot @ ISO 800, F1.8, .5 seconds exposure. The garage is at around 100 feet away. Note that different batteries and number of batteries are used in these various lights.


[…] so that I can use it for hours on, without having to trade in new batteries. See my review on the Magicshine Monteer 1400 for an example of a handlebar mounted light that I find worth your money. A handlebar-mounted light […]
Not sure why Magicshine insists that the Monteer 1400 will only run on their batteries. Presumably their aim is to increase sale of their batteries. I’m guessing that the 1400 will run on any 18650 battery.
Yeah, it most certainly will run on any 18650 (that’s easy to confirm!). My guess is that they just make a lot of money on selling batteries. My model, I believe, came with Magicshine-branded batteries.