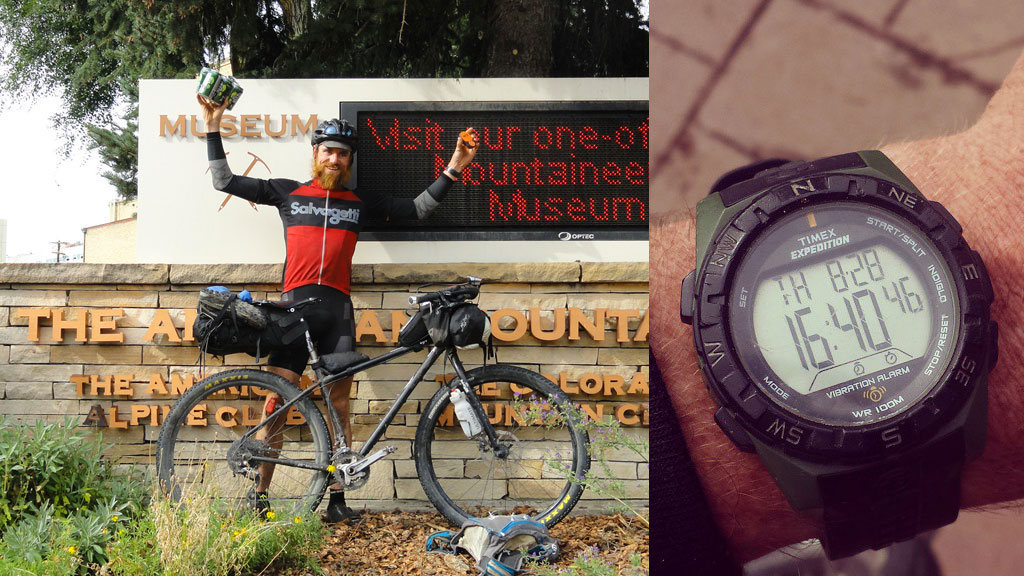
 Shortly after finishing up 34 days of bagging some high peaks, self-powered.
Since completing my own Tour 14er, where I rode to, then summited the 58 (by my count) Colorado mountain peaks over 14,000 feet, I’ve started to get a fair bit of correspondence from people telling me that they’re inspired by what I’ve (and others) have done. They think to themselves: Boy howdy: I own a bike and there’s a group of mountains nearby that have that siren-like song attracting me to climb them – why not use my bike to ride to all of those mountains, then summit: fair means and self-supported?
Then they ask me, “So well: what are the details? How do you pull this off?”
(Work in Progress)
And I’m left with perhaps conflicted ideas. Primarily I feel a painful amount of Imposter Syndrome: what do I really know? What’s the big secret that I discovered that unlocks this whole thing?
Of course, there is no Big Secret, but I do have some practical advice to give. It’s compiled from just getting out there with curiosity and wanting to have some fun. I tried a bunch of ideas, made a bunch of mistakes, found out what worked for me, and I’ve continually evolved my own personal way of doing things, and it’s just gotten funner and funner.
Speed, yeah: I guess that’s important, if you’re keeping time – and some already-established record to beat w/rules to follow or whatever – but truly, those were for me only a tool to keep me on the task at hand. Discipline, in other words. Without it, I don’t know if I’d finish the initial challenge.
Riding a bike to the mountains is a sure way to get yourself into all sorts of interesting circumstances that have nothing to do with setting FKT’s: clothing optional hot springs parties; musicians getting together in mountain cabins far away from anyone that would complain about the noise level at 4:00am; chemically enhanced tribal experiences with a circle of trusting people; trails that are on no map that need to be followed to the end; finding yourself somehow in a different country, now married.
This list goes on.
My only warning is that if you’re not going for some sort of FKT attempt, it would be a shame to close the door to those sort of spontaneous life experiences. You’ll have other, different experiences by limiting what it is you allow yourself to do which will have its own magical cathartic experience associated with it, but it’s just not the only way to go about it all and I don’t dare suggest that there’s only one true way.
This is going to be a living document, as I kept getting questions asked: I’ll try to figure out what it is I came up with, first by figuring out the problem I had, then offering solutions that worked for me. You’re still going to have to use your own brain to solve all these problems.
My background is an Artist – I have degree in Drawing and Painting. Before I was 25, the closest I got to athletics was skateboarding. In my higher learning, I was taught how to imaginatively find solutions to problems that don’t exist – I had to make those up, too. The outcome was the finished art project. The process I had to follow was whatever I wanted.
Core Concepts
The below is practical advice when going about taking on a self-supported, self powered challenge.
I started out with ultra endurance mountain bike races like the Tour Divide, The Colorado Trail Race and the Arizona Trail race (I have yet to actually compete in a, “official” mountain bike race. These races span a few days to a few weeks. You’re required to follow a specific course, and times are compared. Rules are based on being self-supported.
Later, I got interested in using a bike to travel to various mountains and their trailheads, to then summit them, usually by foot. The course was up to the challenger – whatever made sense and was best optimized for the challenge and the object was to summit all the peaks in the course. That’s what I’ll be talking about below. You can use this same advice for an ultra endurance mountain bike race, or a thru hike, or what I prefer: a sort of remix of the two. Use what makes sense.
Race Rules
Race rules are just general guidelines that challengers agree upon, before setting out on a challenge, in the hopes of having a level playing field. There’s many ways to go about them:
Fully Supported
Generally, fully supported means there’s a support crew in a vehicle following you around and resupplying you. This makes whatever challenge you’re taking on a team effort. Lots of different tasks can then be given to different people: someone in charge of driving, another for planning meals, another for navigation, etc.
Examples of fully supported FKTs are:
Scott Jurek’s Appalachian Trail FKT
Scott’s wife, Jenny, did most of the support, driving around a van to meet Scott at various parts of the trail to resupply him with food. I believe there was also a film crew? Scott still undertook the entire trail by himself, on foot.
Andrew Hamilton’s 14er FKT
Andrew Hamilton now holds the fully supported record for summitting all the Colorado 14ers at an incredible 9 days, 21 hours and 51 minutes. Hamilton used rules based on the previous record holder, “Cave Dog”. The rules allow for an entire support crew and Andrew had at least three separate vehicles, a downhill mountain bike and a large rotating cast and crew to fill various needs throughout the 9+ days. Transportation between trailheads was done in vehicles.
Self Supported
Self Supported is the basis of the Tour Divide, Colorado Trail Race and Arizona Trail Race. They all have their own unique sets of rules, but they boil down pretty much to the same thing: do it all yourself. Supplies can be attained from any commercial store (gas station, restaurant, hotel), but no pre-arranged support by a friend along the route is tolerated. You can also look at the rules I developed for my own Tour 14er challenge.
Unsupported
Unsupported basically means you carry all the supplies you will need from start to finish, save for water, which you may pick up en route. No other supplies can be bought, found, or bartered along the way.
Short distance (relatively speaking) challenges, like the various Longs Peak Duathlons and Triathlons can be done in an unsupported style, since all you need is food to bring along and the challenge lasts much less than a day.
With careful planning, longer challenges can be successfully completed. One example is the unsupported thru hike of the Colorado Trail, where all food was brought from beginning to end.
When it comes to what rules to use for your own challenge, my suggestion is to go with Self Supported, and if possible Unsupported if that seems realistic. My opinion is that there’s more purity in going at it alone, it’s more sporting and it’s more of a intellectual challenge. Do what you personally feel is right. Whatever you do, just report how you did everything, the only thing that’s not OK is lying about how something was accomplished.
On Designing the Course and Challenge Itself
One of the great delights of FKTs is that you can decide and design what the challenge will be and attempts at it are done whenever someone feels like it, with no one’s real approval. One feels great joy in designing a good challenge, then sharing it with others. The anxiety of a looming race date is completely removed. You go for it, when you’re ready.
What makes a good challenge?
Repeatability:
Can someone else go out, and do the challenge themselves? Are there access problems on the route?
Interesting, but Obvious:
Does the challenge traverse an interesting course? Does it follow something that’s so obvious, it begs to be challenged?
A full traverse of a ridge line, like the Fitz Roy Massif in Patagonia is an obvious, interesting challenge, that just begs to be done, but still is a very difficult challenge, which also makes it attractive.
Is it already established as a Classic? Take an existing line, and see how fast you can go! The Nose Route on El Capitan is a super classic, and has a rich history of speed climbing.
Why make it self-powered at all?
Many of the examples I’ve given are either singular activities: running, cycling OR climbing, but not two or all three. Why do them all together? In short, because it’s super fun to do so, and adds another dimension to a challenge. Why use a car, when you can just use a bicycle? It makes a challenge simpler to plan, and cheaper to pull off. It also makes it a human-based challenge, rather than a challenge based on machines and humans. Personally, it also fits my background and passions: I’ve been car-free for most of my life and I love it. Using motorized transportation to do an FKT would seem a little strange to me. Perhaps you can relate.
Being well-conditioned in all three disciplines is rare. How will your strengths in one compensate for your weakness in the others? How will your strategy differ from someone else, with a different background?
How Do Your Train?
My main goal is to have a whole lot of fun, it’s not to win a World Series, so training is not how I frame things. I’ve relied on keeping a high level of stoke to keep myself progressing. If there’s no internal drive, why would you want to do this?
Rather than training, I’ve always like to frame what I do, when I’m not doing the Big Stuff as “practicing”. You can practice drawing, or a musical instrument, or a martial art; you can also practice riding a bike real good, or running up and down a mountain swiftly. The act in of itself is its own reward. Practice should be a source of immense delight – almost a synonym for, “playing”, which also brings the idea of imagination.
The “training” part: gaining a higher level of fitness through some sort of structured agenda of workout sessions – yeah: it’s part of it, but it’s not such a big part of things that I’m compelled to labor over the finer details myself: most days I go pretty damn slow, some days I kick it up a bit more. When I’m tired: I rest. When I’m bored, I switch gears and do something else I find enjoyable. I’m a seasonable person as well: in the summertime, sometimes I can’t even sleep; in the winter: sometimes I stay in bed for multiple days.
So, do you need to train in the conventional sense at all? Well, yeah. That’s like asking, “Do you need to work on your verb conjugations, if you want to get better at speaking French?”. You need to do it, but unless you’re surrealistically sadistic, that’s not the Big Picture Goal: Your goal is probably to talk fluently to a person you find attractive in a foreign country in an attempt to spend a magical night with them. The best way to do it is to (say): go to France and strike up some conversations – who knows where that will lead. Use the verb conjugation “training” as a supplemental part of it all. You get better by doing. It’s a lot, “scarier” (whatever that means), but the payday is much richer. Don’t ever use a supplement when you have the Real Thing available instead.
Have discipline and moderation in anything you practice: it’s better to do consistent practice regularly, rather than do an overwhelming amount sporadically – the latter will lead to burnout and injury. Practicing is a tool to literally rewire your brain – to change how you think/react/understand. What you’re practicing for should almost feel nonsensical, or you’re not setting a high enough goal. When you get better at something, it should feel amazing – as if the ground has slightly shook around you, and nothing is quite as it was before. That in of itself is an experience worth repeating, and will keep you stoked on practicing.
One book I suggest where they do not try to pussyfoot around the idea of structured training in the hopes to gain a next-level advantage is Steve House and Scott Johnson: Training for the New Alpinism, which lays it all done pretty clearly. Love the book, you will too.
Sleep
How much should you sleep?
Sleep, like most things is going to be individual. If you’re going for an FKT, the idea is to go as fast as you possibly can, so like many things, the more you have of it, the slower you’re probably going to be since sleep also means you’re not moving anywhere. So, utilize just as much as you need, and no more.
Some people can get away with not sleeping for days; others are a wreck without a good 8 hours/day. You’re probably going to fall somewhere in between. Suss it out when practicing your art. You’re probably going to experience wanting both to sleep more than you are and less than you want to at the same time in a bizarre internal struggle.
Figure out if this is because you need the rest, or it’s your emotional subconscious telling you want it wants, rather than what it needs. For me, this comes out with my inner voice attempting to strike a deal with me. It’s almost as if it’s trying to convince me how good it would feel to have that few extra hours of sleep. “Don’t you wanna stop? Wouldn’t that feel great? You’ll be so much faster, afterwards! Sleep is important! Yes! Sleep. Dreaming! Yes!”
Your body wants you to be in a state of homeostasis, and this is just not going to happen when you’re on a multi day/week ultra endurance batshit crazy adventure challenge. Come to terms, acknowledge and understand this. You’re going to shake up this delicate balance your brain and body want to keep and you’re gong to do it for far longer than say, what is healthy for you. You’re going to pay for this after you’re all done: it’s going to suck: most likely you’ll engage in classic signs of overtraining afterwards, because buddy: that’s exactly what you did.
Sleep deprivation is not something you can “train”. You don’t become better at it (via adaptation) the more you do it, like you can when strength training. Probably the opposite. But, when you are in the act (practice) of doing it, you can start developing an understanding of the experience you’re having, the emotions you go through, and the mental trickery you self-undergo. From those experiences, you can take a distanced, objective (or closer to objectivity) perspective of what you’re going through, and then make a call. Thus the battle with the Sleep Monster can commence.
Sometimes that call is, “Keep moving!”, and sometimes it will be, “Stop and Sleep!”. I would not suggest anyone to forgo sleep, if what you need is intense concentration: if you’re climbing something technical and need those extra IQ points that seem to be dropped when you go with a night or three of sleep – I mean, my God: get enough rest to do the climb safely. The idea of cheating some hours of sleep
a day is not to be misrepresentative to yourself and your needs at that very moment, it’s to realize that you’re Internal Governor for sleep is conservative, because it’s looking at the big picture of your health for over the long run.
So long story, short: try to figure out what the minimal amount of sleep you can get away with is for the short run, and realize that it’s going to affect you later, after you’ve stopped putting such a stress on your body.
How Do You Sleep?
In a tent, in a bivvy? Indoors/Outdoors? Wearing clothes? Naked? During the day? At night?
There’s so many questions, it’s always going to be a, “it depends”.
Let’s go back to that underlying principal of going fast: when it comes to resources, utilize only what you need, and nothing more. The shorter the “course” is, the less you’re going to need for bedtime, pretty much because the less you’re going to sleep! Sleep on a coupla day challenge is going to be a few cat naps, and away you go. Maybe bring a puffy to snuggle in. If you’re going for the record, and the current time is stiff, there’s just so much quickness you’re going to be able to run/pedal; it sometimes comes down to sleeping less and being more efficient at everything else. That’s the game we’re playing.
If you’re doing the Tour Divide, a 2700+ mile mountain bike race that crosses the United States: you’re going to be on the course for weeks, so guess what? One winning strategy is to bring along an entire sleep system comprised of a UL bivvy, a UL sleeping bag, and a UL pad, so that when you stop for a couple of hours every night, you’re warm and comfortable, no matter if you’re in The Flathead Valley of Canada and it’s snowing, or you’re in some ditch south of Pie Town, New Mexico, hiding out from a rabid pack of javelinas. The sleep you get will be of some quality, since again: sleep deprivation isn’t something that you build up an adaptation for – the negative aspects of it just compound over time, so you’re strategy is to minimize that as much as you can.
This is an area where weight becomes an issue and you’ll have to figure out where the cost/benefit is best for you. Will lugging an extra few pounds of sleeping kit garner a better night’s sleep, leading you to go faster/more alert when you’re awake? Or will the extra baggage itself just slow you down when you’re not sleeping, making it a zero sum game – except now you have to manage all that extra gear that’s not doing anything really important?
There’s also the option of sleeping indoors, in a motel. This works for many. You could skimp even more on your sleep system, knowing that a full-sized bed is awaiting you at the end of… whatever timeframe it is since you last got some shuteye. Perhaps even bringing only an emergency bivvy, and no more, on those rare occasions you can’t find a motel to crash in for a few hours. There’s negatives to this, one being cost (expensive!) and the other being lack of flexibility – what do you do if there’s no motel? You’re SOL.
Either Camping or Hoteling it, what you don’t want to do, is carry a UL sleep system that’s appropriate for all the time you’re hoping to be out, and utilizing it only a fraction of that time. The time you’re not using it is wasted potential energy of lugging it around, without employing it. In that case: you’re entire efficiency has gone down, which is the opposite of the ideal situation.
Sporadic motel nights are good times to wash clothes, recharge batteries, clean yourself, and sort gear in a climate controlled room. Still be careful with this resource, as it can suck up time and creature comforts are a difficult treat not to overindulge in. For me, being clean is a nicety, and getting dirty is somewhat of a downer. Once I’m dirty though, I get used to it, and tend to stay pretty dirty. Showers every couple of days just give me a temporary sense of relief, until I begin to get dirty again, and have to go through that entire process of dirt-ification until I’m comfortable looking, feeling and smelling awful. Sounds gross? Kinda is. Revel in it, you’ll think back during that board meeting the Tuesday after you get back.
Ultra endurance challenges are rarely won by the fastest; they’re won by those who are most efficient, clever, imaginative and resourceful.
That’s what you gotta play with: length of the challenge, conditions, quality of sleep you hope to get, weight of your sleep system (if any), then any personal requirements. Adjust to the challenge.
Sleep System
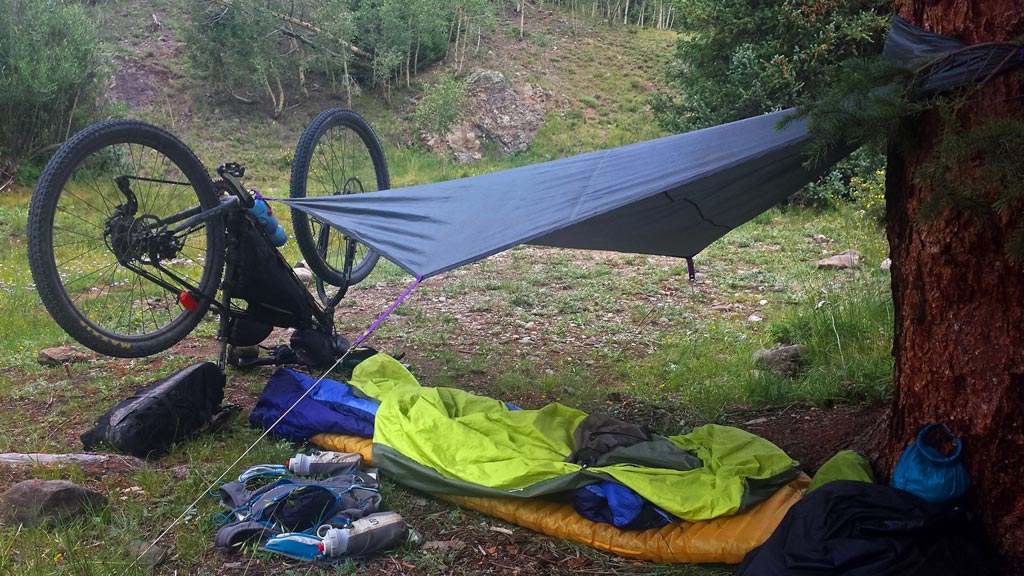
Home, sweet home, for the next couple of hours, before bagging Redcloud, Sunshine and Handies
When peak bagging on the clock, you will not be camping – camping is an activity in of itself, which is closely related to, “having fun”, “drink with buddies” and, “having fun, drinking with buddies and fishing”. You’re goal is to rest, recoup. Setting up/tearing down needs to be kept to a minimum, since it can be a real time-waster. The more gear you have the long it takes, the more mental energy it warrants to keep everything straight, the more expensive it can be, the more likely you’ll lose something. Keep things simple.
I now favor a bivvy-type system, and I currently utilize the following items, that I’ve picked up over the course of my wanderings:
A UL sleeping bag. I currently use a 40 degree UL down bag, sold by Kelty.
For ultra light, three-season sleeping in Colorado, that’s all you really need. Anything warmer, and you’re going to risk overheating – compensate on cold nights by wearing more clothes. I usually wear a wool balaclava while sleeping, so that I can keep my head outside my bivy.
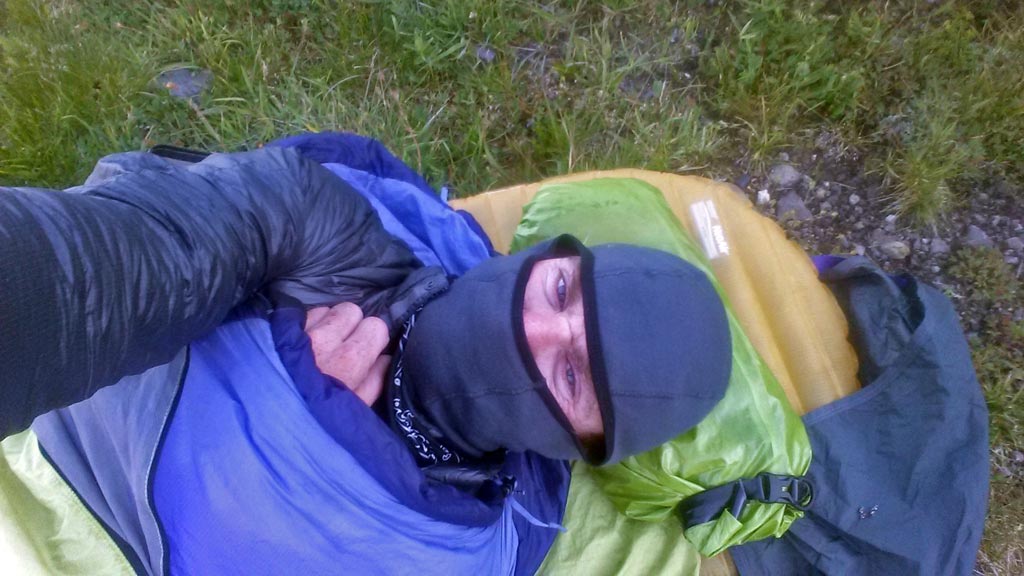 Sleeping near 13,000′,
A sleeping bag liner. The liner keeps my bag cleaner and warmer. Perhaps you may go without, depending on the rating of your bag, the amount you mind you bag being dirty and your delight cleaning down, after sleeping in it for weeks at a time. Sleeping bags are beautiful items that I think, demand that you keep them in good condition.
I use the Sea to Summit Thermolite Reactor liner. It’s really warm. For summer nights, almost too warm, and I’d be better off with something a little lighter, like this little number:
9oz, rather than 14oz; probably packs down a lot tighter. I went with the former when I did the Colorado Trail Race, as I went sans sleeping bag completely. I fool’s move, but “sleeping” wasn’t much of a forethought – the winner averaged less than 90 minutes/night, for 3 nights.
What I wouldn’t suggest is a liner made of silk, as it does a good job with keeping a bag clean, but not so much heavy lifting keeping you warm. I’ve also never had a silk liner that didn’t get ripped to shreds.
A UL bivvy; Something like the BD Twighlight Bivy.
Pluses on this specific bivy:
As simple an light as can be
Packs down to almost nothing
Minuses:
Not waterproof (use a tarp, for more flexibility!), but will keep you a little more warmer than without a bivvy at all, and should keep the dew out (although it’ll keep perspiration IN). If wishes were fishes, it would be nice to have a zipper at the bottom of your feet, to create some sort of ventilation.
A UL pad: currently, I’m using a Thermarest XTherm (similar to this little number), after being a very happy user of the related XLite pad model. The XTherm looks a little heavier, but I sized down to compensate. The XTherm is also much more warmer than the already toasty XLite, and seems to have much more resilience to sharp objects on the ground. Being warmer – in fact, being rated for winter use, means I can skimp more on the other parts of my sleep system.
A tarp. Since nothing in my sleep system is 100% waterproof (except the pad, I guess) and my bag is down, which is borderline dangerous to be in when wet, I utilize a sil-nylon tarp to cower under when it’s raining. My tarp is nothing special – it’s a replacement ground cloth for a tent I picked up at the local sporting goods recyclery. I’ve tied pieces of parachord to some of the ends, and I bring along a few light tent stakes. In the majority of situations I’ve put myself into. this is all I need. If I feel there’s no chance of rain, I’ll use the ground clothe as, you know: ground cloth, which helps with wear and tear of my bivvy and can help with unfortunate pin holes developing in my blow up sleeping pad.
I upgrade my sleep system periodically, and this part may be the next thing to get an upgrade. To what, I’m not entirely sure. It would be nice to have a little bit more area of the tarp and perhaps have a little thinner material making up the tarp, if that doesn’t compromise the waterproofness of the system. I don’t know if moving from cuben fiber is a reasonably cost effective move, but it’s something to research for sure.
All this is stuffed into a Sea to Summit Compression Dry Sack, and lashed to my handlebars. When packing, pack the items that compress the best first. For me, my BD Twighlight Bivy is made of the thinnest material, so it goes in first. Then, my sleeping bag, tarp, sleeping pad and then my liner. My liner is made of think polypro and resists all attempts at compression. If it’s at the top, it’s easier to mess around with it, without having some weird pocket of air at the bottom that is impossible to remove, without taking everything out. The sleeping pad is also annoying to attempt to compress, but I usually don’t stuff it in last, as it’s nice to have something after it to fill in some of the volume it creates.
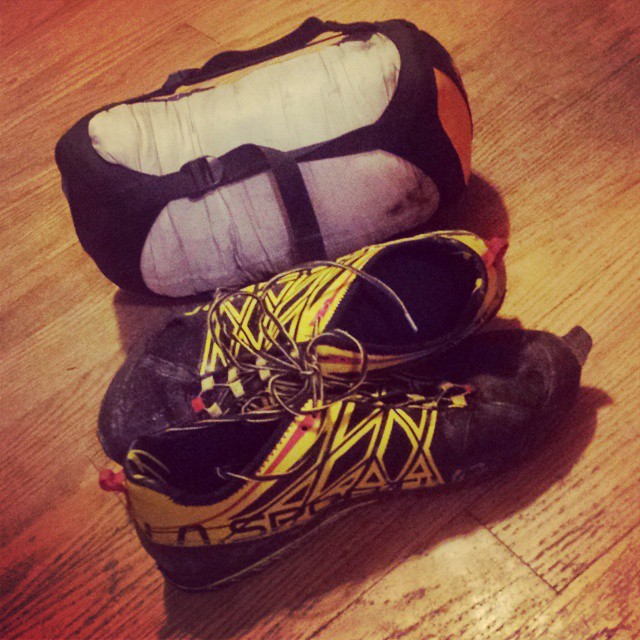
Example of a well-tuned sleep system: XS Sea to Summit Compression Dry Sack holding a BD Twighlight Bivy, Kelty Light Year Down 40 sleep bag, Thermarest XTherm sleeping pad (M), and a Sea to Summit Thermolite Reactor sleeping bag liner. Total Weight: 4.5 pounds. (Shoes used to illustrate packed size)
Do not store your gear in this dry sack for extended periods of time. It’s bad for the down in the bag, anything wet needs to be aired out or it’ll start growing things on it that are very hard to get rid of, and everything is going to smell like the worst smelling item in the collection after a few days. See your sleep system as an investment and protect it.
How Do You Eat?
Food’s a big one. Eat! Do not starve yourself before, during or after the challenge and don’t use a challenge as some sort of diet strategy – that’s f*cking weird. If you do not eat, you will not go, and this, “not going” will happen in an incredible flaming death spiral towards Hell that will be hard if not impossible to dig yourself out of easily, also known as “bonking”. Do not bonk.
Likewise, not try to “fatten yourself up” before a challenge thinking you’ll have an extra gas tank to work with – go into it in your best possible physical shape. The more weight on your entire system (including you), the slower you will be going.
You will lose weight on long challenges and there’s nothing you can do about it. You’ll lose fat and muscle and it’s probably not a ratio you can easily control given the circumstances. People think you can tune your body to use this or that type of macronutrient, but I personally question this, given how little control you have over food sources in such a variety of locations. I mean: good luck.
Do not eat things that you are unfamiliar with during the challenge. There is no One True Diet – eat as close to how you habitually eat already, but realize your choices on the road and trail may be more limited than what you’re used to. Use your imagination when dealing with a limited choice of foodstuffs.
Go into stores knowing what you want to purchase – make a list beforehand, if necessary, but do not graze around as your mind will want everything and nothing at the same time. It’s stressed and compromised, it needs to do as little complicated tasks that require critical thinking as possible.
Listen to your body and its cravings when
you clearly have them. Eating is a source of incredible enjoyment and it’s to your benefit to enjoy that eating time. Sit down restaurants can waste time, especially in tourist areas where the staff is already overworked, and the orders in the kitchen are piling – it can also be much more costlier.
Instead, grab items at supermarkets and gas stations. Eat on the go, and have a place to put your food in a convenient place to forage for while riding.
Eating many small meals is a strategy worth investigating. You want a steady flow of calories; big meals sometimes make people lethargic and stomach’s upset enough to need to quickly remove the food located within. This may happen anyways: do you want to have it happen on an overfull stomach, or something a little more moderate?
Similar to everything else, bring along only the amount of food you need, and nothing else. You can save some sort of emergency, high calorie reserve in case you miss a resupply, but don’t do so out of fear. Become good at figuring out how long you’re going to be out for, until you can get back to your main cache of food. Get all the macronutrients covered (fat, carbs, protein). Avoid unrealistic amounts of sugar – do not subsist on candy – you’re mouth will rebel. Don’t worry a ton about vitamin deficiency if you start out healthy (which you should). That happens after a prolonged period of eating imbalanced meals – it doesn’t happen overnight.
Use the rule of Familiarity: if something has worked for you in the past: keep relying on it. If certain foods agree with you while running, stick with them. Experiment! But severely limit this during the actual challenge.
What to do with Food on the Bike
Say you’ve parked your bike at the trailhead, and you’ve got food you’re not bringing along for your run to the summit, what to do with it?
Above all, keep it far away from your bike! Put it all in a stuff sack, tie the stuff sack with some parachord and swing that bag into a tree to hang, much like you would when camping in bear country for the night – there’s many resources explaining the proper procedure. A stuff sack and parachord is minimal extra weight and volume and is easily packable.
Perhaps a bear encounter isn’t realistic in the area you’re in, but other varmints abound; from rodents, squirrels, ants and other insects; to giant grey cheeky parrots flown in from New Zealand. Avoid losing your food to these creatures, and avoid getting your bike and kit destroyed because of these things smelling food around it and doing their best to find said food with their sharp claws, teeth and beaks.
Unfortunately, there’s just so much you can do to prevent your bike and your clothes smelling perhaps delicious. One problem is that unwashed clothes are going to smell attractive to some creatures; if not your body odor, the salt from your sweat will be an attractant to animals such as mountain goats and deer. Food may not be contained in your bike kit, but your bike and kit is still going to smell like food, since you’re touching food throughout the day, then touching your bike with your hands. Most likely when you do sleep, you’re also eating right beforehand, so the smell of food will permeate your sleep kit. Things like soap, toothpaste and deodorant also attract. Forgo soap (utilize it in public bathrooms, if available), deodorant and pack your toothpaste/toothbrush with your food (do not go without brushing your teeth, if you can help it!)
If you’re in bear country, this is a legitimate concern. I have no solution to it, other than to hoist your entire bike into a tree, which is somewhat unrealistic! Take all signs about problem bears very seriously. Every time I’ve entered an area about a problem bear, I’ve had a bad encounter. Minimize your time in these areas, and perhaps leave your bike in areas that are less attractive to a bear, such as in a high-traffic areas (parking lots, busy trails) where other people are present, and not near things like garbage cans in out of the parts of campsites. Resist the temptation to pack any type of meat and seal food as best as possible in plastic bags and waterproof stuff sacks.
Try your best to be clean and neat, but realize there’s only so much you can do: you’re going to be physically and mentally tired and you’ll make silly mistakes. You’ll most likely find yourself sleeping with half a hamburger stuffed in your mouth and hearing a rustling in the bushes of some creature of the night. Whoops.
The amount of food you have on you for any one stretch is again dependent on a few factors: how much the food weighs, how bulky it is, if it’ll turn or spoil, how smelly it is, etc. There’s no need to bring along a week’s worth of supplies, if you’re going to hit a town every day. Your food is going to get jostled in your pack/bags, and perhaps get smooshed, escape its container, get forgotten/lost and simply take up space, add weight and add discomfort. Getting things in bulk at the store is a great way to save money, unfortunately, it’s many times unrealistic when you want to travel light. I mean, really: how many jars of peanut butter do you wanna carry around at one time?
Realize if you’re packing too much food because you have the fear of being hungry and if that fear is real or imaginary. Personally, hunger isn’t a big urge on long challenges: you lose the feeling of hungry and have to remember to eat on a consistent and normalized schedule.
Resupply areas should be right between two points and not out of direct way, as any distance you have to travel that doesn’t lead to where you need to go is wasted time.
Clothing
The clothing you bring with you will depend entirely on the conditions present. For the mountains of Colorado in the summertime, I’m faced with a fairly wide temperature range from chilled nights @ 14k’+, to the middle of a sunny day, trapped in the bottom of a canyon. What I’m usually not faced with is days of continual rain or high levels of humidity. Monsoon weather can be present, and violent thunderstorms are a given, but if things get wet: they dry out. Your environment may be different, so adjust.
For riding the bike, I usually bring a ordinary bike kit of a pair of cycling bibs, a jersey, some kind of casquette, gloves and arm warmers. For socks, I’ll have a light pair of wool socks I use only for riding in. Light socks seem to help with fit, drying time, hot spots, etc. I try not to use these for running, as running will make your socks wet and dirty. For shoes, I’ve primarily used pretty fancy, lightweight XC MTB shoes, but it’s not something I would ultimately recommend, as you may be faced with quite a bit of hike-a-bike, where a more HaB friendlier shoe would be a better fit. Various choices abound. When I was faced with extended tracks of hike-a-bike, I would just put on my trail running shoes.
For running, I bring a pair of running shorts, and for an upper, perhaps utilize the bike jersey + other bike accessories, so I’m not bringing two of ver similar items – there’s just no need. I’ll also bring along a pair of warm running tights. I’ll also bring along two pairs of wool socks, and perhaps a light skull cap. Anything I bring for running can also be used for cycling, of course. I favor fairly lightweight trail runners (but nothing that approaches a minimal shoe); I don’t have any problems with weak ankles or anything like that and don’t need any sort of extra support.
To regulate my temperature in colder times, I’ll bring along a wool base l
ayer, perhaps a warmer hat or balaclava even and a puffy sweater. The puffy is UL, and is not to be used while riding, as I tend to sweat through it, and nothing is worse than a wet, useless puffy.
To round everything off, bring along a impermeable upper and lower, a light pair of glove liners, and maybe a Buff or something similar.
For sleeping, I usually strip down to nothing, then put on my base layer + balaclava and yet another pair of socks that are thicker than my other 2+ pairs, and are used only for sleeping in, and emergencies of extremely inclement weather conditions. Same with the wool base layer: I like to keep it relatively clean, and wearing it while being active and perspiring can lead to making it wet with sweat and a little less useful later in the day and night.
Bike
Could there be anything more individual, than the bike you use?
For my own personal tastes, I’m a no nonsense guy. For Tour 14er, I used a steel Surly Ogre built with middle of the road parts, all brought together by my friends at Salvagetti. Without my local bike shop, I would been lost.
Picking the right bike for the task can be very involved, with a custom build (like I did with Tour 14er), or it could be looking at the bikes you have available and picking something. Like anything though, you’re going to have to commit. But some pointers:
Figure out what the terrain is going to be. You’ll want to optimize your bike for the time you’re most likely to spend on that one type of terrain, knowing that you’ll actually be less efficient on all other types of terrain. For example:
Colorado Trail Race: mostly single track mountain biking. A few detours of gravel roads, and a whole lot of hike a biking. What to use? How about a full suspension, XC mountain bike, with a dropper seat post. Your time on the gravel road bits will be a little slower, given that your bike is going to weigh more than other options, but the other areas of the course will be faster, and much easier on your body. What not to use: anything resembling a gravel grinder bike. Why? Because the geometry/drivetrain is all wrong. You need a very small gear to attempt some of the climbs (the hell with a top end gear, you’re in it for the free ride down, with the practice of using your brakes as little as possible in full effect!), and you want as much confidence descending as you can muster. Remember: it’s a race, and you’re going to be tired. The better of a technical mountain biker you are, the more you can cheat on this – you have some flexibility and perhaps you can go with a lighter rig with less squish, in the attempt to gain some precious advantage using the weight angle, since hike a biking is a big part of it. Full squish also has the detriment of having many points of failure. What are you going to do if you blow a seal? Probably limp to the finish line, perhaps destroying some pricey piece of gear, or scratch. Make sure everything is in supreme condition before you start.
Different race: Tour Divide. Should you use that same bike as the Colorado Trail Race? Sure, you certainly could! Interesting thing happens: all things being equal, your full squish ride will be more comfortable, leading to less fatigue, which equalizes the extra weight you’re lugging around. But, it’s a friggin’ long race, and rear suspension just shouldn’t be run for that sort of mileage without an overhaul. The chances of failure of that part are great, before finishing. That’s one of the reasons you don’t see many top finishers these days running full squish, or even just front suspension.
The other reason is that a carbon fork may actually work better for the great majority of the terrain. Most of the bumps and jarring from gravel road riding can be mitigated by a good selection in the tire department, and running your tires tubeless at a reasonably low pressure. Look at full-on gravel grinder bikes: tire width is much, much lower than 2.1″, which is your standard Tour Divide tire.
Rather the terrain that causes the most anguish and loud, audible swearing within earshot of houses of the Lord are washboarded roads – road surfaces with tiny ripples. On this surface, your suspension really does f-all, but what seems to help mitigate the hell-on-earth is (after running a low tire pressure) is a carbon fork, that flexes fore and aft, rather than the telescoping movement of your usual suspension fork. Since you’re going to be hitting hundreds of sections of washboard, and many feet of technical terrain, the suspension is out, giving you the advantage of a lighter rig, with less vectors of complete and total destruction. Use the money you’ve saved on not buying the squishy bits for all the junk food you’re inevitably going to buy!
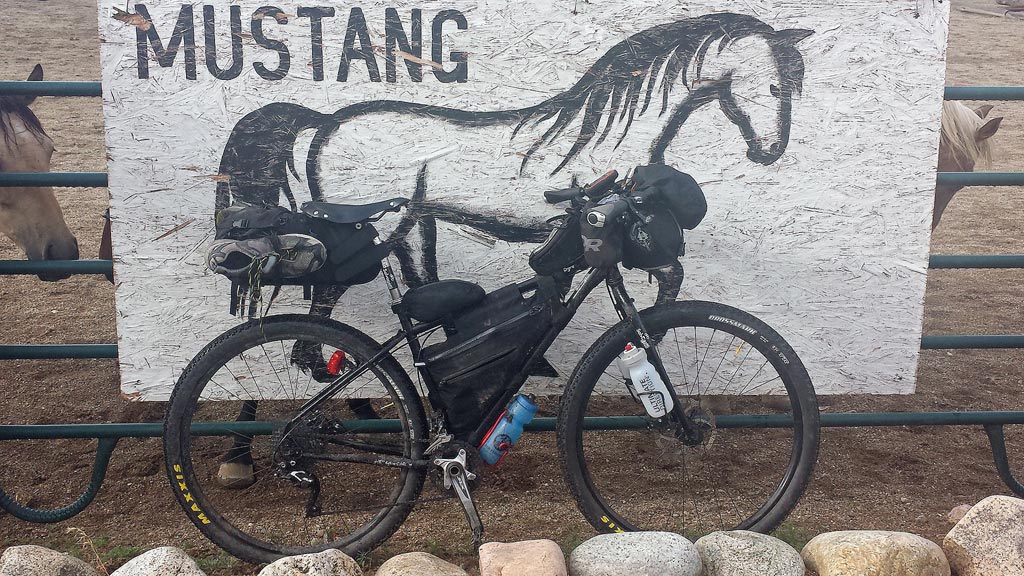
For the Tour 14er, I had one extra problem to overcome and that was of: Bling. Would it be nice to have a fancy full-carbon race beast to utilize for speed runs. Problem is, much of the time, I was away from my bike, running up and down mountains. What did I do with my bike during that time? I left it, usually unlocked, at the trailhead. Unlocked because I’m not about to carry a heavy lock and what’s the point, when any jerk can brake any lock I have, with tools they probably already posses in the back of their modified pick-em-up truck?
But, I can attempt to make the relatively easy steal of my bike less interesting by having a less interesting bike to steal! Detuning the bike, by dressing it in all black components (black gets dirty looking, fast!), that aren’t eye catching from a distance, and we’re using camouflage to our advantage. If it felt like a particularly risky place, I would wheel the bike a few meters into the trail, then go a few meters the side of the trail, and lay the bike down in some brush. With that, it’s nearly invisible – especially if someone is not actually looking for a bike to steal – unlike in a city centre, where there are people looking for bikes to steal, full time.
For Tour 14er, I also mapped out my route ahead of time (although I had no intention to stick with it, 100%). A lot of it looked similar to terrain found on the Tour Divide, which I’ve also have taken part in. The climbs were longer and steeper, and there was more single track and hike a bike, but not so much, I’d consider suspension to be mandatory. A carbon fork would have been nice, but budget just didn’t allow.
Packs
For the most part, I prefer soft bikepacking bags/packs to using racks/panniers. The system is lighter, and less prone to break on rough roads. Many of my own packs are made locally at Bolder Bikepacking, based in Boulder, CO. There are many other companies, none of which I would avoid. My suggestion is to support your local bikepacking pack maker, as it’s still a cottage industry, putting out quality custom products, and that’s really pretty cool.
One product Bolder Bikepacking developed for me was a saddle bag that included a harness that allowed me to securely stow my shoes in, while riding my bike. I never worried about losing my shoes.

I’ve found that trail running vests work much better than MTB-style packs, especially when running, when greater emphasis on the design of the pack has been done to mitigate or even eliminate chaffing and related problems when using the pack while running. The vest still works more than adequately while riding. My personal favorite for self-supported peak bagging is the Ultimate Direction Peter Bakwin Signature Series Vest.
Full disclosure: I am now a Brand Ambassador for Ultimate Direction – I couldn’t be happier. The gear is designed locally, the athletes onboard are ones that I admire and respect and everyone that I’ve met that work for UD are wonderful people.
For more unsupported adventures, I’ve been experimenting with using one of the Ultimate Direction Fastpacks – either the Fastpack 20, or Fastpack 30, depending on the length of the challenge,
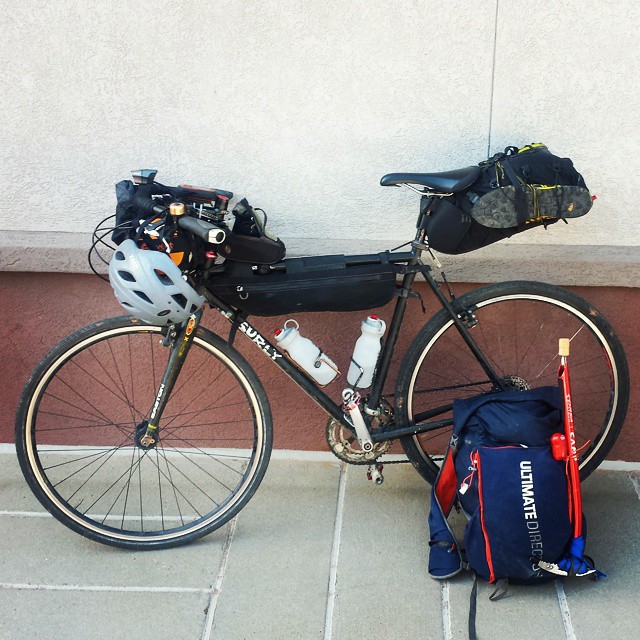
The FastPack 30, being used in conjunction with a bikepacking setup.
