Like this? Follow me:
Winter backpacking is a constant battle against keeping things from freezing — especially when managing water. Making water by melting snow is a chore I rather not have to do more than I need to and fuel is too precious to waste. Running out puts you in a dangerous circumstance. And the snow here in Colorado is dry, making the whole process more cumbersome.
Today, I’m looking at what I’m storing my water in once I’ve got it. And to help, I’ve grabbed some cheap consumer thermometers from Govee to do some product testing . These thermometers both report and log temperatures in a way that’s easily exported out to plunk into a Google Sheet to make pretty graphs. One of these thermometers has a flexible probe to stick in weird places, like under clothing. I’m not too familiar with this new-to-me test equipment, so I thought a good beginner experiment to play, would be testing the efficacy of two insulated water bottles I already have.
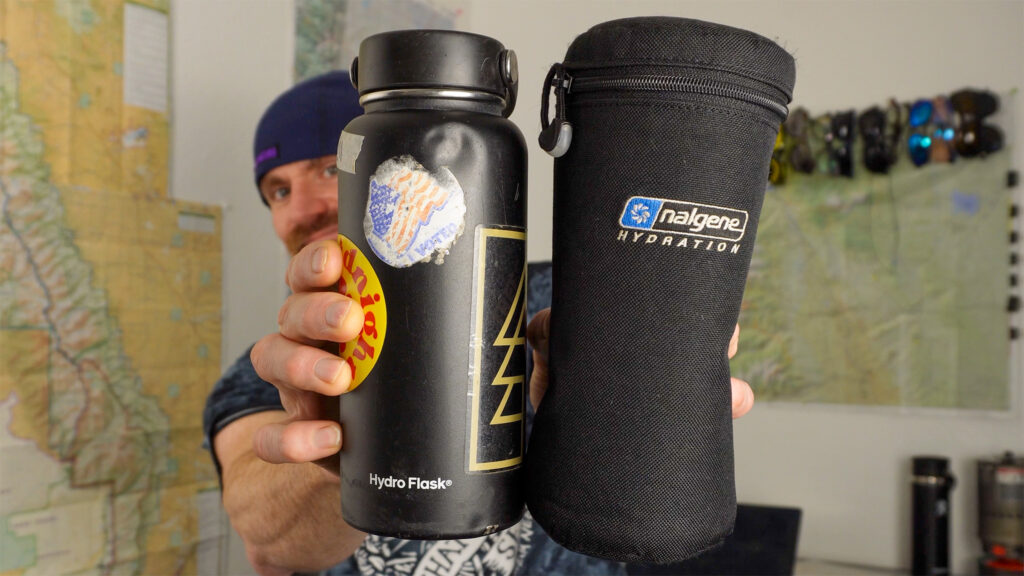
Challenger One: Nalgene Insulated Bottle Cover
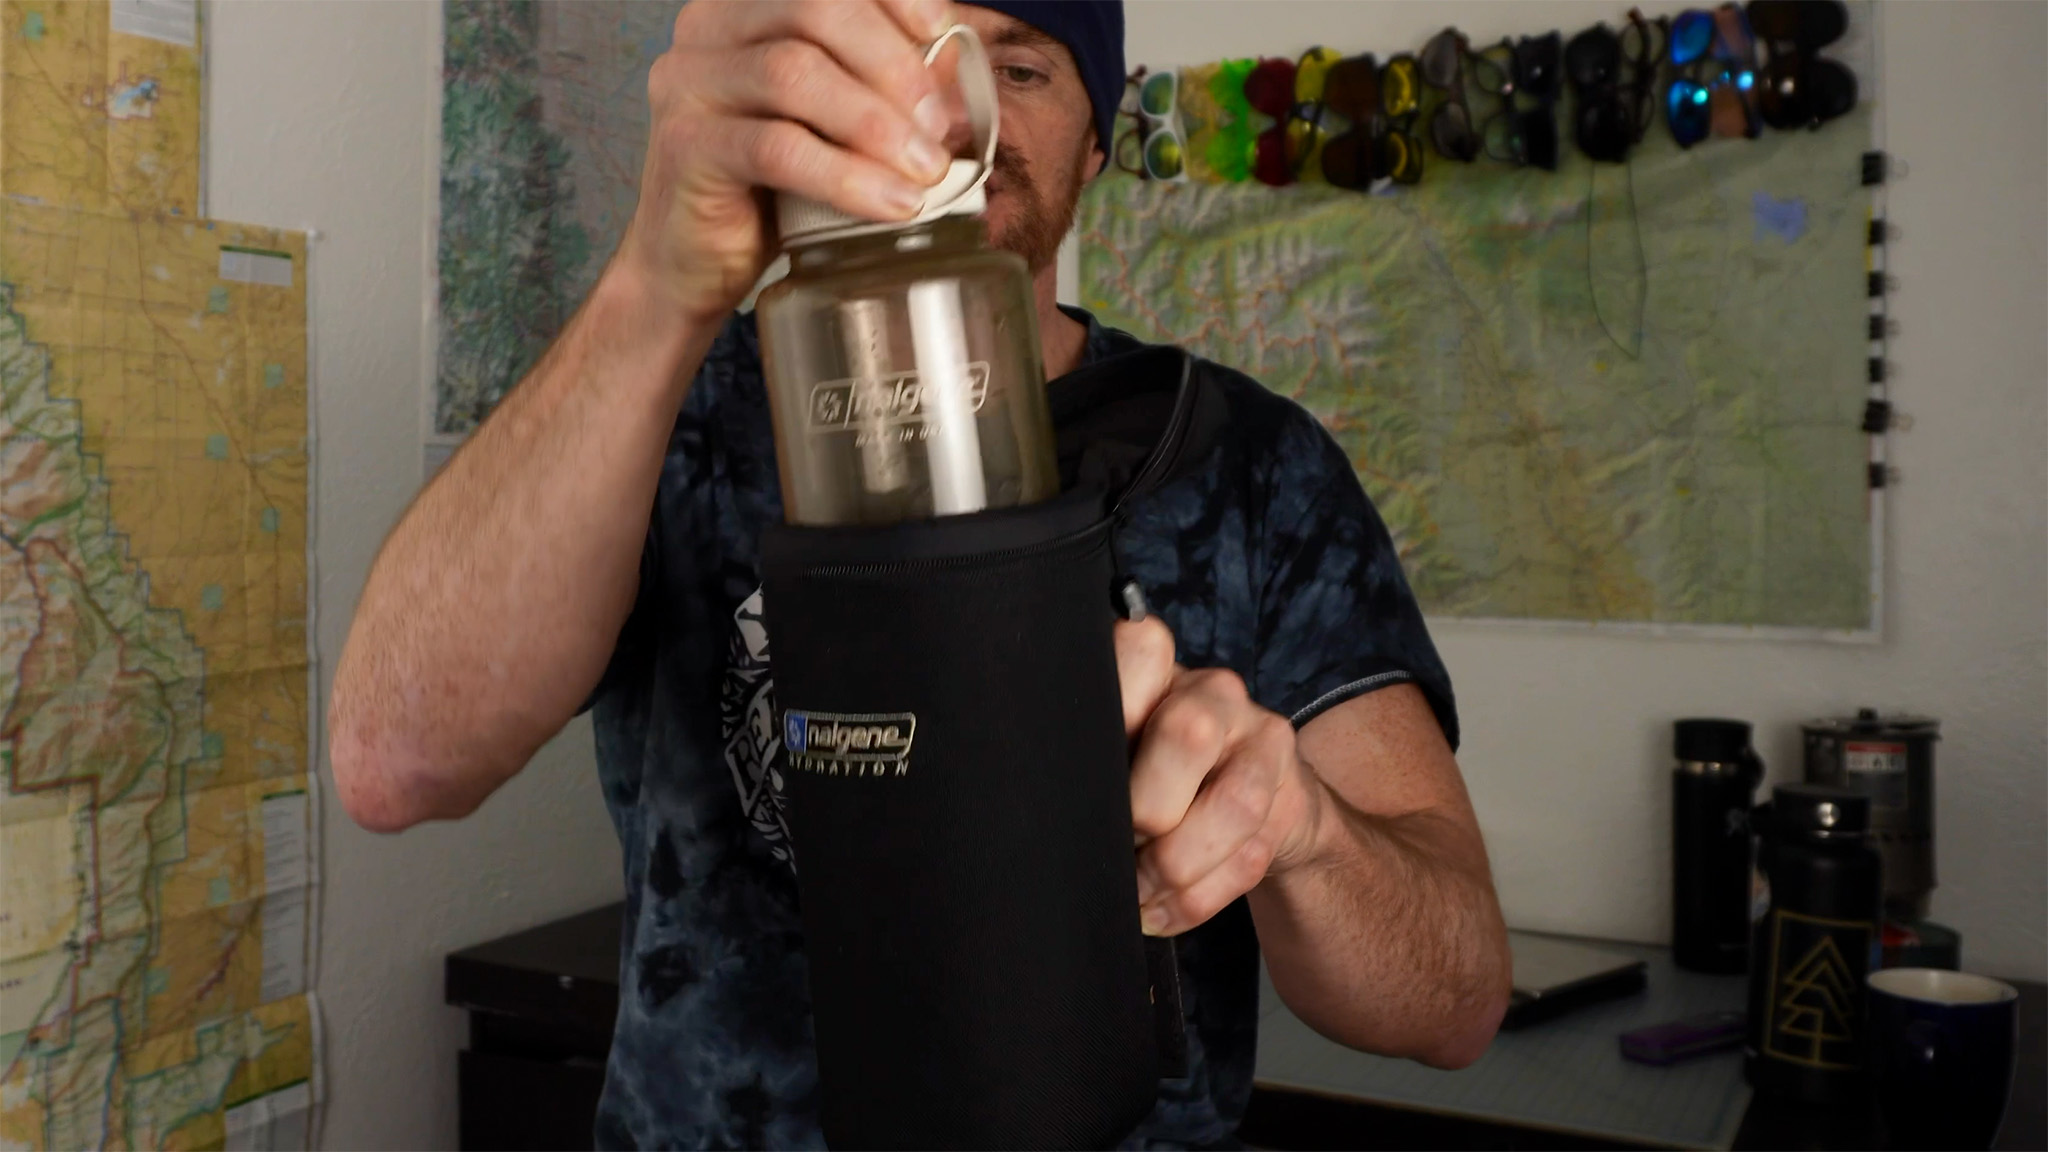
The first water bottle system I have is an insulated bottle cover (sometimes called a “parka” or “coozy”) that fits over a 32 ounce Nalgene bottle that I picked up at my sports recycler. It’s lightweight, and since I picked it up used: pretty cheap! You see old school mountaineering photos of people using something similar on their trips up Denali and what not.
Some good points about this system: fits a Nalgene and you probably have one of those laying around already. And it’s light! Without the Nalgene bottle my own — made of thick Cordora wrapped around probably a closed cell foam like neoprene — weighs a whopping 123 gram. With a Nalgene bottle, it’s 303 grams.
Foam makes a poor conductor of heat and provides a pretty good gap between the outside air and the water within, cutting down convection.
Challenger Two: Hydro Flask

I also just picked up a 32 ounce Hydro Flask from my local climbing gym’s collection of left and forgotten water bottles for just a coupla clams. Every few weeks the gym puts their collection out for people like me to re-home. They then donate the money to a local climbing non-profit, so everyone wins! This bottle retails for $45 which is not cheap. Given my track record of losing things, I would think twice about buying one at retail. It’s tech is much different and even older than the closed cell foam used in the Nalgene: the Hydro Flask is a vacuum insulated bottle. Invented in 1892 by James Dewar, but patented and put out on the consumer market by Reinhold Burger (who then started a little company called, “Thermos”). This Hydro Flask is a big boy, weighing in at 476 grams — a pound in freedom units!
Metal itself is an excellent conductor of heat, but the heat can’t get all that far, given the air gap created by the vacuum. This air gap also cuts down on convection, as does the smaller diameter and thick bottle top where the vacuum air gap does not exist. My hunch is that the vacuum/air gap is more effective than neoprene. The reflective, stainless steel interior of the bottle should also help with loss of heat from radiation — an advantage over the Nalgene bottle holder.
Which Insulated Bottle System Keeps Water Warmer?
Personally I want the Nalgene system to come up on top, because it’s lighter and I’m always trying to cut down on weight. Two advantages instead of one sound real nice to me! But I’m also going to guess there’s a reason why something so expensive and heavy like the Hydro Flask is still being produced — and it’s not all just clever marketing and fashion.
Let’s find out using thermometers:
Test Design
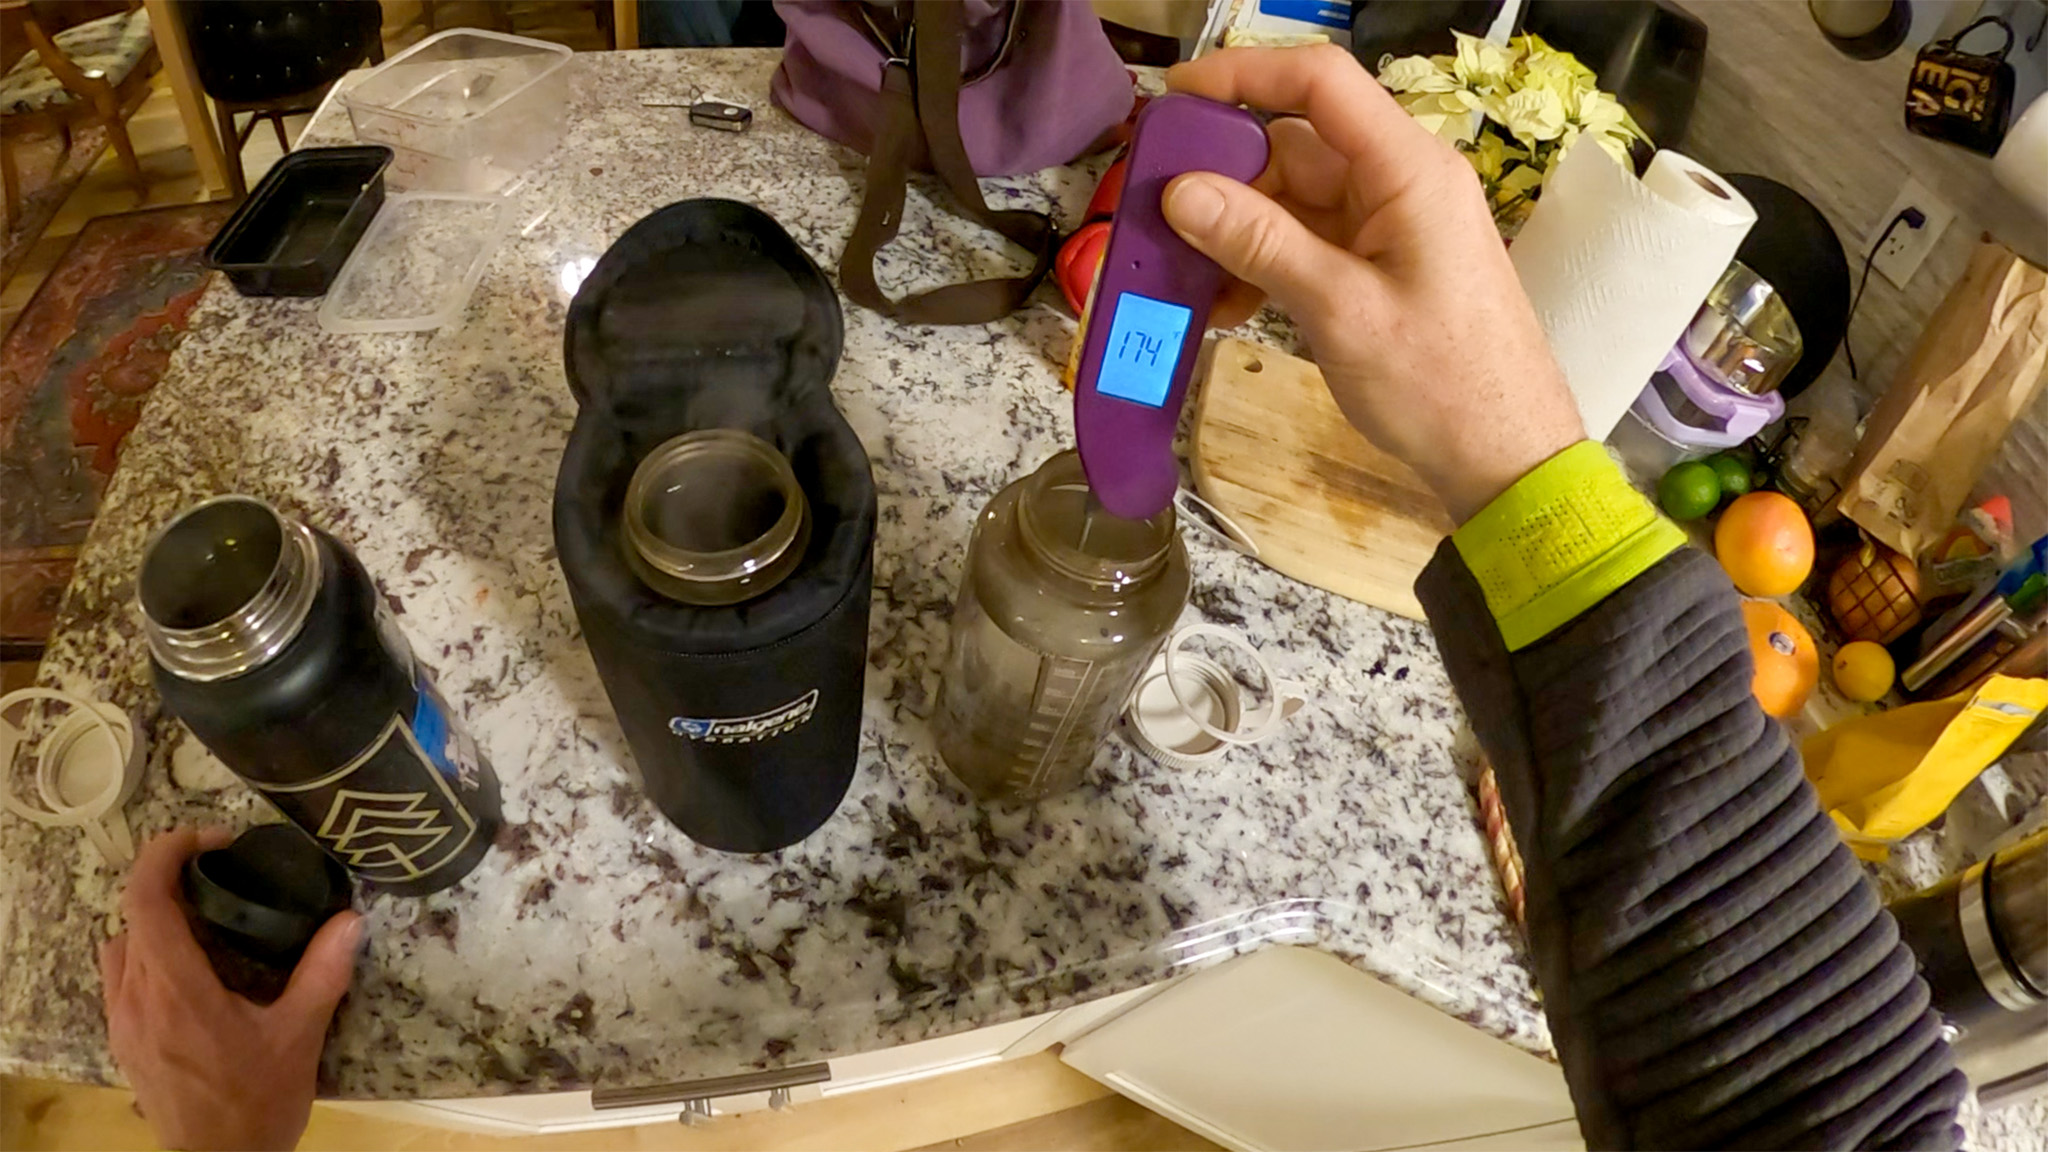
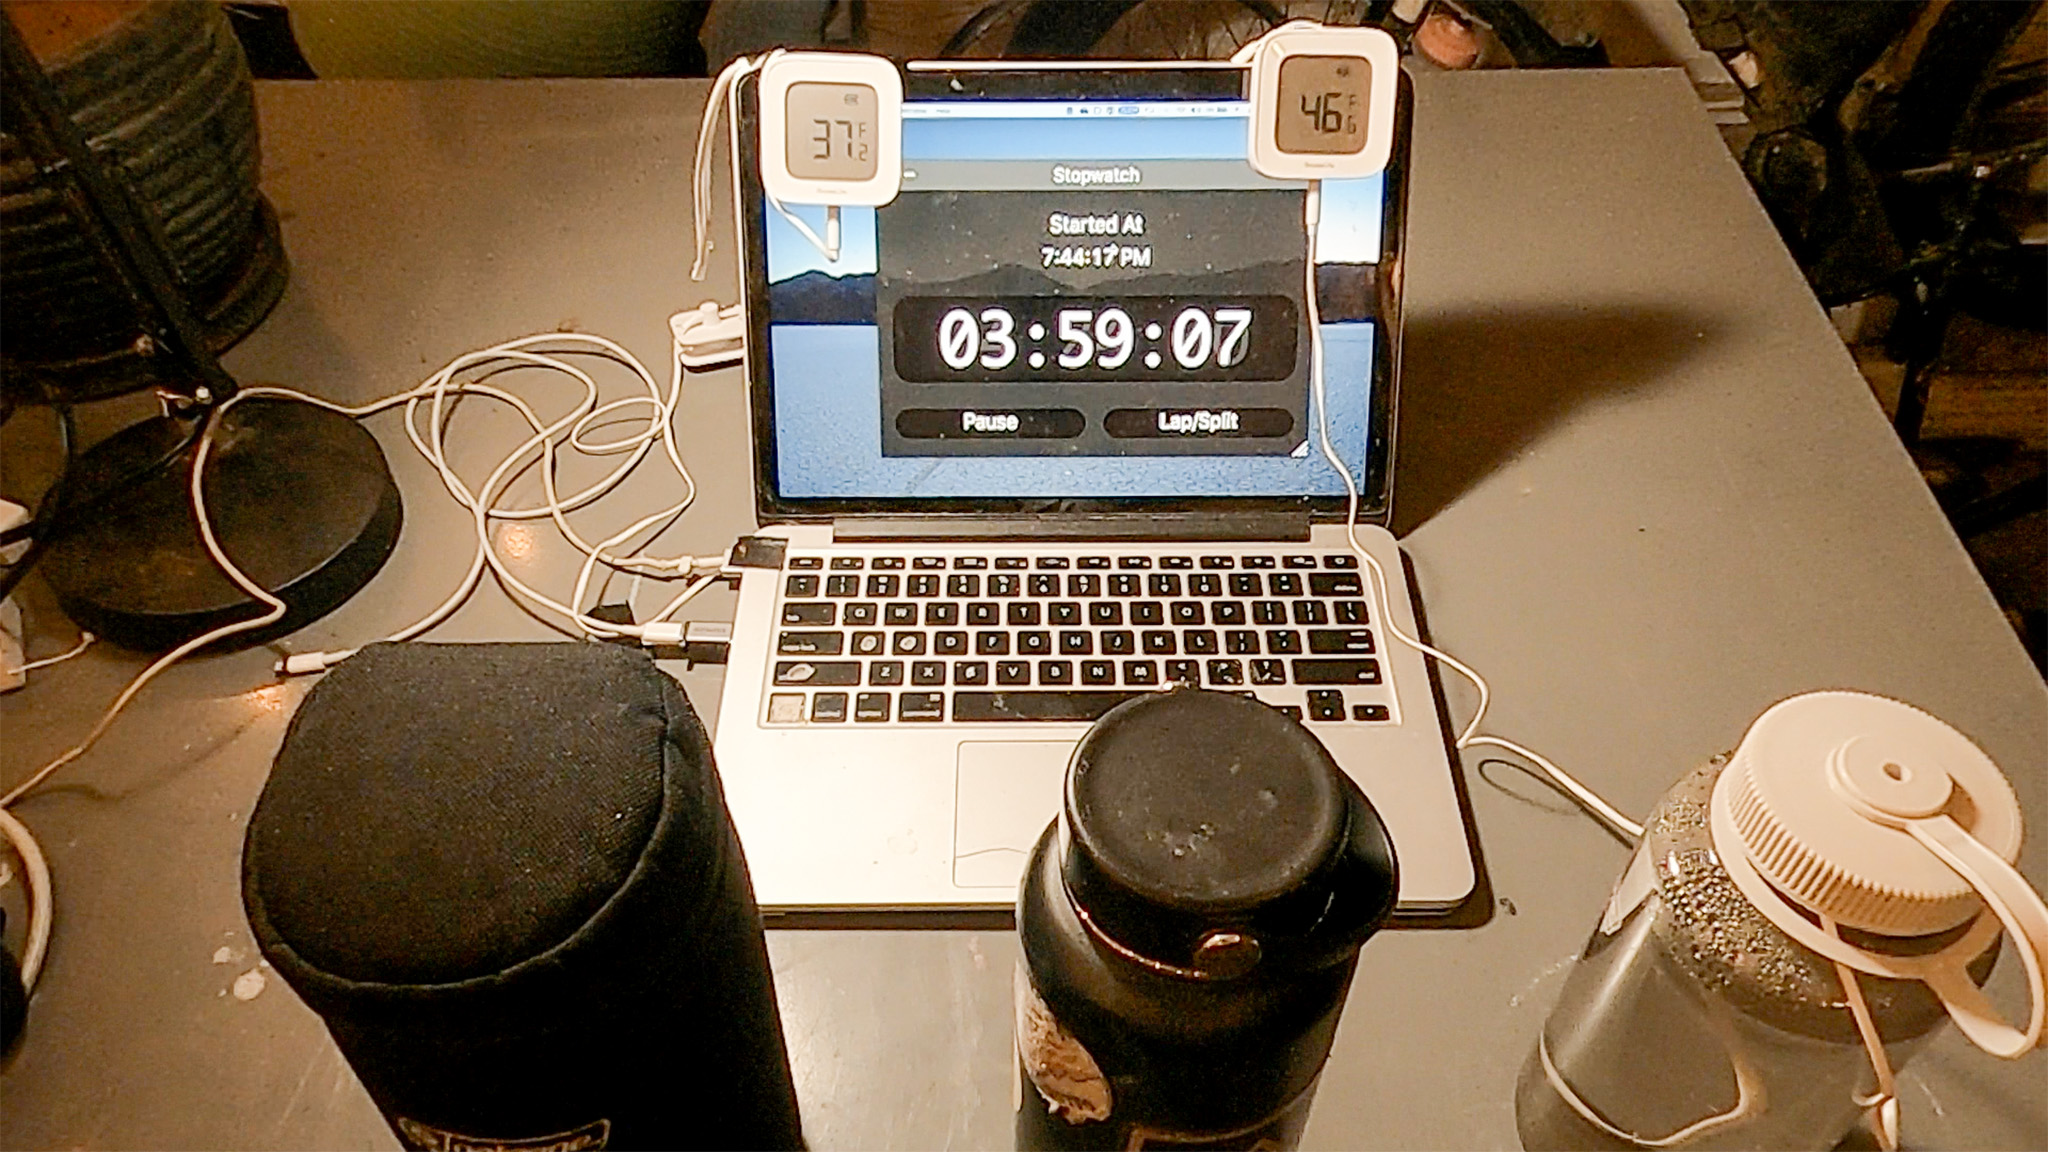
Fill up our two different insulated bottles — as well as a third naked Nalgene bottle (as a control) — with hot water of the same temperature (174F / 78.9C).
Put each insulated bottle out in the cold at the same time for ~5hours 3min
Afterwards, measure the temperature of the water inside.
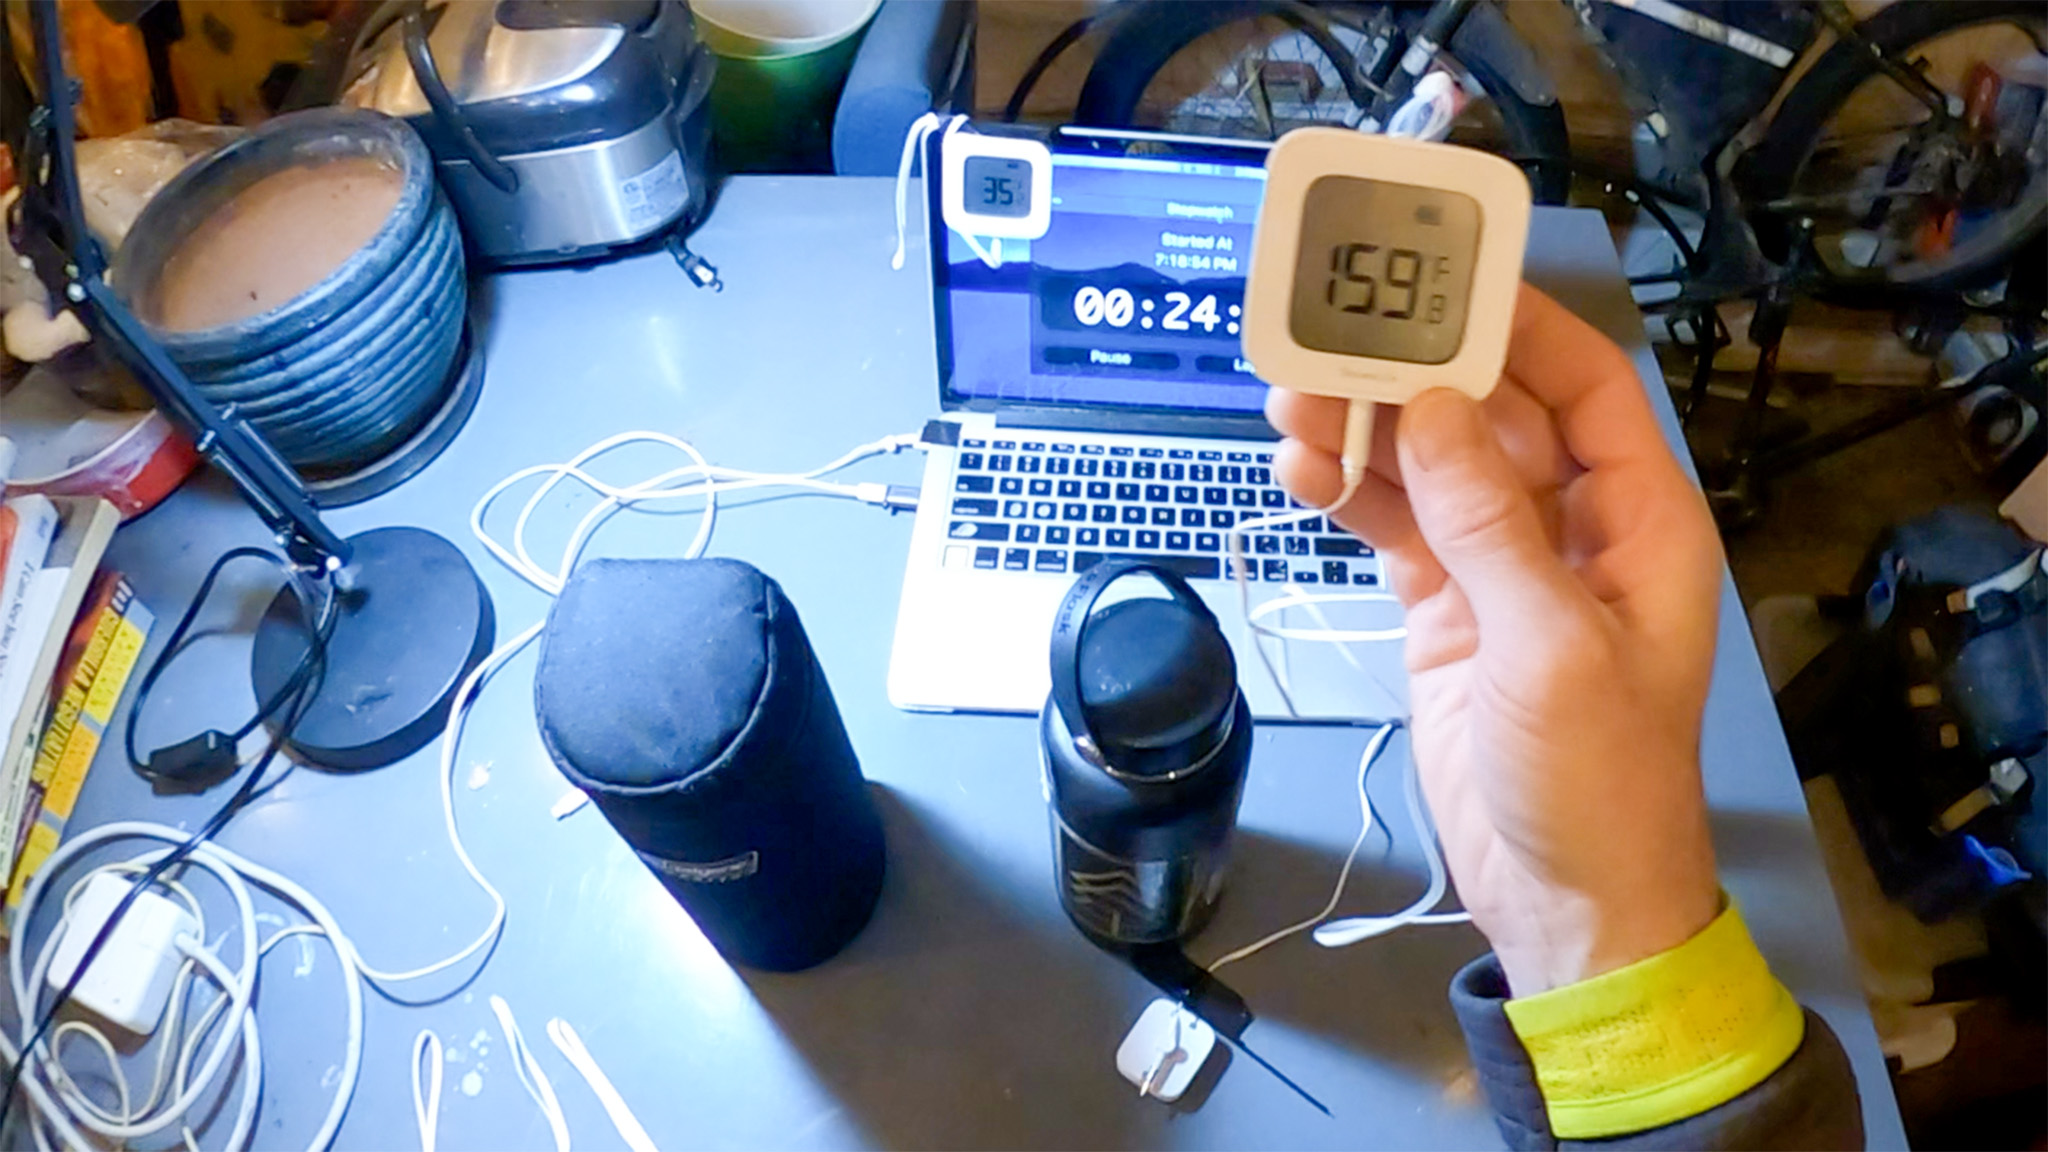
For the non-insulated Nalgene, I’ll put in a probe so we can watch the progress of the hot water come to the ambient temperature of the room.
I’ll also have another thermometer in the room to monitor the room temperature itself.
Using this setup, we should be able to see if there is a marked heat transfer and temperature loss of the water between the two different insulated bottles and if the temperature difference (if any) is enough of a significant difference to make any conclusions on which bottle performed better at keeping the water within at a higher temp.
Results
After approx. 5 hours and 20 minutes, here is the data for the control naked Nalgene that had its temperature logged every minute, as well as the room temperature which was also logged every minute:

Room temp hovered between 38F and 35F degrees. The water in the Nalgene bottle was first measured to have a temperature of 154.2F / 67.9C by the time I got the probe in. That’s already a drop of 22 degrees F in only a couple of minutes, from when I took the bottles down from the kitchen and into the garage! It would only take 7 more minutes for the water to drop another 22 degrees F.
The drop in temperature in the Nalgene bottle slowed down as time progressed. By the fourth hour, it would take 43 minutes to drop 1 degree F.
Unfortunately, I couldn’t keep probes inside the insulated bottles without keeping them open, which defeats much of the benefits of the insulated bottles themselves, so I had to settle on comparing the initial water temp with the temp after the 5hr 20min. Here are the results:
- Insulated Nalgene Coozy: 94F – 54% of initial temp.
- Hydro Flask vacuum insulated bottle: 135F – 77.6% of initial temp.
Even with my crude test, the Hydro Flask unequivocally dusted the insulated Nalgene coozy, keeping the hot water closer to the starting temp by 41 degrees F.
Conclusions
The Hydro Flask is markedly heavier than the Nalgene by 173 grams/ 6.1 ounces, so now the question becomes: which is better for different circumstances?
For overnight/multi-day: Hydroflask hands down. It’s a little counter-intuitive, but a heavier container may pay out in the long run. Stove fuel becomes a deciding factor: to heat up water, you need to expend fuel and that fuel weight should also be considered. And why essentially waste all the energy you just used to heat up that water just by losing it at a faster rate? Stopping to make water takes time, so keeping your water as warm as possible for as long as possible makes sense.tre
For shorter trips or for that “Summit day” push: I’ll use the Nalgene insulated bottle cover and save a few grams of weight when it counts.
On trips that I’ll be using both, I’ll just remember that the water in the Nalgene will cool faster, so I should drink from it first.
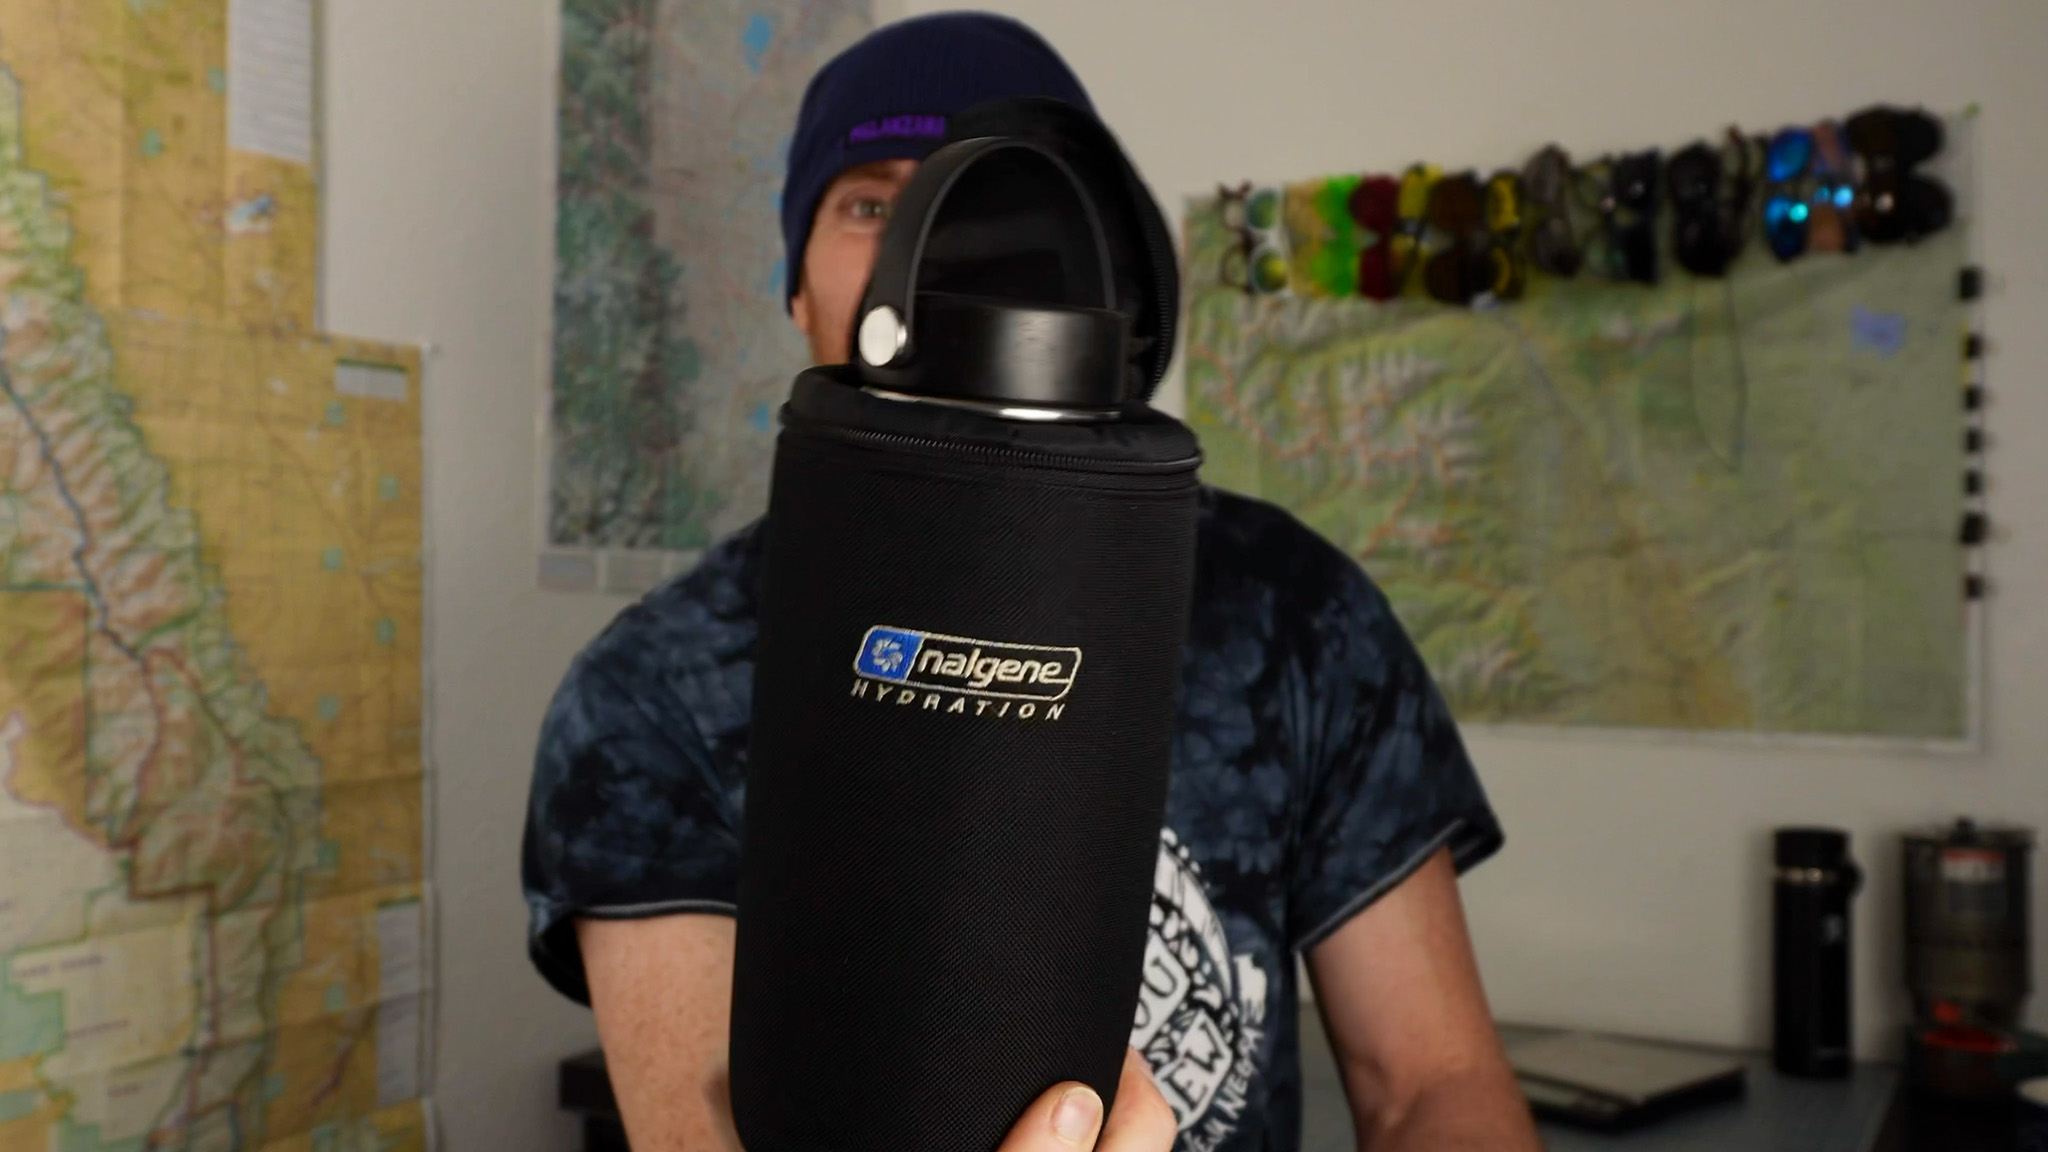
And surprisingly, the Nalgene insulated bottle cover can hold the Hydro Flask! That’s very useful to know: if and when the Nalgene is empty, you can transfer its cover over to the Hydro Flask, keeping its water warmer for even longer.
Purchasing This Gear
I didn’t make this article to sell you thermometers, coozies, or Hydro Flasks, but if something piques your interest, or you want to recreate my simple experiment:
Naglene Sleeve/Coozy
Hyperlite Mountain Gear has a contemporary version still for sale for many dollars made of DCF and thinsulate, while a bespoke company called Forty Below has their own version. Outdoor Research has one currently in their tactical collection, but it’s even more expensive than the Hyperlite one and isn’t available to purchase as I write. Nalgene themselves has something that looks nothing like that one I have, but seems to be thinner and lighter, but it does have a foiled/reflective inner, which could be beneficial as a radiant barrier. It’s listed at weighing 136 grams, surprisingly a little more than my beefy old-school version.
Hydro Flask
There is all manner of Hydro Flasks in this world. I used the 32 ounce version, which you can get in many places. They’re not cheap, but I have a whole lot more confidence that they’re the real deal. Do be careful of cheap imitations that lack a bona fide vacuum air gap.
Govee Thermometers
These thermometers did everything I was hoping they would do: track temperature and log it every minute, controlled by my phone via Bluetooth. Data exported in CSV format. Here are the models I’ve grabbed:
The smaller thermometer/hygrometer was perfect to have hanging out in the room to measure ambient temperature. This particular model won’t do well in a storm (not waterproof!)
The R1 is designed to be used in freezers. It has a flexible probe which I took advantage to place in the non-insulated Nalgene bottle overnight.
Govee pushes the use of a WiFi gateway. For experiments like this, you don’t need it — I don’t have one and don’t plan on getting one. A gateway makes far more sense if you’re using these thermometers for their intended use around your house to monitor rooms or other spaces.
I checked on my thermometers just using my iPhone, connected to the thermometers via Bluetooth.
Other Thermometers
For taking the initial/final temp. of the water inside the various bottles, I used a Thermoworks Thermapen ONE that I already had on hand. This is also a probe thermometer — you may have something similar to check on the internal temperature while cooking meat.

Thermos has one model, sold as either Thermos Mountain Beverage or Thermos Ultimate. The 900ml version weights ~350g, getting closer to that 1l Nalgene. Cozies are surprisingly heavy!